Exporting and Importing Translations
Service Board ships with predefined translations to supported languages. You can update and customize these default translations per your business needs, and also add translations for languages that are not yet supported. In Service Board 24.1 and later, you can use Translation Workbench to export and import translations.
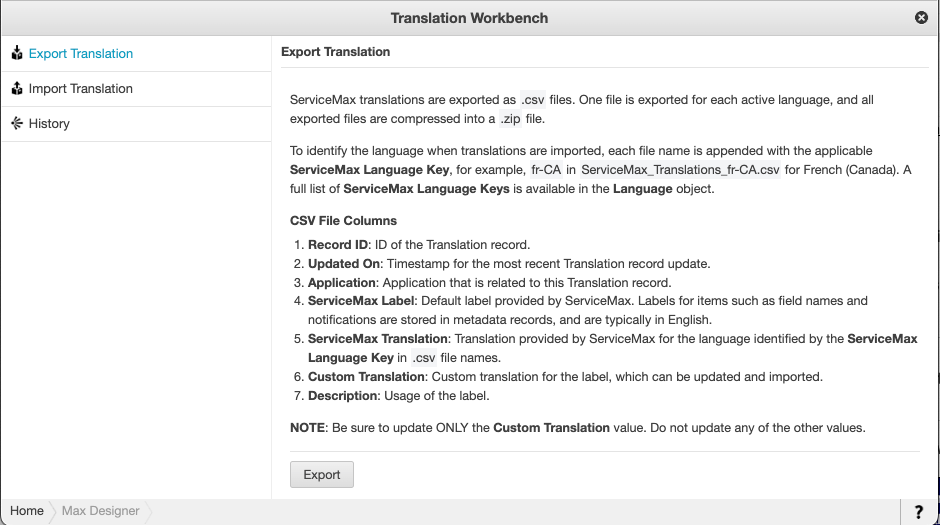
One ServiceMax translation file for each active language in the system is exported in .csv format. To properly identify translations, exported filenames are appended with the applicable ServiceMax Language Key, for example, Service_Max_Translations_fr-CA.csv for French (Canada), and files are compressed into a .zip archive.
|
CSV File Column
|
Description
|
|---|---|
|
Record ID
|
Translation record ID.
|
|
Updated On
|
Timestamp of the most recent Translation record update.
|
|
Application
|
Application related to this Translation record.
|
|
ServiceMax Label
|
Default labels for items such as field names and notifications are typically stored in metadata records in English. English translations of Translation records are used as this value.
|
|
ServiceMax Translation
|
Default translations provided by ServiceMax for the languages identified by the ServiceMax Language Key appended to .csv filenames.
|
|
Custom Translation
|
Custom translations for labels that can be updated and imported.
|
|
Description
|
Usage details for the label.
|
|
|
A complete list of ServiceMax Language Keys is available in the Language object.
|
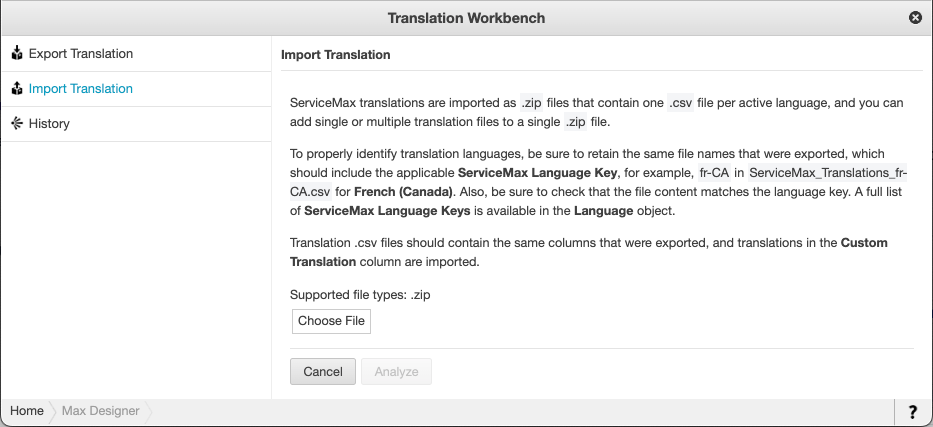
ServiceMax translations are imported as .zip files that contain one .csv file per active language, and can include single or multiple files.
|
|
• To properly identify translations, filenames assigned on import should remain unchanged when imported.
• Imported translation files must contain the same columns that were exported, with no added or deleted columns.
• Only the translations in the Custom Translations column are imported. Although values in other columns can be updated, those changes are not imported.
|
To export and import translations:
1. In Max Designer, on the main landing page, in the top left corner, in the Designer Actions pane, click Go to Translation Workbench, and then in Translation Workbench, in the left pane, click Export Translation.

2. In the right pane, click Export, and then in the status message that appears when the export is completed, click Download.
3. In the Custom Translations column of each file whose translations you want to update, modify the language, and then save the file with the same name and columns that were exported.
4. Compress all translation files into a .zip archive, and then in Translation Workbench, in the left pane, click Import Translation.

5. In the right pane, click Choose File, and then select a .zip file that contains updated translation files.
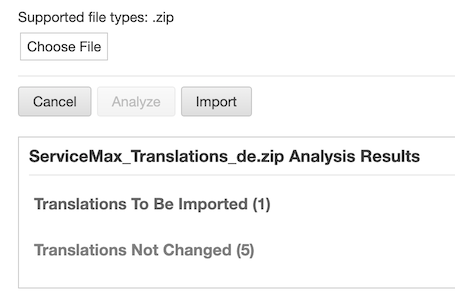
6. Click Analyze, and then in the lower pane, check the analysis results.

7. Click Import, and then check the results.
To view translation export and import history, click History. |
For more information: