Configuring Action Menus
You can configure Action Menu options for the following:
|
Tab
|
Item
|
Location
|
|---|---|---|
|
Scheduler
|
Job Cards
|
Scheduler Job List
|
|
Scheduler Resource List
|
Scheduler Calendar
|
|
|
Appointments
|
Scheduler Calendar
|
|
|
Crew Manager
|
Resource Cards
|
Crew Resource List
|
|
Crew List
|
Crew Calendar
|
|
|
Map
|
Job Cards
|
Map Job List
|
|
Resource Cards
|
Map Resource List
|
|
|
Configurable Action Menus are not supported for Appointments on the Multi-Resource Calendar and Project Gantt.
|
To configure Action Menus:
1. In Max Designer, on the Developer Tools ( ) launchpad menu, expand the User Interfaces section and click Controls, and then in the top left corner, click Create (
 ).
).

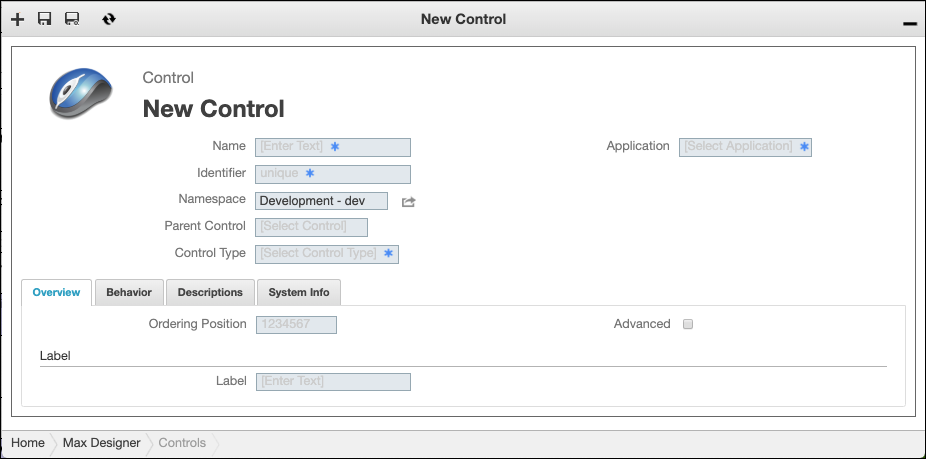
2. On the New Control page, complete the fields as follows:
Field | Value | Description |
|---|---|---|
Name | The name you want to use for the new menu option. | |
Identifier | Auto-generated based on the name you specify. | |
Namespace | The namespace where you want to define the control. | |
Parent Control | Service Board Action Menu Parent Control | Filters the options available in the Control Type field. |
Control Type | Service Board Crew Menu Item (Crew Manager) | Crew Column on Crew Manager Calendar |
Service Board Job Card Menu Item (Scheduler/Map) | Job Cards on Scheduler and Map | |
Service Board Resource Card Menu Item (Crew Manager) | Resource Cards on Crew Manager Resource List | |
Service Board Resource Menu Item (Scheduler/Map) | Resource Column on Scheduler Calendar, Resource Cards on Map | |
Service Board Appointment Menu Item (Scheduler) | Appointments on Scheduler Calendar | |
Service Board Multiple Appointments Menu Item (Scheduler) | Appointments on Scheduler Calendar | |
Label | The text you want to show for the new option in the UI. | Optional value. If not specified, the Name value is used by default. |
3. On the Behavior tab, in the Target field, click New Tab, Current Tab, or Custom Operation, and then in the Client Code field, enter JavaScript to specify a custom URL to open when the menu option is selected.
Parameter | Description | ||
|---|---|---|---|
recordid | The Record ID value of the Job, Resource, or Appointment record in Service Board. | ||
sfdchostname | The hostname of the Salesforce org for the tenant. | ||
externalid | The ID of the referenced Work Order, Technician/Equipment, or Event record in Salesforce. | ||
externaluserid | The ID of the Salesforce User record for the relevant technician. | ||
externalresourceid | The ID of the Technician/Crew for the referenced Salesfore Event record.
| ||
externaljobid | The ID of the referenced Salesforce Work Order for the referenced Salesforce Event record.
|
For custom menu options that support Multi-Appointment selection, parameters are replaced a comma-separated list of the related values of the selected Appointments. |
Examples
◦ The following JavaScript code can be implemented to open https://[Salesforce hostname]/a1g3i000000TxB4AAK, where a1g3i000000TxB4AAK is the ID of the Salesforce record referenced by the selected Service Board record.
https://sfdchostname/externalid
◦ The following JavaScript code can be implemented to open https://[Service Board hostname]/sb-admin/index.html#/c505e03b-9640-470f-a609-c8b4af6bf797/svmx_job/364c8d23-3b48-4455-bb15-f9d68045f00 where 364c8d23-3b48-4455-bb15-f9d68045f005 is the Record ID of the selected Job record. This example opens the selected Job record in Service Board Admin:
/sb-admin/index.html#/c505e03b-9640-470f-a609-c8b4af6bf797/svmx_job/recordid
◦ To retain any of the standard parameters as part of the URL, customReplaceKeyMap code can be configured with a case-insensitive key and value.
{
"url": "http://xxxxxx/customRecordId/recordId/svmx_job/customExternalId/externalId",
"recordid": "customRecordId",
"externalId": "customExternalId"
}
"url": "http://xxxxxx/customRecordId/recordId/svmx_job/customExternalId/externalId",
"recordid": "customRecordId",
"externalId": "customExternalId"
}
4. Save the record, and then on the Development Actions ( ) launchpad menu, in the Development Actions section, click Synchronize Translations.
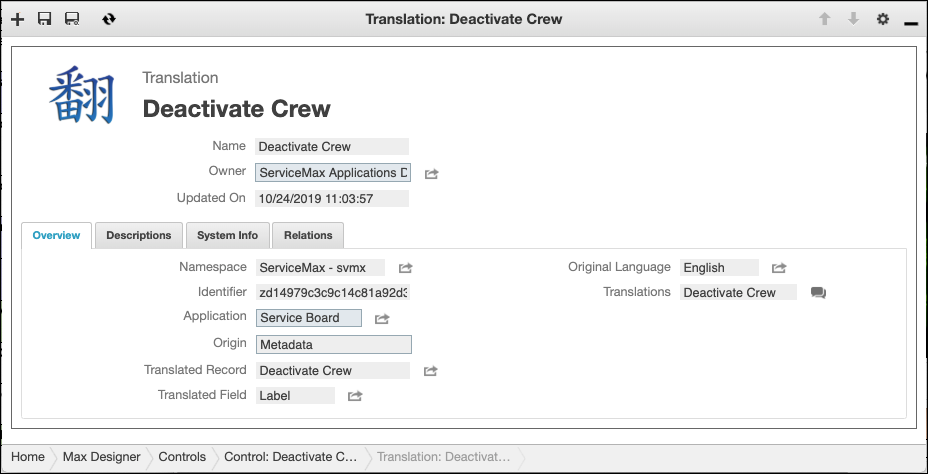
5. In the newly created Control record, on the Relations tab, in the list, click Translations, and then in the Related Translations list, click the first entry to open the related record.

6. On the Translation record page, to the right of the Translations field, click Go To Translation Editor ( ), and then in the Translations list, add all the translations.
7. If needed, repeat the previous step for any additional items in the Translations list.
8. Optionally, to configure access control, in the Control record, on the System Info tab, in the Record area, select the Private check box and save the record, and then in the top right corner, on the Options ( ) menu, click Share.
9. To finish configuring access control, in the lower pane, select the users, roles, and groups to which you want to grant access, and then click Share.
For more information: