Configuring Job and Resource Cards
You can configure the number of fields that appear on collapsed Job Cards and Resource Cards in the following locations:
|
Card Type
|
Locations
|
|---|---|
|
Job
|
Scheduler Job List
|
|
Map Job List
|
|
|
Job Search results on the Scheduler and Map tabs
|
|
|
Nearby Jobs List on the Scheduler tab
|
|
|
Jobs Filtered From Map List on the Scheduler tab
|
|
|
Resource
|
Crew Resource List
|
|
Resource Search results on the Crew Manager tab
|
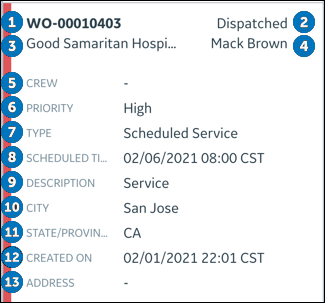
By default, four fields are shown on collapsed Job Cards and Resource Cards, and you can configure up to six fields. You can also configure the order in which fields appear on collapsed or expanded Job Cards on the Scheduler and Map tabs, and collapsed or expanded Resource Cards on the Crew Manager tab.
|
|
• In cases where Job and Resource records have fewer fields configured in their associated list view definitions, nonexistent fields appear as empty. For example, if you configure six visible fields and a record has only five fields, the sixth field shows as empty.
• The Number of Fields on Collapsed Card setting is also applied to cards on the Recommended Jobs List. However, the last field always shows score and distance details for the recommended Job.
• On both collapsed and expanded cards, fields with null values are indicated by hyphens.
|
To configure Job and Resource Cards:
1. To configure the number of fields that appear on collapsed cards, in Max Designer, click Administration ( ) > , and then in the list view, click Number of Fields on Collapsed Card.
) > , and then in the list view, click Number of Fields on Collapsed Card.2. On the record page, on the Overview tab, on the Default Value list, select a value, and then in the top left corner, click Save and Close ( ).
).
).3. To configure the order in which fields appear on collapsed or expanded cards, in Max Designer, click Developer Tools ( ) > , and then in the left pane, search for and select Job or Resource.
) > , and then in the left pane, search for and select Job or Resource.4. On the object design page, In the left pane, click Records, and then in the list view, in the top right corner, on the Options ( ) menu, click Designer.
) menu, click Designer.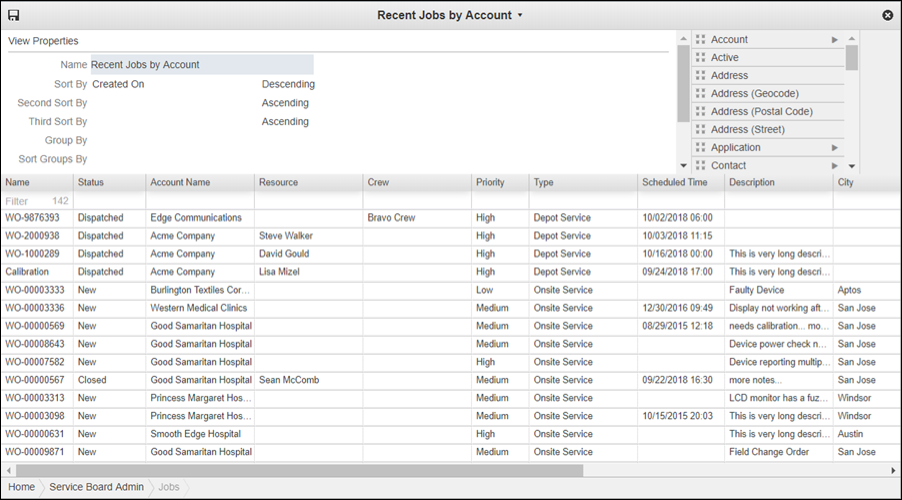
5. In View Designer, drag and drop columns into the order in which you want to show information on the card, and then in the top left corner, click Save ( ).
).
).|
1
|
Name
|
 |
|
2
|
Status
|
|
|
3
|
Account Name
|
|
|
4
|
Resource
|
|
|
5
|
Crew
|
|
|
6
|
Priority
|
|
|
7
|
Type
|
|
|
8
|
Scheduled Time
|
|
|
9
|
Description
|
|
|
10
|
City
|
|
|
11
|
State/Province
|
|
|
12
|
Created On
|
|
|
13
|
Address
|