Assigning Jobs to Multiple Resources
To assign Jobs to multiple Resources:
1. On the Scheduler Job List, drag and drop one or more Jobs into the Scheduler Calendar row for the first Resource you want to assign, and then do any of the following:
◦ On a selected Job Card, click > .
◦ On the Scheduler Calendar, click an Appointment, and then on the context menu, click Manage Multiple Resources.
◦ On the Job List, drag and drop the same single or multiple Jobs into a different Resource row on the Scheduler Calendar.
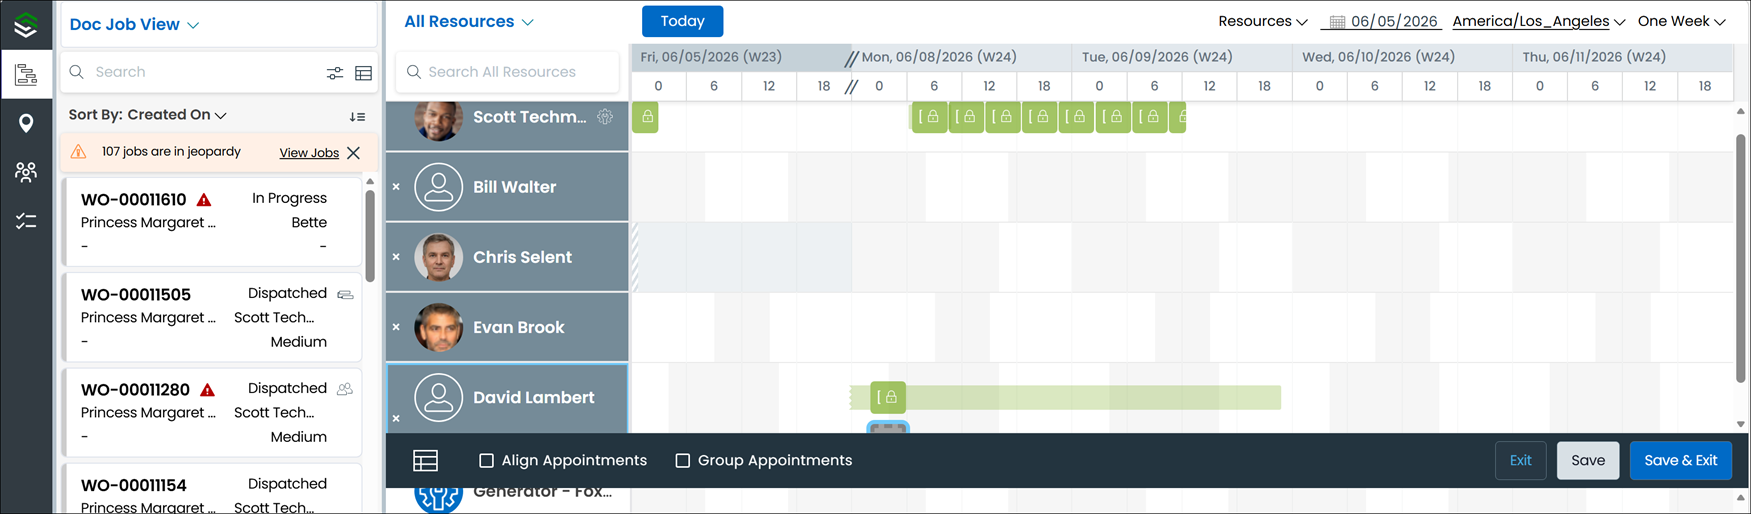
2. On the Multi-Resource Assignment Calendar, in the Resource List, to the left of the additional Resource you want to assign, click Add.
|
|
• When you create Multiple-Resource Appointments by using the method described in this topic, by default, the selected date range automatically adjusts to show all Appointments created for the relevant Job.
• When you click Add to assign additional Resources to Jobs that have no non-final Appointments, the Preferred Start Time value for the relevant Job is applied to newly created Appointments, and the Calendar view automatically moves to the Preferred Start Time for that Job. In cases where the Preferred Start Time for a Job is hidden by the current Calendar display settings, the view shifts to the nearest visible day of the Preferred Start Time.
• When you drag and drop a previously dispatched Job into a different Resource row on the Scheduler Calendar or use the Appointment menu to reassign a Job, the currently selected date range and start date remain unchanged.
• When you invoke Manage Multiple Resources from the Job Action Menu, the currently selected date range and start date automatically adjust to show all Appointments created for the relevant Job. However, if configured by your system administrator, the currently selected date range and start date remain unchanged.
|
3. To add more Resources, repeat the previous step as needed, and then click Save.
4. To exit the Multi-Resource Assignment Calendar, click Exit.
Assigning Jobs to Multiple Resources in Classic Mode
The Classic user interface retires on November 8, 2026. All features are available in the Service Board Modern interface. We recommend switching to Service Board Modern at your earliest convenience to access the latest features. |
To assign Jobs to multiple Resources:
1. On the Scheduler Job List, drag and drop one or more Jobs into the Scheduler Calendar row for the first Resource you want to assign, and then do any of the following:
◦ On a selected Job Card, click Job Action Menu ( ) > .
) > .
) > .◦ On the Scheduler Calendar, click an Appointment, and then on the context menu, click Manage Multiple Resources.
◦ On the Job List, drag and drop the same single or multiple Jobs into a different Resource row on the Scheduler Calendar.
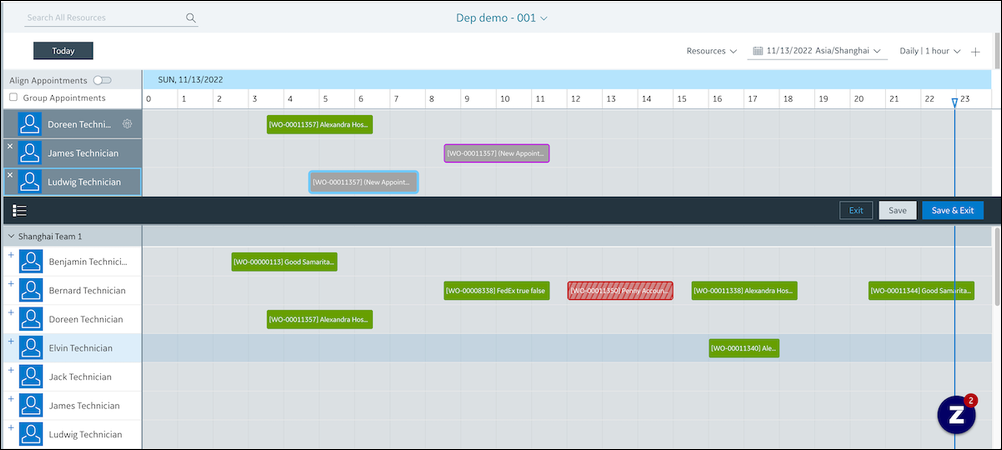
2. On the Multi-Resource Assignment Calendar, in the Resource List, to the left of the additional Resource you want to assign, click Add ( ).
).
).• When you create Multiple-Resource Appointments by using the method described in this topic, by default, the selected date range automatically adjusts to show all Appointments created for the relevant Job. • When you click Add ( ) to assign additional Resources to Jobs that have no non-final Appointments, the Preferred Start Time value for the relevant Job is applied to newly created Appointments, and the Calendar view automatically moves to the Preferred Start Time for that Job. In cases where the Preferred Start Time for a Job is hidden by the current Calendar display settings, the view shifts to the nearest visible day of the Preferred Start Time.• When you drag and drop a previously dispatched Job into a different Resource row on the Scheduler Calendar or use the Appointment menu to reassign a Job, the currently selected date range and start date remain unchanged. • When you invoke Manage Multiple Resources from the Job Action Menu, the currently selected date range and start date automatically adjust to show all Appointments created for the relevant Job. However, if configured by your system administrator, the currently selected date range and start date remain unchanged. |
3. To add more Resources, repeat the previous step as needed, and then click Save.
4. To exit the Multi-Resource Assignment Calendar, click Exit.
Related Topics