Scheduler Characteristics
The Scheduler can be divided into two primary areas, the toolbar and the calendar area.
|
|
The Scheduler may not display the expected date and time format after using the Zoom option. For more information, see Known Issues and Limitations.
|
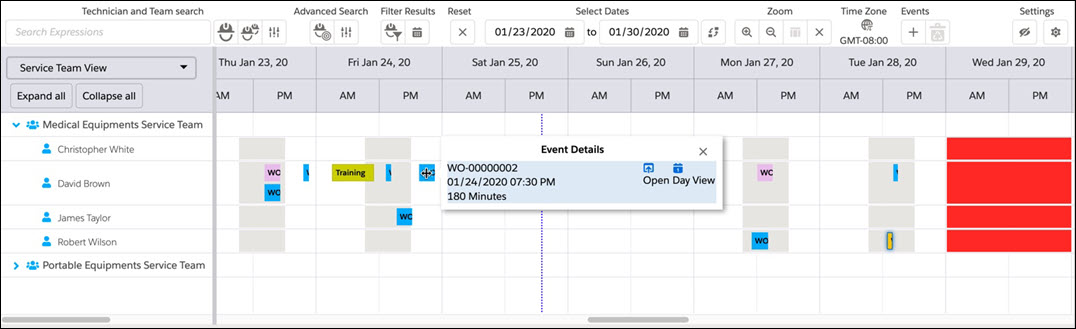
The toolbar displays various icons that allows you to filter the technician tree, manipulate the calendar area, and control display of the map. Each icon is described below:
1. Advanced Search: You can filter technicians based on multiple criteria match against work order attributes.
◦ You can configure advanced technician search using Configure Advanced Technician Search button.
◦ You can run the advanced technician search using Advanced Technician Search button. For more information, see Advanced Technician Search.
2. Filter Results: You can filter to view only those technicians and events that are assigned / associated with the work orders currently displayed in the grid.
◦ You can filter to view assigned technicians using Show only technicians assigned to Work Orders above button.
◦ You can filter events using Show only events associated with Work Orders above button. For more information, see Filter Results.
3. Reset: You can clear the applied filters on Technician Tree, Filters, Scheduler, and Map by clicking Reset button.
When the Reset button is displayed with a yellow border, it indicates that filters are applied. When you clear the filter (by clicking the Reset button), the yellow border is also cleared.
4. Select Dates: You can control the number of days for which the events are displayed in the calendar area by setting the desired start and end dates, and clicking the Refresh icon to redraw the Scheduler for those dates. For more information, see Start Date and End Date and Refresh.
5. Zoom: You can expand or shrink the details shown in the calendar area by using the zoom icons.
◦ You can increase the time intervals displayed in the calendar area by clicking the Zoom in icon. To decrease, click the Zoom out icon. For more information, see Zoom .
◦ You can click Project View icon to get a one-screen view of all events assigned for the selected work orders. For more information, see Project View.
◦ You can click Reset icon, to reset the Scheduler to show only matching events for the default Scheduler date range. For more information, see Reset .
6. Time Zone: You can change the time zone used to display in the Scheduler by clicking the Globe icon. The selected time zone is displayed below the icon.
7. Events: You can add and delete events by clicking Add Event and Delete Event icons respectively.
8. Map: You can toggle displaying of Map in the right-most pane using the Map icon. For more information about the Map feature, see How to use Map.
9. Configure - You can control certain aspects of technician tree, calendar, and event colors using Configure icon. You can click on it to configure the following:
◦ Configure fields to be displayed in the Technician Tree
◦ Define the display sequence of teams and territories
◦ Configure Calendar
◦ Configure Event Colors and Rules
The calendar area shows the assignments (events) for technicians displayed in the Technician tree. This provides a pictorial view of what a technician is working on when, and when he would be free, thereby helping the dispatcher in assigning new work orders. For more information, see Display of Events.