Creating Hotline Groups
Hotline Groups give field teams a direct line to the right experts when they encounter issues in the field. You create a Hotline Group when your organization needs a structured support channel for incoming requests from field users. Before you create Hotline Groups, be sure to identify the topics or functional areas for which you want to provide support and the staffers who are best suited to do so, and then educate the planned staffers on the details of how to work with Hotline Requests. For more information, see Working With Hotline Groups and its relevant child topics in Zinc for Field Service Teams.
You can freely create Hotline Groups if you have the Organization Admin role. Additionally, if you have the Team Admin or Broadcaster role, you can use any Folder or Official Group over which you have admin rights to create Hotline Groups.
To address the needs of multi-tiered support organizations, you can define Hotline Automation Rules to create Transfer-Only Hotlines, which are visible only to Hotline staffers who triage incoming Hotline Requests and escalate cases that require specialized expertise from front-line support to teams of experts for resolution. Additionally, you can configure Hotline Chatbots to automatically triage incoming Hotline Requests based on user responses to questions that you define to determine whether to escalate, close, or reroute Requests to other Hotlines.
To create Hotline Groups:
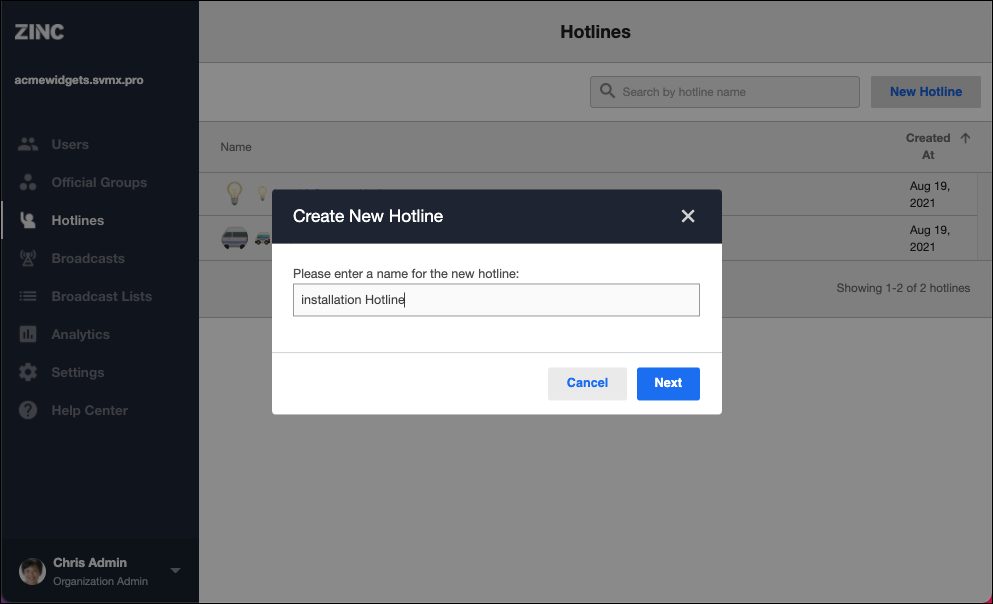
1. To create a new Hotline Group and Queue Group, on the Hotlines tab, in the top right corner, click New Hotline, and then in the Create New Hotline Group dialog box, enter the name you want to use for the Hotline Group and click Next.
2. Do one of the following, and then click Next.
◦ On the left side of the dialog box, click Create New Queue Group. to create a queue group with the same name as hotline.
◦ On the right side of the dialog box, in the Use Existing Group list, search for and select an existing Official Group to use as the Queue Group, and then click Create Hotline.

3. In the Add Hotline Staffers dialog box, type or paste the usernames or email addresses of the users you want to assign as staffers, and then click Add Hotline Staffers.
|
|
Alternatively, to create a new Hotline Group that uses an existing Official Group as its Queue Group, on the Official Groups tab, navigate to the target Group Settings page, and then in the Hotline section, click Enable Hotline (
 ). ). |

5. On the Hotlines tab, navigate to the Group Settings page for the newly created Hotline Group, and then update the values as follows:
|
Section
|
Field
|
Value
|
|---|---|---|
|
Name
|
Name
|
The name you want to use for the Hotline Group. (Required).
|
|
Avatar
|
Select an emoji to use as an avatar to help users quickly identify the Hotline Group. (Optional)
|
|
|
Open Hours
|
Time Zone
|
Select the time zone in which the Hotline Group open and closed hours are set.
|
|
Set Custom Hours
|
By default, Hotline Groups are open 24 hours a day, 7 days a week. Click to copy open and closed hours from another Hotline, or to manually set open hours for specific days of the week.
|
|
|
Transcript Emails (Optional)
|
Email Address
|
Enter or copy one or more email addresses to which to send Request Conversation transcripts after Requests are closed.
|
|
Click Action
|
Action
|
Define what happens when staffers click Request notifications. Click Preview the request to show a preview to the staffer. Claim the request immediately is the default.
|
|
Visibility
|
Where Visible
|
Visible everywhere is the default. To create a Transfer-Only Hotline, select Visible only when transferring a request to make Hotlines visible only to staffers of other Hotlines.
|
|
Chatbot(Optional)
|
Simple
|
Configure custom autoresponse Messages to send when new Hotline Requests are received during open or closed hours.
|
|
Advanced
|
Configure how to automatically triage incoming Requests by defining a series of questions and specifying Request handling based on user responses.
|
|
|
Automation Rules
|
Automations
|
Define rules for how to automatically triage incoming Hotline Requests based on user responses to questions that you define to determine whether to escalate, close, or reroute Requests to other Hotlines.
|
|
Context Retrieval (Optional)
|
Enable Context Retrieval
|
Toggle context retrieval ON or OFF. At least one context field must be configured when context retrieval is enabled. A connected Salesforce or ServiceMax org is required to use this feature.
|
|
Context Fields
|
Select the Salesforce or ServiceMax fields to include as context data for context-aware hotlines. Fields are anchored to a single object type such as Work Order and can include fields from related objects.
|
Use Case
Routing Field Service Support Requests Using a Hotline Group
Role: Business Administrator
A Business Administrator at Iniscope International creates a hotline group called Soniscape Device Support to handle incoming service requests from field technicians. The admin assigns experienced staffers to the hotline queue and configures an advanced chatbot that asks technicians to identify their device model (SSI 1000 or SSI 800) and the issue category. The chatbot routes calibration requests to a specialist staffer and closes requests for known issues by sending a resolution link. The admin also defines a transfer-only hotline for escalations so that front-line staffers can hand off complex hardware failures to senior engineers without exposing the escalation queue to all technicians. The setup keeps each request with the right staffer from the start, reducing average handling time.
For a full list of use cases of Zinc, see Use Cases for Zinc.
Related Topics