View Options
At the top of the Scheduler Calendar, the Toolbar provides multiple options to manage the information you can view.

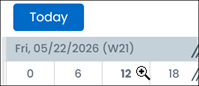
• Today: You can click this button to show Appointments for the current day.
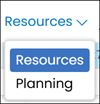
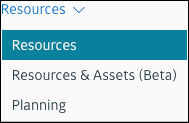
• Resources: You can select Resources & Assets to view Installed Products in the Asset Calendar, or Planning to enter Planning Mode.
• Time Zone: You can select a date and time zone. Your local time zone is the default.

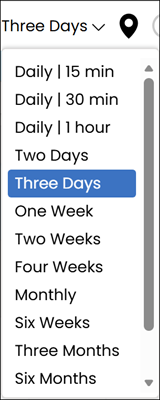
• Preset Date Range: You can select the number of days to view and time interval increments within a day.
|
|
For the Monthly and Nine Monthsoptions, the range starts on the first day of the month in which the date selected in the Time Zones list falls. For the Three Months and Six Months options, the date range starts on the first day of the week in which the selected date falls. For all other Preset Date Rangeoptions, the range starts on the selected date. The date range option you select is saved as your default until you change to a different time interval.
|

Other Calendar view options include the following:
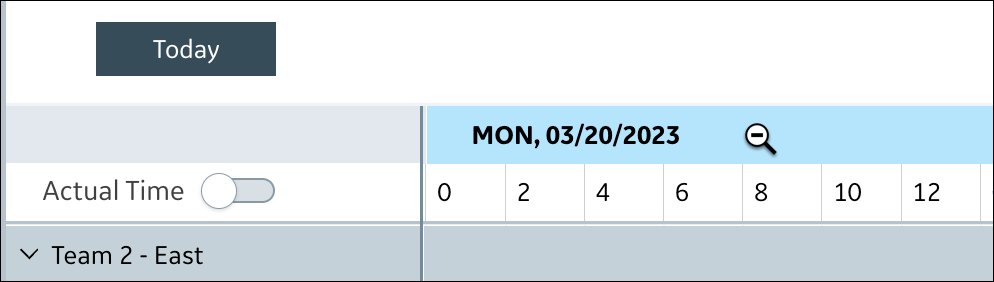
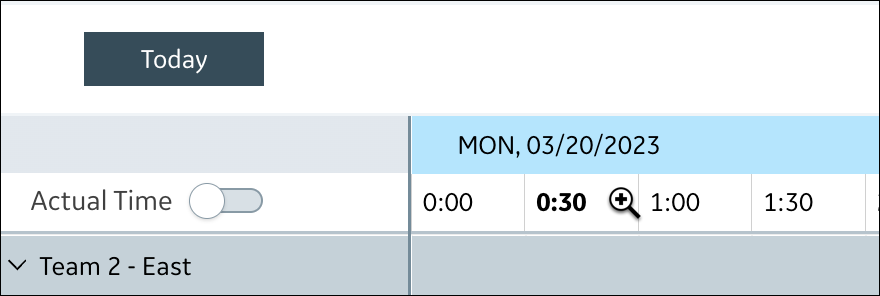
• Zoom: You can quickly increase or decrease the time intervals shown in the Calendar by hovering your mouse pointer over the upper and lower time interval column headers. When you hover over the upper header, the view zooms out and time intervals become larger, and when you hover over the lower header, the view zooms in and time intervals become smaller. The time intervals vary according to the currently selected Preset Date Range. For example, when Two Weeks is selected the upper headers show weeks and the lower headers show days, and when Three Months is selected the upper headers show months and the lower headers show weeks.

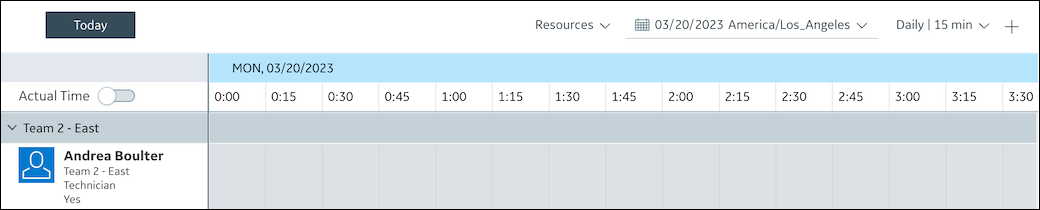
• Actual Time: If enabled by your system administrator, you can click this slider button to open the Actual Time view. A black bar appears to indicate that you now see live updates that show the actual times when technicians begin work on Appointments. You can then easily make adjustments when traffic conditions or unexpected situations cause delays.

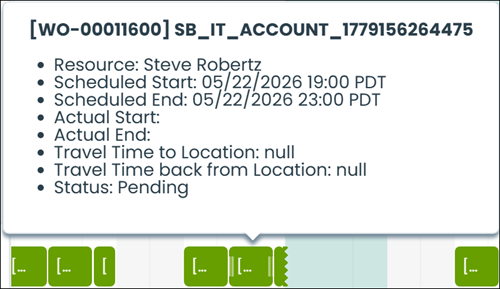
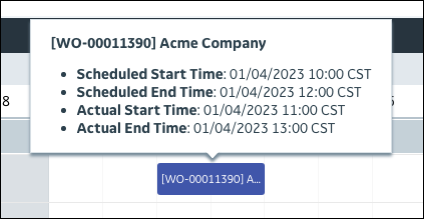
• You can hover over Appointment blocks to view tooltips that show scheduled and actual Appointment start and end time values.
• Infinite Scroll: You can view information for past or future days, weeks, and months by scrolling horizontally. To trigger infinite scrolling, you can click and hold and drag or swipe left or right on the Calendar body, or click and hold and drag the bottom scroll bar.
|
|
• Infinite scrolling is not supported for the Three Months, Six Months, and Nine Months date ranges.
• The maximum number of months for which Appointments and Events are loaded to support infinite scrolling can be configured by your system administrator.
|
• Current Time: A blue vertical line indicates the current time in the currently selected time zone.
• Appointment Details: When you hover your mouse pointer over Appointments, Job and Account Name information appears on a Preview Label. The information that appears on these labels can be configured by your system administrator.
• View Route: You can click Expand Map Panel ( ) in the top right corner to view Resource and Crew routes in real time, and draw areas on the Map Panel within which to filter Jobs.
) in the top right corner to view Resource and Crew routes in real time, and draw areas on the Map Panel within which to filter Jobs.View Options in Classic Mode
The Classic user interface retires on November 8, 2026. All features are available in the Service Board Modern interface. We recommend switching to Service Board Modern at your earliest convenience to access the latest features. |
At the top of the Scheduler Calendar, the Toolbar provides multiple options to manage the information you can view.

• Today: You can click this button to show Appointments for the current day.
• Resources: You can select Resources & Assets to view Installed Products in the Asset Calendar, or Planning to enter Planning Mode.
• Time Zone: You can select a date and time zone. Your local time zone is the default.

• Preset Date Range: You can select the number of days to view and time interval increments within a day.

For the Monthly and Nine Monthsoptions, the range starts on the first day of the month in which the date selected in the Time Zones list falls. For the Three Months and Six Months options, the date range starts on the first day of the week in which the selected date falls. For all other Preset Date Rangeoptions, the range starts on the selected date. The date range option you select is saved as your default until you change to a different time interval. |
Other Calendar view options include the following:
• Zoom: You can quickly increase or decrease the time intervals shown in the Calendar by hovering your mouse pointer over the upper and lower time interval column headers. When you hover over the upper header, the view zooms out and time intervals become larger, and when you hover over the lower header, the view zooms in and time intervals become smaller. The time intervals vary according to the currently selected Preset Date Range. For example, when Two Weeks is selected the upper headers show weeks and the lower headers show days, and when Three Months is selected the upper headers show months and the lower headers show weeks.
• Actual Time: If enabled by your system administrator, you can click this slider button to open the Actual Time view. A black bar appears to indicate that you now see live updates that show the actual times when technicians begin work on Appointments. You can then easily make adjustments when traffic conditions or unexpected situations cause delays.

• You can hover over Appointment blocks to view tooltips that show scheduled and actual Appointment start and end time values.
• Infinite Scroll: You can view information for past or future days, weeks, and months by scrolling horizontally. To trigger infinite scrolling, you can click and hold and drag or swipe left or right on the Calendar body, or click and hold and drag the bottom scroll bar.
• Infinite scrolling is not supported for the Three Months, Six Months, and Nine Months date ranges. • The maximum number of months for which Appointments and Events are loaded to support infinite scrolling can be configured by your system administrator. |
• Current Time: A blue vertical line indicates the current time in the currently selected time zone.
• Appointment Details: When you hover your mouse pointer over Appointments, Job and Account Name information appears on a Preview Label. The information that appears on these labels can be configured by your system administrator.
• View Route: You can click Expand Map Panel () in the top right corner to view Resource and Crew routes in real time, and draw areas on the Map Panel within which to filter Jobs.
) in the top right corner to view Resource and Crew routes in real time, and draw areas on the Map Panel within which to filter Jobs.Related Topics