Scheduling and Modifying Dependent Appointments
|
|
To schedule dependent Appointments, at least one Work Order Dependency must be defined in a Dependency Group in Salesforce for the Jobs you want to dispatch.
|
To schedule and modify dependent Appointments:
1. On the Scheduler Job List, click a Job Card labeled with the Dependency icon, and then do one of the following to open the Dependent Jobs Calendar:
◦ Click > and then to create a new Appointment, drag and drop the selected Job into the Dependent Jobs Calendar.
◦ Drag and drop the selected Dependent Job into the Dependent Jobs Calendar.
|
|
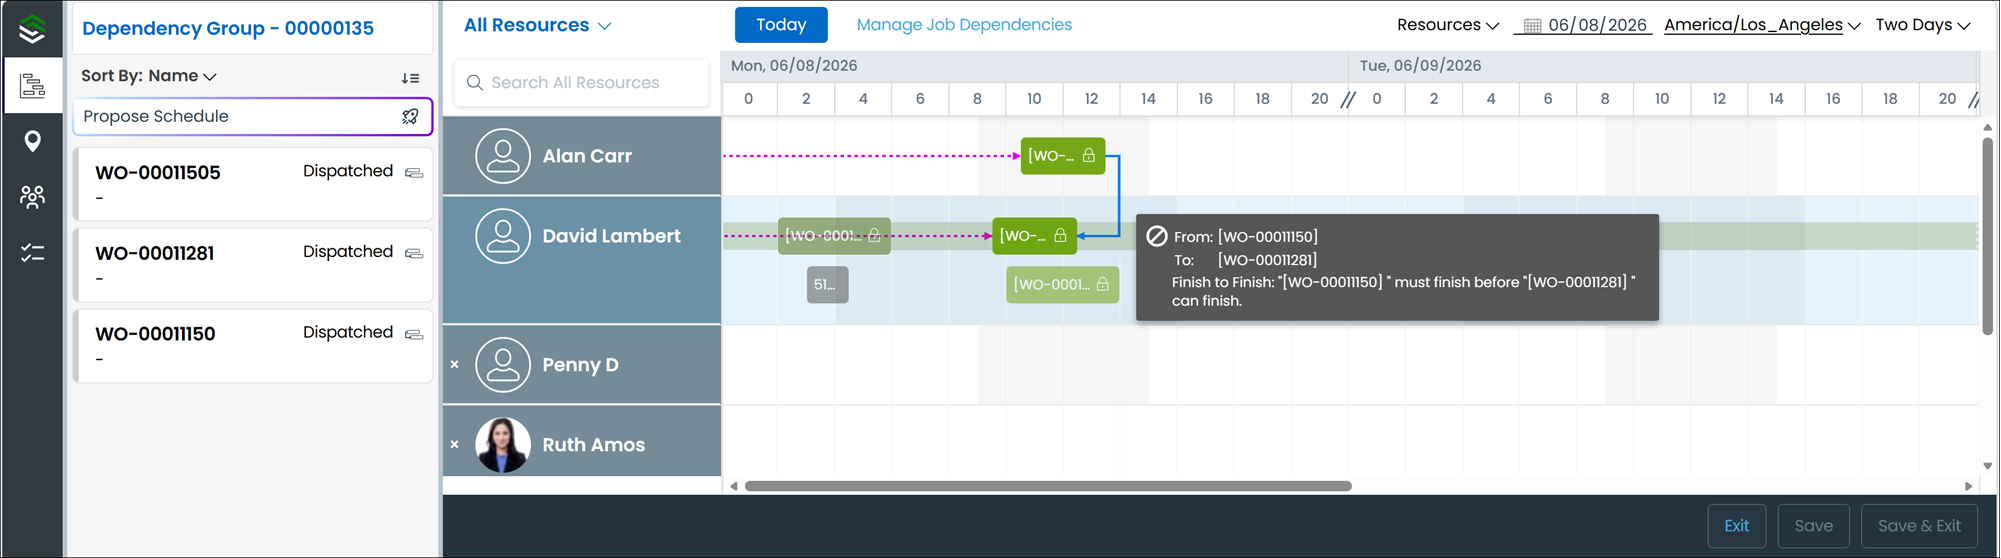
• When you open the Dependent Jobs Calendar, the currently selected time range and date are adjusted in the same manner as for the Multi-Resource Calendar. Dependency lines appear between related Jobs and Appointments. After you create Appointments, the related Job Cards are labeled with a Scheduled icon over which you can hover to show a tooltip that indicates the related Job is tentatively scheduled. You can make changes as needed until you are ready to save your work to finalize Appointments.
• The Dependent Jobs List shows only the Jobs that are configured in the same Dependency Group. Sorting support is limited to only the Name, Priority, Resource, and Status fields. Fields that are not defined for this list view are automatically excluded from the list of fields from which you select sorting criteria.
• When you drag Jobs or reschedule existing Appointments into invalid time ranges, dark gray shadows appear on the Dependent Jobs Calendar, and a tooltip appears and shows a dependency validation warning message.
|

3. To view dependency details, hover over a dependency line to show a tooltip.
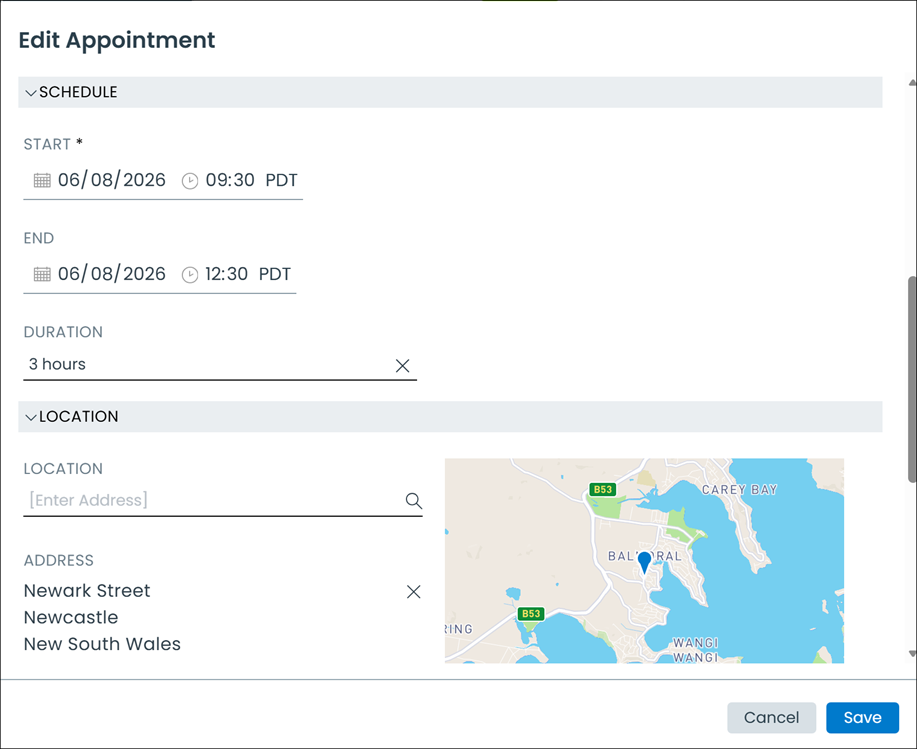
4. To edit newly created or existing Appointments, in the context menu, click Edit Appointment, and then in the Edit Appointment dialog box, make changes as needed.
|
|
• On the Scheduler Calendar, when you reschedule dependent Appointments by dragging and dropping them into different rows, or modify start and end times by dragging dependent Appointment borders, dependencies are not checked before the Dependent Jobs Calendar opens. The rescheduled Appointment appears as a temporary change with a red dependency line if the change is invalid. If you do not correct the dependency validation issue, a warning message appears when you save your changes.
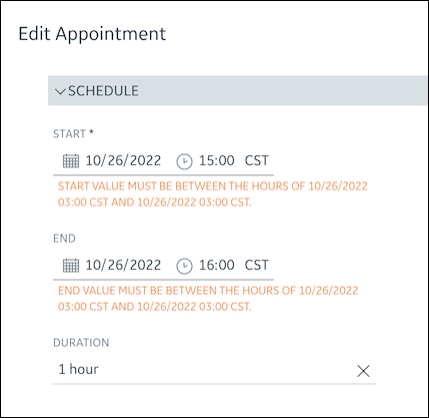
• In the Edit Appointment dialog box, when you make edits that violate dependency validation rules, messages appear below fields in which you enter invalid values.
|
5. To reassign newly created or existing Appointments, in the Dependent Jobs Calendar, drag and drop an Appointment into a different Resource row.
6. To delete temporary Appointments, in the Appointment context menu, click Delete, or to cancel dependent Appointments, click Cancel Appointment.
|
|
When you cancel a primary Appointment related to a Dependent Job, a confirmation dialog appears to notify you that all other Appointments related to the same Dependent Job will also be canceled, and unsaved changes on the Dependent Jobs Calendar are committed together.
|
7. After you make all needed changes, click Save to commit your changes, or Save & Exit to commit your changes and close the Dependent Jobs Calendar.
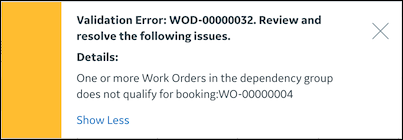
8. If dependency sync to Salesforce fails, on the Dependent Jobs Calendar, click the row that is rendered with a striped red background to view the details in a notification box, and then make updates as needed to resolve the issue.
For example, to address the following error, check the related Work Order record to ensure that the Zip or Service Duration fields are not empty.
Scheduling and Modifying Dependent Appointments in Classic Mode
The Classic user interface retires on November 8, 2026. All features are available in the Service Board Modern interface. We recommend switching to Service Board Modern at your earliest convenience to access the latest features. |
To schedule dependent Appointments, at least one Work Order Dependency must be defined in a Dependency Group in Salesforce for the Jobs you want to dispatch. |
To schedule and modify dependent Appointments:
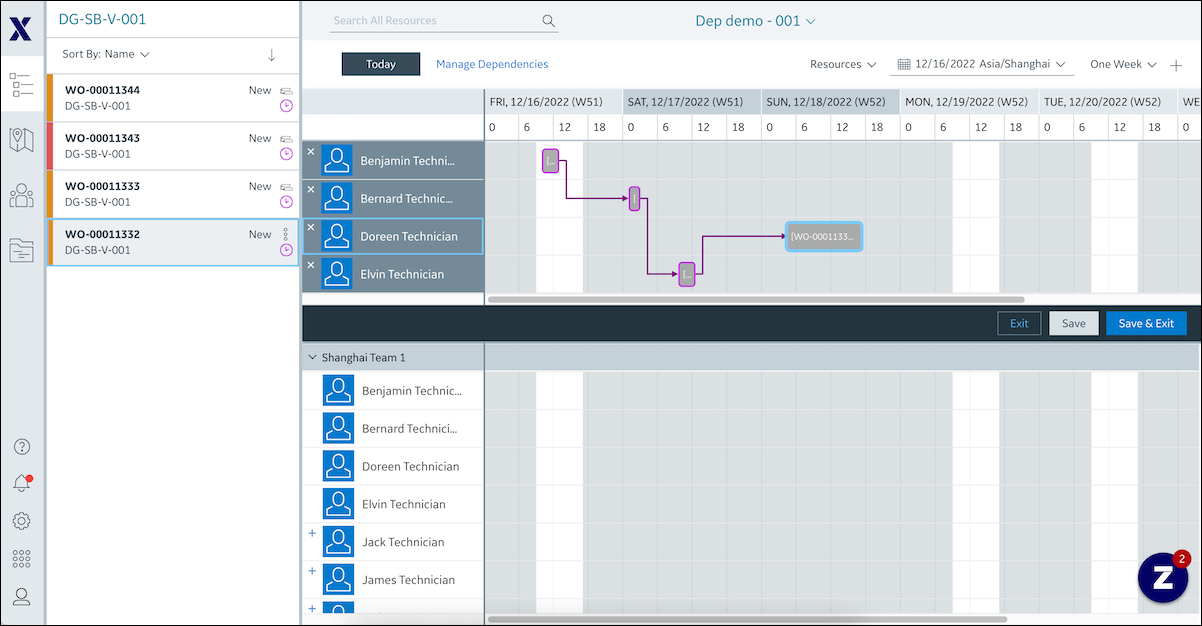
1. On the Scheduler Job List, click a Job Card labeled with the Dependency icon ( ), and then do one of the following to open the Dependent Jobs Calendar:
), and then do one of the following to open the Dependent Jobs Calendar:◦ Click Job Action Menu ( ) > and then to create a new Appointment, drag and drop the selected Job into the Dependent Jobs Calendar.
) > and then to create a new Appointment, drag and drop the selected Job into the Dependent Jobs Calendar.◦ Drag and drop the selected Dependent Job into the Dependent Jobs Calendar.
• When you open the Dependent Jobs Calendar, the currently selected time range and date are adjusted in the same manner as for the Multi-Resource Calendar. Dependency lines appear between related Jobs and Appointments. After you create Appointments, the related Job Cards are labeled with a Scheduled icon (  ) over which you can hover to show a tooltip that indicates the related Job is tentatively scheduled. You can make changes as needed until you are ready to save your work to finalize Appointments. ) over which you can hover to show a tooltip that indicates the related Job is tentatively scheduled. You can make changes as needed until you are ready to save your work to finalize Appointments.• The Dependent Jobs List shows only the Jobs that are configured in the same Dependency Group. Sorting support is limited to only the Name, Priority, Resource, and Status fields. Fields that are not defined for this list view are automatically excluded from the list of fields from which you select sorting criteria. • When you drag Jobs or reschedule existing Appointments into invalid time ranges, dark gray shadows appear on the Dependent Jobs Calendar, and a tooltip appears and shows a dependency validation warning message. |
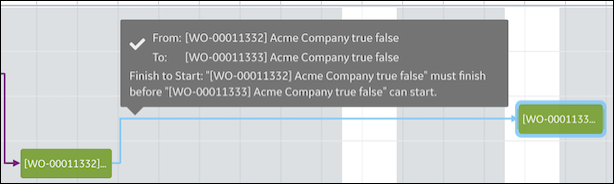
3. To view dependency details, hover over a dependency line to show a tooltip.
4. To edit newly created or existing Appointments, in the context menu, click Edit Appointment, and then in the Edit Appointment dialog box, make changes as needed.
• On the Scheduler Calendar, when you reschedule dependent Appointments by dragging and dropping them into different rows, or modify start and end times by dragging dependent Appointment borders, dependencies are not checked before the Dependent Jobs Calendar opens. The rescheduled Appointment appears as a temporary change with a red dependency line if the change is invalid. If you do not correct the dependency validation issue, a warning message appears when you save your changes. • In the Edit Appointment dialog box, when you make edits that violate dependency validation rules, messages appear below fields in which you enter invalid values. |
5. To reassign newly created or existing Appointments, in the Dependent Jobs Calendar, drag and drop an Appointment into a different Resource row.
6. To delete temporary Appointments, in the Appointment context menu, click Delete, or to cancel dependent Appointments, click Cancel Appointment.
When you cancel a primary Appointment related to a Dependent Job, a confirmation dialog appears to notify you that all other Appointments related to the same Dependent Job will also be canceled, and unsaved changes on the Dependent Jobs Calendar are committed together. |
7. After you make all needed changes, click Save to commit your changes, or Save & Exit to commit your changes and close the Dependent Jobs Calendar.
8. If dependency sync to Salesforce fails, on the Dependent Jobs Calendar, click the row that is rendered with a striped red background to view the details in a notification box, and then make updates as needed to resolve the issue.
For example, to address the following error, check the related Work Order record to ensure that the Zip or Service Duration fields are not empty.
Related Topics