Enabling Message Center Notifications
By default, 18 browser-based slide-out notification messages and 3 push notifications appear in Message Center. You can enable additional notifications for Message Center, and also deactivate predefined notifications or delete custom notifications. After notifications are enabled, Message records are created at runtime to store the translations or push notification text associated with currently active Message Request records. For browser-based slide-out notifications, messages are stored in the default language for the browser currently in use, and for push notifications, the subscriber’s preferred language is used.
Predefined push notifications are triggered when you create or update Appointments and one of the following validations fails.
|
Validation
|
Example Message
|
Message Request
|
|---|---|---|
|
Check whether the assigned Appointment falls partially or fully outside valid working hours for this Resource (including travel time).
|
Appointment WO-00001001 was assigned to Resource Luca Martin. This appointment falls partially or fully outside valid working hours for this resource.
|
Appointment {0} was assigned to Resource {1}. This appointment falls partially or fully outside working hours for this resource.
|
|
Check whether the assigned Appointment overlaps with existing Appointments or Events.
|
Appointment WO-00001001 was assigned to Resource Luca Martin. This appointment overlaps with existing appointments or events.
|
Appointment {0} was assigned to Resource {1}. This appointment overlaps with existing appointments or events.
|
|
|
These validation checks are disabled by default, and you can easily enable them by updating the relevant Message Request record.
|
To enable Message Center notifications:
1. In Max Admin, click System Management ( ) > > , and then in the list view, in the top left corner, click Create (
 ).
).
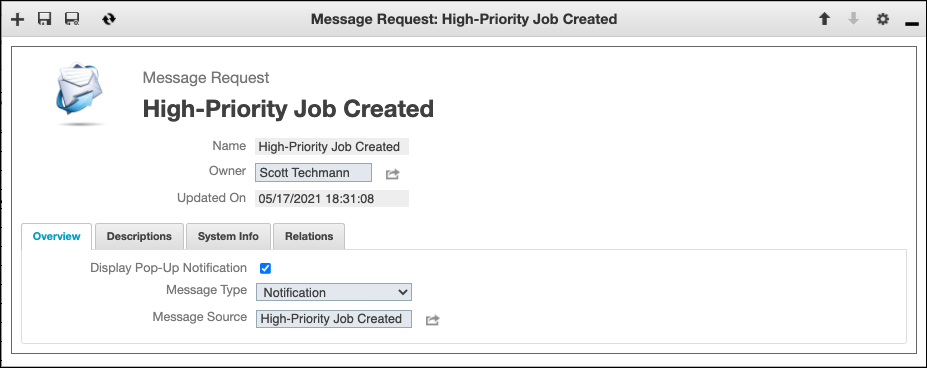
) > > , and then in the list view, in the top left corner, click Create ().2. On the Message Request record page, complete the fields as follows, and then in the top left corner, click Save and Close ( ).
).
).|
Field
|
Value
|
|---|---|
|
Name
|
Calculated field value that is generated after new Message Request records are created and saved.
|
|
Display Pop-Up Notification
|
Select to show a pop-up notification to the message owner when messages are received, or clear to disable pop-up notifications to the message owner.
|
|
Message Type
|
Select Notification.
|
|
Message Source
|
The Push Notification Request or Translation record for the notification you want to enable.
|
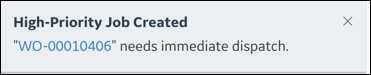
3. Click System Management () > , and then in the list, click the record you specified as the Message Source in the newly completed Message Request record, for example, High-Priority Job Created.
) > , and then in the list, click the record you specified as the Message Source in the newly completed Message Request record, for example, High-Priority Job Created.4. On the record page, on the Overview tab, in the Message field, specify code in the format [objectFullIdentifier](recordName | recordUUID) to make the message clickable in Message Center, for example:
"[svmx_job](<%= svmx_name %> | <%= io_uuid %>)" needs immediate dispatch.
|
|
To support global searches, for Job- and Resource-related notifications, use recordName.
|
5. In the top left corner, click Save and Close (), and then click Development Actions ( ) > .
) > .
), and then click Development Actions () > .6. To deactivate an existing Message Request, navigate to the relevant list view and open the record, and then in the System Info tab, clear the Active check box and resynchronize.