Configuring Job Card and Appointment Tooltips
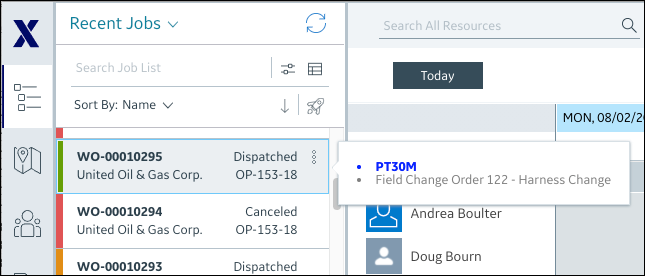
You can configure tooltips for Job Cards in the Scheduler and Map tabs, and Appointments in the Scheduler Calendar. To do so, you configure Tooltip Definition records, define code to automatically generate information when users move their mouse pointers over a Job Card or Appointment block, and then configure key-value pairs in the Tooltip Settings record.
|
|
• Tooltips are regenerated whenever Job or Appointment records are directly or indirectly updated. You cannot configure tooltips for temporary appointments in the Multi-Resource Calendar.
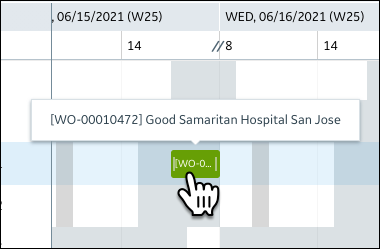
• If no Tooltip Definition record is configured for Appointments, tooltip content defaults to the primary name in the format [Work Order ID] Account Name, for example, [WO-12345678] Good Samaritan Hospital.
|
To configure Job Card and Appointment tooltips:
1. Follow the steps in Configuring Tooltip Definitions to create a Tooltip Definition record, and in the Related Object field, do one of the following:
◦ To configure a Job Card tooltip, select the Job object.
◦ To configure an Appointment tooltip, select the Appointment object.
2. In the Code field, implement Groovy code to define the tooltip content as shown in the following examples:
◦ To configure a Job Card tooltip:
"<h4>Job Card Tooltip Example</h4>" +
"<br>" +
"<li style='font-weight:bold;color:gray;font-style:oblique;'>${svmx_name}</li>" +
"<li>${svmx_workflow}</li>"
◦ To configure a tooltip that shows the Name, Start, End, Assign to Resource, Travel Time to Location, and Status field values for an Appointment:
"""
<span>${svmx_name}</span>
<li>Resource: ${svmx_assigned_to?.svmx_name}</li>
<li>Start: ${svmx_start_datetime}</li>
<li>End: ${svmx_end_datetime}</li>
<li>Travel Time to Location: ${svmx_travel_time_to_location}</li>
<li>Status: ${svmx_workflow}</li>
"""
3. Follow the steps in Configuring Tooltip Settings to configure key-value pairs for the new Tooltip Definition record in the Tooltip Setting setting with the following keys, as applicable:
◦ Job Card tooltip: svmx_job::card_tooltip
◦ Appointment tooltip: svmx_appointment::gantt_tooltip