Submitting Depot Service Request in 25.1
You can submit a request from an Account, Work Order, Case, or the community portal. The Depot Service Request is available as a wizard step for Account, Work Order, and Case records. To configure Depot Service Request LWC component, see Custom Action for Depot Service Request LWC.
To submit a Depot Service Request from an Account record:
1. From the Home page, click the Accounts object. The list of Account records is displayed.
2. Click the record from where you want to raise a Depot Service Request.
3. Under the Service Flow Wizard, click the Create Service Request link.
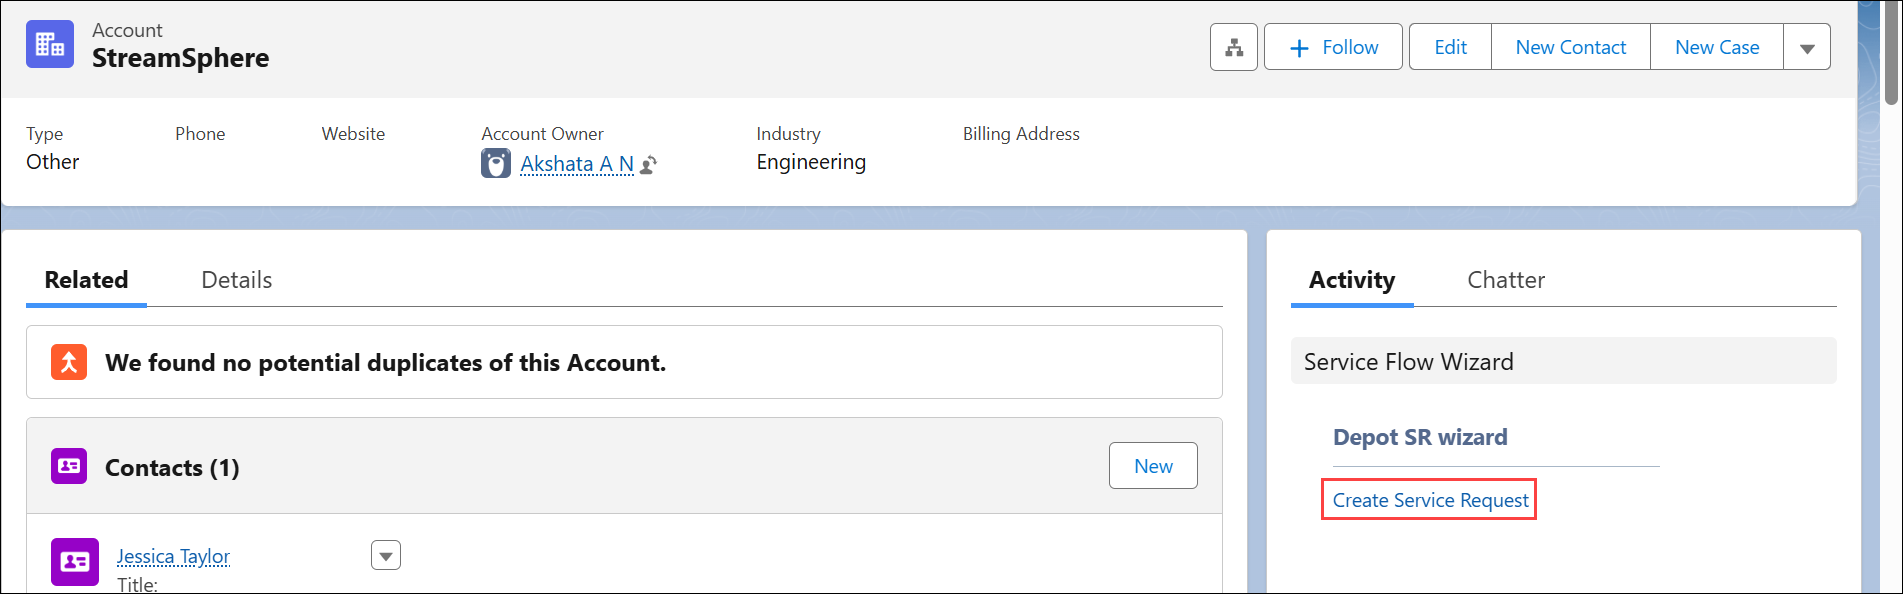
The Create Service Request pop-up window is displayed with the Your Information step.

4. In the Your Information step, configure the fields as described in the following table:
|
Field
|
Description
|
||
|---|---|---|---|
|
Contact
|
Select the appropriate Contact of the account. The Contact record includes individual’s details such as phone number, address, title, and role.
|
||
|
Location
|
Select the appropriate Location from which the request is being raised. Other fields are auto-populated based on the selected location. You can modify them if required.
|
||
|
Notes
|
Enter a detailed description of the issue.
|
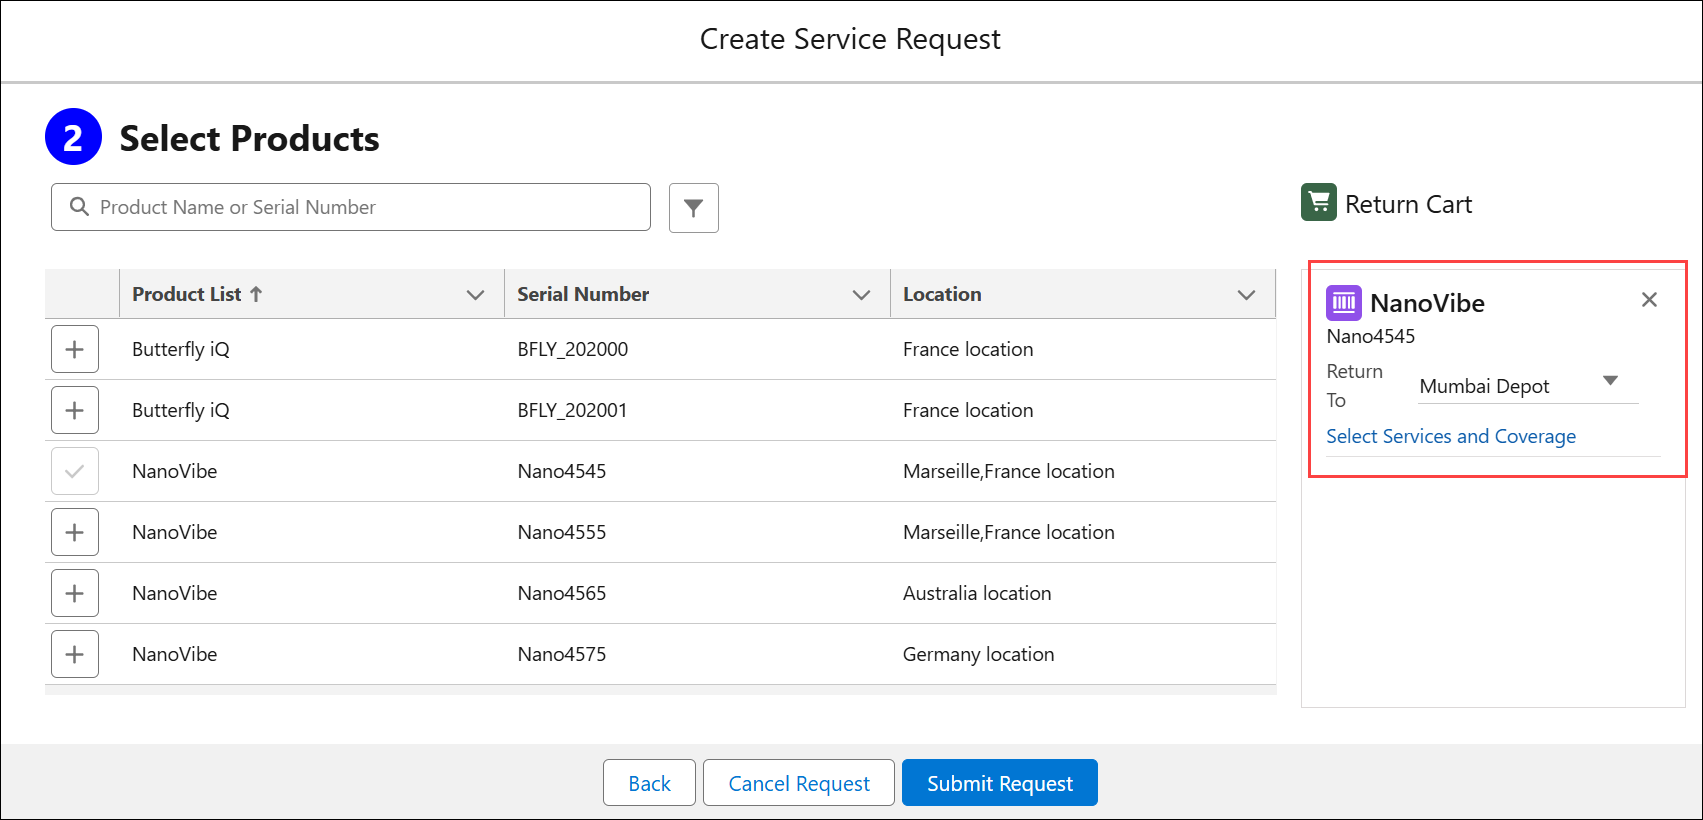
5. Click Next. The Select Products step is displayed with the list of products associated with the Account and Location.
6. In the Select Products step, add the products that have issues and require depot service. Click the + icon next to each product you want to add to the cart.
The Product is added under the Return Cart. After adding a Product to the cart, the Service Request item is created and listed under Service Request Line Object. From this Object, you can manage Service Request items. For more information, see Managing Depot Service Request.
|
|
• You can use the search bar to search for products based on the Product Name or Serial Number.
• You can apply advance filters to narrow down products based on Location, Covered By, and so on. For more information, see Filtering Products using Advanced Options.
|
7. For a Product added under Return Cart, configure the fields described in the following table:
|
Field
|
Description
|
||
|---|---|---|---|
|
Return To
|
Select the depot to which the product should be returned for service. By default, the engine assigns the most suitable depot based on the Depot Qualifier configuration. For more information, see Depot Qualifier.
|
||
|
Select Services and Coverage
|
Click the Select Services and Coverage link to choose the logistic services for the selected product. Logistic services are the work plans configured to perform logistics-related tasks. For more information, see Configuring Logistic Services.
|
|
|
• After selecting services, you can remove them by clicking the Clear Services and Coverage option.
• You must select a depot and at least one service to proceed with the submission.
|
8. Click Submit Request.
Based on the Service Request Line items, Work Orders are automatically created. Since work plans and depot are assigned during submission, the Work Orders appear in the Depot Queue under Logistic section. For more information, see Managing Logistic-Specific Queue Items.
Similarly, you can submit a request from Work Order and Case.
Related Topics