General Information Tab
The following screen shows the General Information tab in the SFM Wizard Designer. This is displayed when you launch the wizard create/edit screen.
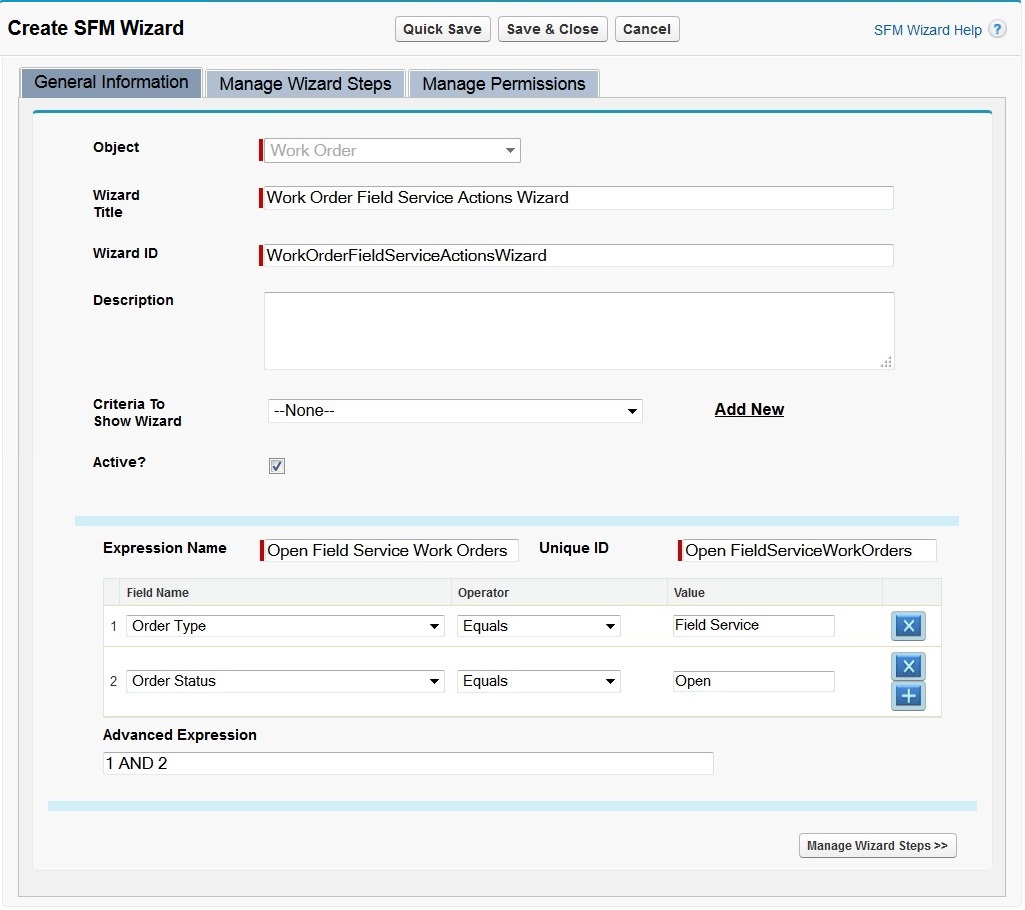
Enter the details for the wizard attribute fields as described in the following table:
|
Fields
|
Description
|
|---|---|
|
Wizard Title
|
Enter a user-friendly title for the wizard. Generally, the wizard title represents the business process (Paid Repair or Warranty Service). This is displayed in the Wizard Delivery screen in the browser and ServiceMax Mobile For Laptops application. In the other mobile apps, this is displayed as the Actions menu section title.
|
|
Wizard ID
|
Enter a unique id for the wizard, using alphanumeric and underscore characters.
|
|
Description
|
Enter a detailed description of the wizard. This is shown on hovering over the wizard title in the SFM Wizard Delivery screen in the browser. If this is blank, the wizard title itself is displayed on hover also.
|
|
Criteria To Show Wizard
|
Follow one of these steps to configure the criteria that a record must match, for the wizard to be displayed in the SFM Wizard Delivery screen and mobile apps.
From the list of available criteria, select the applicable standard or custom criteria.
Select the applicable custom criteria and modify the criteria by clicking the View/Edit link and adding/updating/deleting conditions / advanced expression. Since the criteria can also be re-used by other configurations such as wizards, SFM transactions, and so on, use extreme caution when modifying existing criteria.
Click the Add New link to define new criteria and associate with the current wizard.
If a record does not match the criteria, the wizard is hidden. If the criteria field is blank, the wizard is always displayed.
|
|
Active
|
Check the Active checkbox to make the wizard available to use.
|
|
|
Only active wizards are displayed in the SFM Wizard Delivery screen and mobile apps.
|
The sequence of steps to define new criteria is as follows:
1. Enter unique Expression Name and ID. Using the combination of Field Name, Operator, and Value, configure the required criteria.
|
|
You can use any of these SOQL Date Literals for date and date-time fields: TODAY, TOMORROW, YESTERDAY, LAST_90_DAYS, NEXT_90_DAYS, LAST_N_DAYS:n, NEXT_N_DAYS:n LAST_WEEK, THIS_WEEK, NEXT_WEEK, LAST_MONTH, THIS_MONTH, and NEXT_MONTH. These are supported by the SFM Wizard Delivery screen in the browser.
|
2. Use the buttons marked with x and + to remove and add conditions respectively. Note: If required, use the Advanced Expression to enter conditions such as (1 AND 2) OR 3.