Creating Visualforce Pages and Tabs
After you create partner communities and partner users and configure OAuth2 authentication, you finish the community setup process by creating Visualforce pages and tabs.
To create Visualforce pages and tabs:
1. On the Salesforce Classic Setup page, in the left pane, click > > .
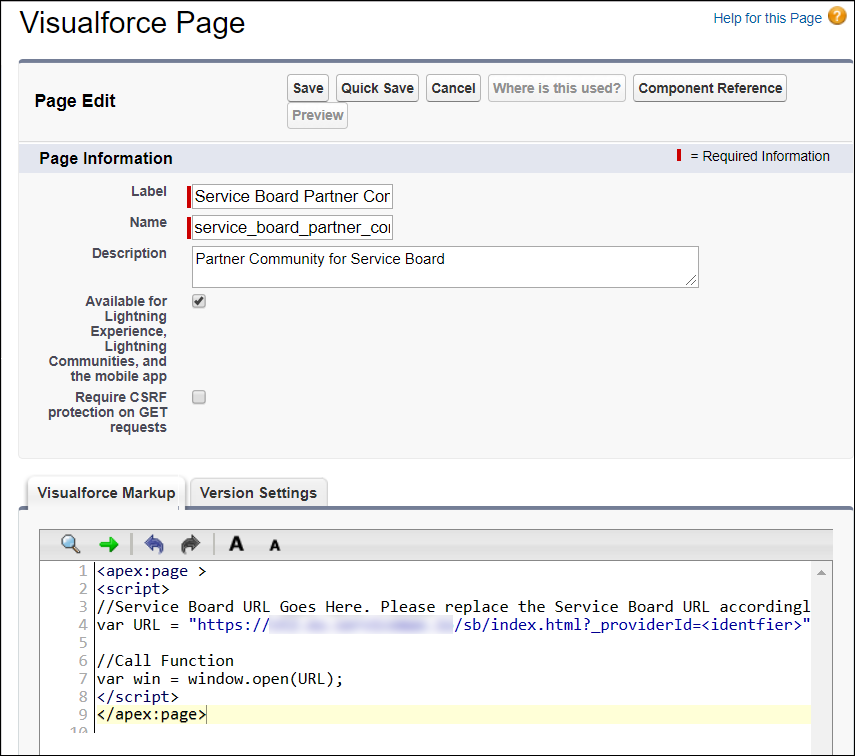
2. Create a new Visualforce page with the following settings:
|
Field
|
Value
|
||
|---|---|---|---|
|
Label
|
The name of the community, for example, Service Board Partner Community.
|
||
|
Name
|
An internal identifier to use for the community, which must contain only lowercase letters and underscores, for example, service_board_partner_community.
|
||
|
Description
|
A brief description of the community.
|
||
|
Available for Lightning Experience, Lightning Communities, and the mobile app check box
|
Selected
|
||
|
Require CSRF protection on GET requests check box
|
Cleared
|
||
|
Visualforce Markup tab
|
<apex:page > |
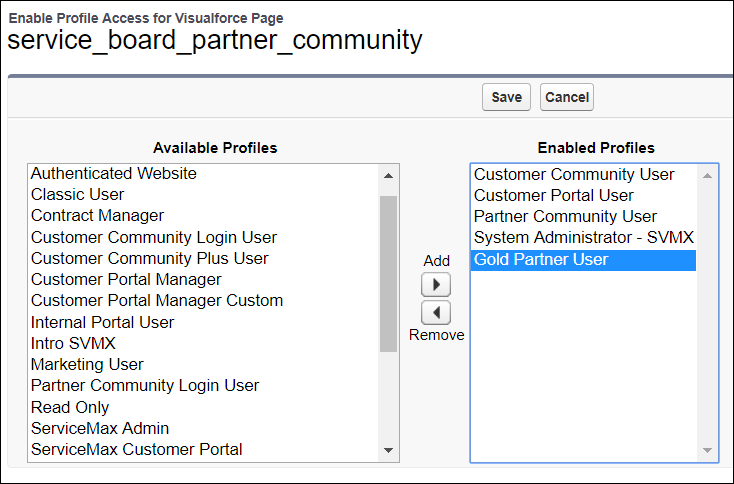
3. On the Visualforce Pages list, to the left of the entry for the newly created page, click Security, and then in the Enable Profile Access for Visualforce Page pane, assign the partner profiles for which you want to enable access to the page.
4. On the Setup page, in the left pane, click > > , and then on the Custom Tabs page, under Visualforce Tabs, click New.
5. Create a new tab for the community page, and then on the Salesforce Setup page, in the left pane, click > > > .
6. In the list view, in the row for the newly created partner community, click Workspaces, and then on the Workspaces page, click Administration.
7. On the Administration page, in the left pane, click Tabs, and then on the Tabs page, move the newly created tab for the partner community from the Available Tabs list to the Selected Tabs lislt and save your changes.
8. Log into the newly created partner community and click the Visualforce tab you created in the previous step to redirect to Service Board.
|
|
If partner or community users are configured for dispatcher access in the Salesforce SVMXC__Dispatcher_Access__c table, these users are automatically assigned the Dispatcher role during initial and real-time sync.
If partner or community users are not configured for dispatcher access in the SVMXC__Dispatcher_Access__c table, these users are assigned only the Standard User role after data sync to Service Board. When these users log in from a partner community, an error appears: You do not have access to any application. Please contact system administrator. You will be signed out in 10 seconds.
|