Creating Custom Resource Lists by Territory
You can create your own Resource List Views organized by Territories to view your currently assigned Service Teams, Resources, and Crews, and show or hide Appointments based on their end Status values.
To create a custom Resource List by Territory:
1. Do any of the following:
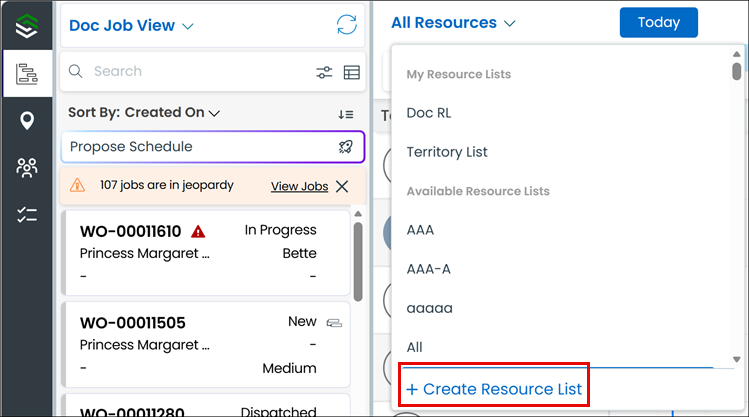
◦ Click > > > .
◦ Click > > > .
◦ Click > > > .
2. In the Create Resource List dialog box, in the Name field, enter a name for your new Resource List, and then to include inactive Resources or Crews in the list, enable the Show Inactive Resources and Crews option.
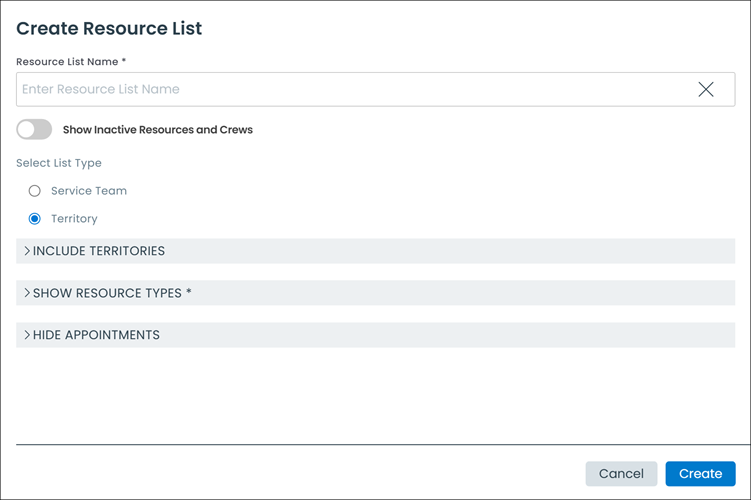
3. Under Select List Type, click Territory, and then click Include Territories and select the Territories that you want to include in the view.
|
|
You can select only the active Territories to which you have dispatch access.
|
4. Click Show Resource Types, and then click any of the following Resource types that you want to include in the view:
◦ Crew
◦ Equipment
◦ Technician
5. Click Hide Appointments, and select any of the following Appointment end Status values that you want to exclude from the view, and then click Create.
◦ Canceled
◦ Finished
◦ Incomplete
◦ Rejected
Creating Custom Resource Lists by Territory in Classic Mode
The Classic user interface retires on November 8, 2026. All features are available in the Service Board Modern interface. We recommend switching to Service Board Modern at your earliest convenience to access the latest features. |
You can create your own Resource List Views organized by Territories to view your currently assigned Service Teams, Resources, and Crews, and show or hide Appointments based on their end Status values.
To create a custom Resource List by Territory:
1. Do any of the following:
◦ Click > > > .
◦ Click > > > .
◦ Click > > > .
2. In the Create Resource List dialog box, in the Name field, enter a name for your new Resource List, and then to include inactive Resources or Crews in the list, enable the Show Inactive Resources and Crews option.

3. Under Select List Type, click Territory, and then click Include Territories and select the Territories that you want to include in the view.
You can select only the active Territories to which you have dispatch access. |
4. Click Show Resource Types, and then click any of the following Resource types that you want to include in the view:
◦ Crew
◦ Equipment
◦ Technician
5. Click Hide Appointments, and select any of the following Appointment end Status values that you want to exclude from the view, and then click Create.
◦ Canceled
◦ Finished
◦ Incomplete
◦ Rejected
Related Topics