Configuring Initial Sync
|
|
Salesforce Business Hours and Salesforce Holiday records are supported for initial sync. Configuration is required, and initial sync must be run manually.
|
To configure initial sync:
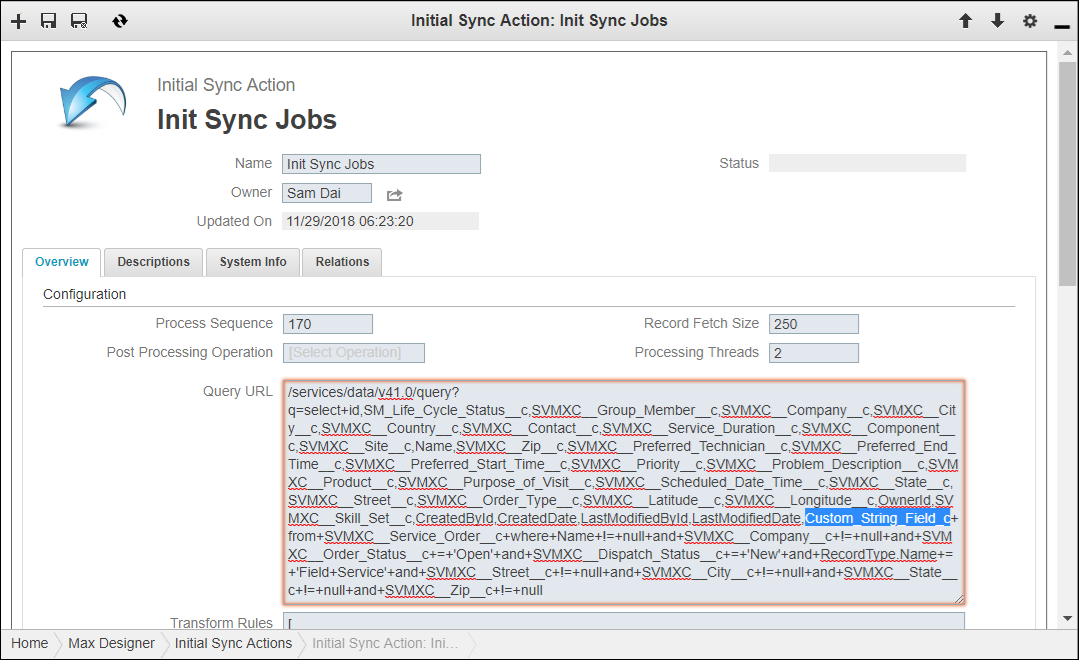
1. In Max Designer, click Developer Tools ( ) > , and then in the list view, click the object whose sync details you want to configure, for example, Init Sync Jobs.
) > , and then in the list view, click the object whose sync details you want to configure, for example, Init Sync Jobs.2. On the Initial Sync Action record page, on the Overview tab, in the Query URL field, add internal identifiers for any custom fields into the query string, for example, Custom_String_Field__c, and then in the top left corner, click Save and Close ( ).
).
).
3. Click Developer Tools () > > , and then in the list view, click the template whose field sync configuration you want to modify, for example, Job Initial Sync Template.
) > > , and then in the list view, click the template whose field sync configuration you want to modify, for example, Job Initial Sync Template.4. On the Transform Template page, on the Overview tab, in the Custom Field Mappings field, add field mappings for any custom fields, for example, Custom_String_Field_c.
|
|
Be sure to configure the same Salesforce fields in the transform template and the Query URL field in the associated related Initial Sync Action record. Otherwise, the corresponding Service Board field value is set to null during initial sync.
|
5. In the Query URL field, add internal identifiers for any custom fields into the query string, for example, Custom_String_Field_c, and then in the top left corner, click Save and Close ().
).6. Click Developer Tools () > > , and then in the list view, click Init Sync ServiceMax Events.
) > > , and then in the list view, click Init Sync ServiceMax Events.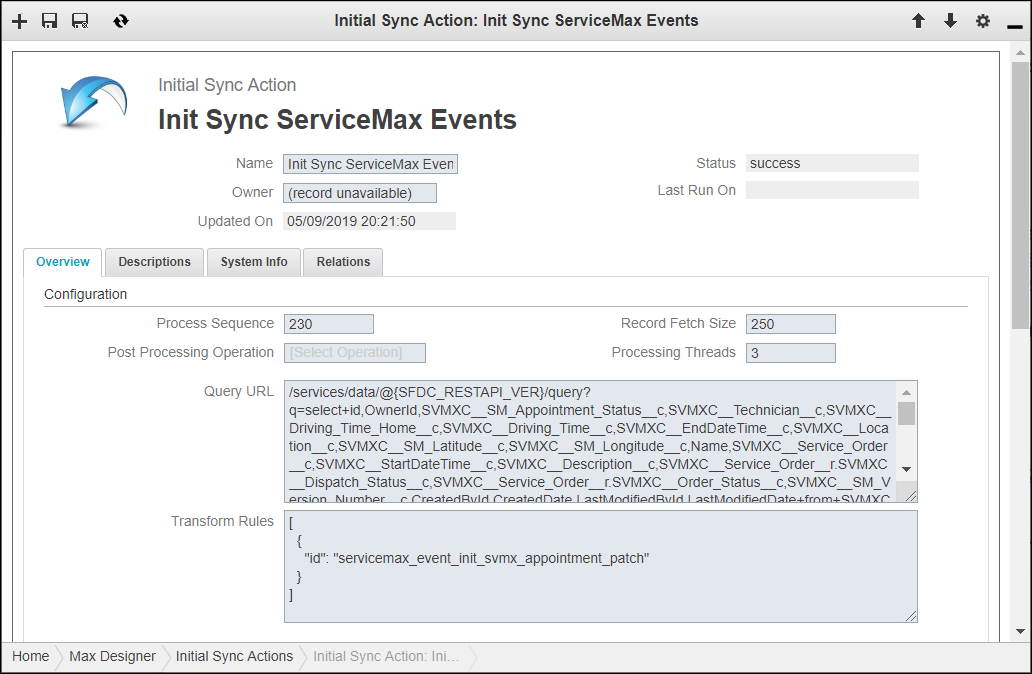
7. On the record page, in the Overview tab, in the Query URL field, add internal identifiers for any custom fields into the query string, and then in the top left corner, click Save and Close ().
).8. Click Developer Tools () > > , and then in the list view, click SME Init Sync Template.
) > > , and then in the list view, click SME Init Sync Template.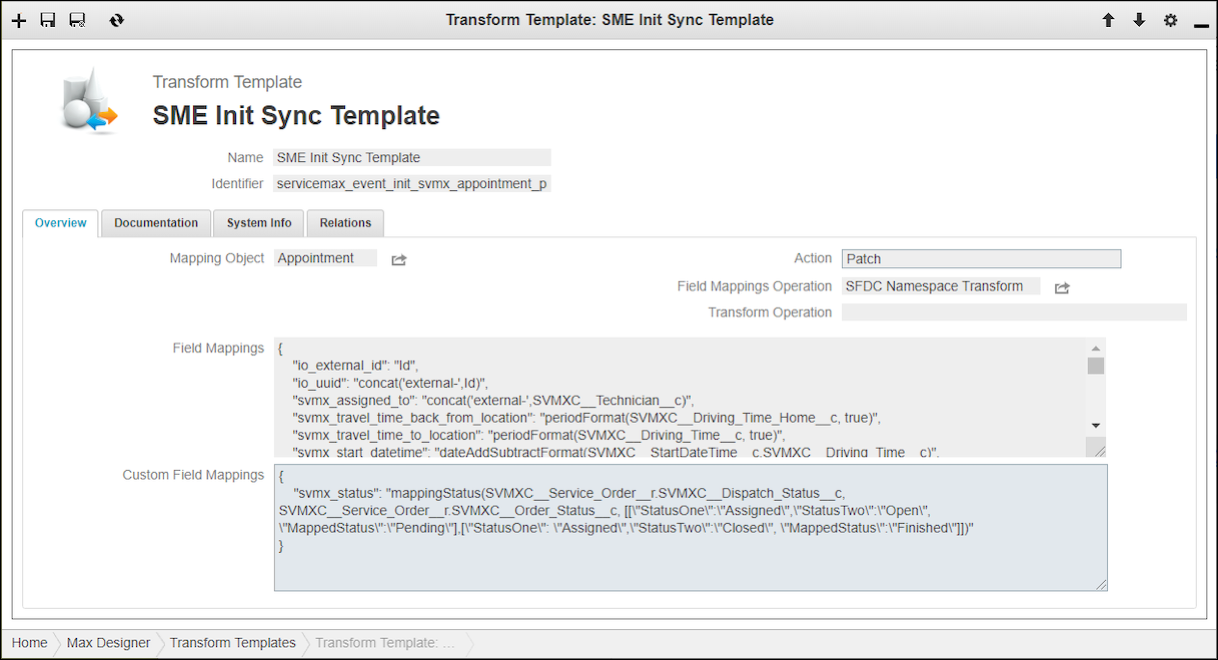
|
|
In cases where you need to map a custom field as a related object, use the getPropertyValue function and include SVMXC_Preferred_Technician_r.Name in the Query URL field, for example, "svmx_name":"getPropertyValue(SVMXC_Preferred_Technician_r.Name)".
|
9. On the record page, in the Custom Field Mappings field, add field mappings for any custom fields, and then in the top left corner, click Save and Close ().
).