Page Layout Header
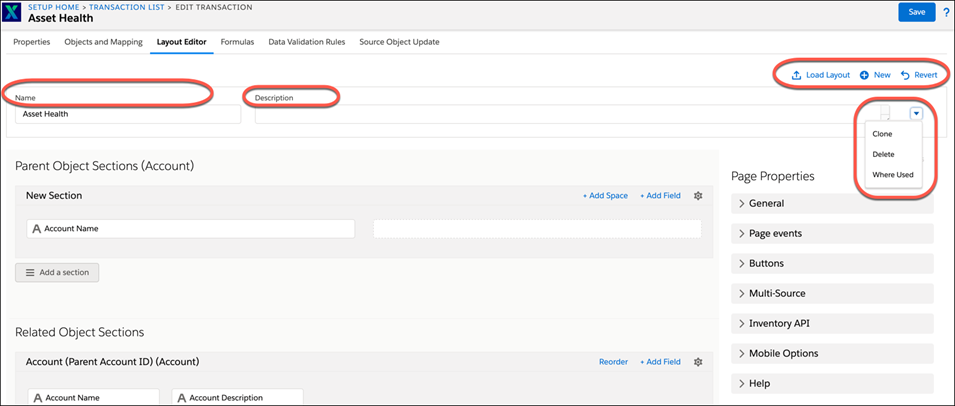
The Page Layout Header describes the field names and action icons in the Page Layout Editor. It allows you to edit the name of a layout, add a description, load an existing layout, create a layout or revert any changes you have made. In addition, the Page Layout allows you to clone the existing layout, delete the layout and also allows you to find out the places where you have used this layout.
The following table lists the fields in the Page Layout Header
|
Page Layout Header Field Names
|
Description
|
||
|---|---|---|---|
|
Name
|
Displays the name of the page layout. By default, the layout name is the same as the Transaction Name.
|
||
|
Description
|
Displays a brief summary of the current layout. You can use this to add a description of the layout.
|
The following screenshot displays the fields and action icons in the Page Layout Header:
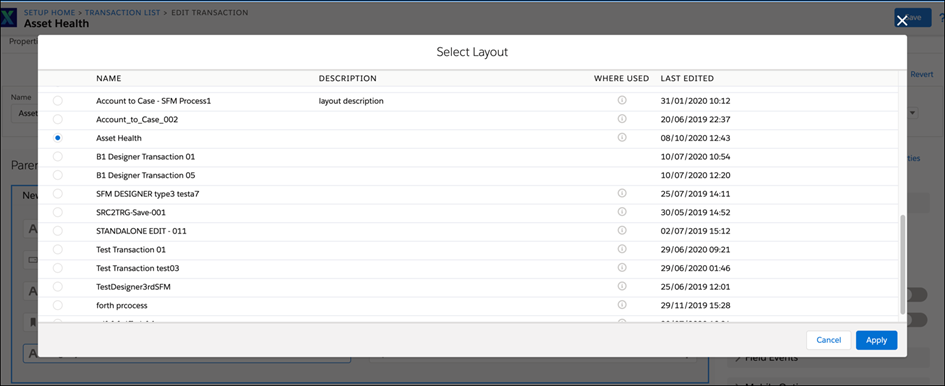
Load Layout
This displays all the layouts are associated with the selected objects in the Object and Mapping tab that has the matching alias names.
To enable Load Layout:
1. Click on the Load Layout icon. A pop-up box is displayed with all the layouts are associated with the selected objects in the Object and Mapping tab has the matching alias names.
• Name: Displays the names of the layouts. Select only one layout at a time.
• Description: Displays the description of the layout.
• Where Used: Displays the list where the current layout is used.
• Last Edited: Displays the last edited time and date of the layout.
• Apply Button: Displays a confirmation message pop-up with the options Yes and No.
2. Click Yes to reset the existing layout and load the selected layout.
3. Click No to retain the selected layout model.
The following screen displays the Load Layout in Page Layout Header:
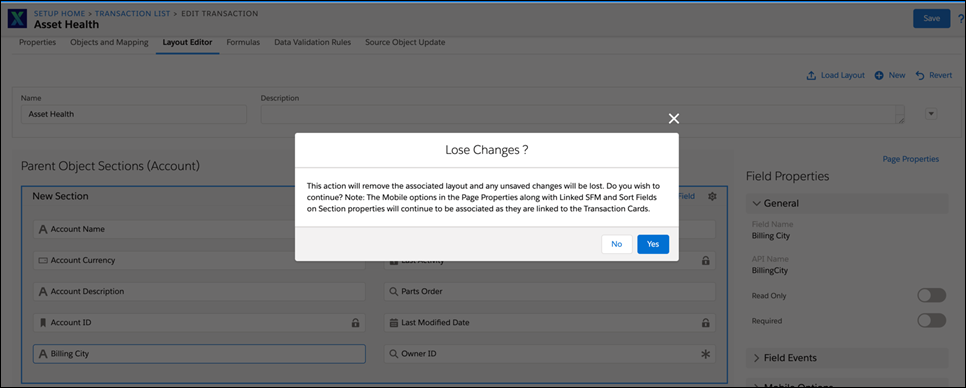
New
This displays a Confirmation/Warning message indicating about losing the changes and information in the existing layout. The options Yes and No allows you to either retain the current layout or close it.
To reset the page to a new layout:
1. Click New. A pop-up box is displayed with the Confirmation/Warning message about losing the changes and information in the existing layout. The options Yes and No allows you to either retain the current layout or close it.
2. Click Yes to reset the page to the new layout.
3. Click No to close.
The following screen displays New in Page Layout Header:
Revert
This displays a Confirmation/Warning message whether you are ready to lose the changes in the existing layout. The options of Yes and No buttons enable you to take the decision.
To revert to an existing layout:
1. Click Revert. A pop-up box is displayed with the Confirmation/Warning message whether you are ready to lose the changes in the existing layout is displayed. The options of Yes and No buttons enable you to take the decision.
2. Click the Yes option, to undo the changes on the layout that are not saved.
3. Click the No option to close the Confirmation/Warning pop-up box.
|
|
The revert option on the Screen Designer tab is enabled by default for Transaction Editor.
|
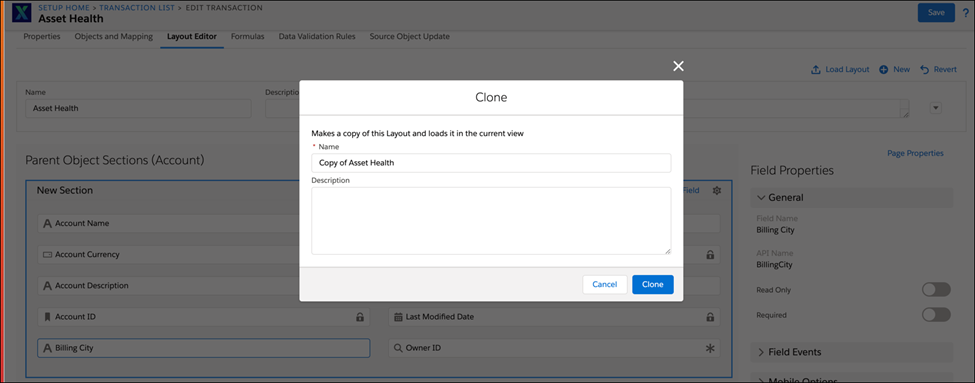
Clone
Clone creates a copy of the existing layout. It also clones any unsaved changes to the cloned page layout. For example, you have added a section called Account and a field called Account Name. You have not saved the page layout. Now when you clone this page layout, the Account section and Account Name field are also added to the cloned page layout.
To clone an existing layout:
1. Click Clone. A pop-up box is displayed with the sections Name and Description. You can edit the name and description in the pop-up box as per your requirement.
2. Click the Clone button below If you want to clone the existing layout.
3. Click Cancel to close the pop-up window and retain the existing layout.
4. Click Save to retain the cloned layout after an existing layout is cloned. The cloned layout is displayed in the list of layouts after it is saved.
5. Click Load Layout and the cloned layout is displayed.
The following screen displays Clone in Page Layout Header:
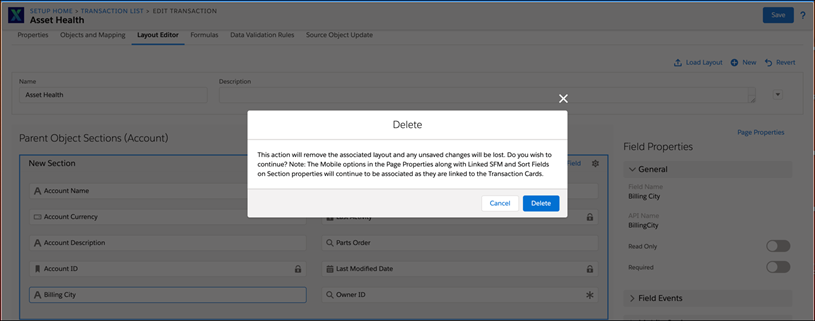
Delete
Delete allows you to delete the selected layout.
To delete an existing layout:
1. Click Delete. A pop-up box is displayed with the list of transactions where the current layout is used. It cautions you before deleting any layout.
2. Click Confirm to delete the page layout. The message appears on the screen confirming the successful deletion of the selected layout.
The following screen displays Delete in Page Layout Header:
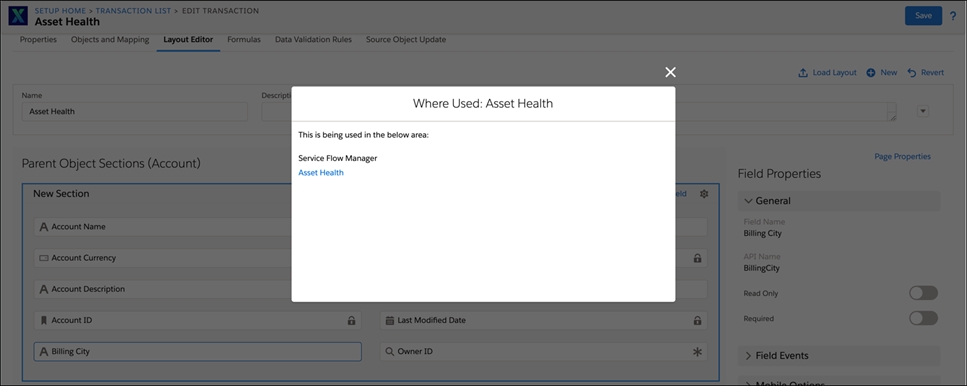
Where Used
This displays a list of transactions where this layout is used.
To enable Where Used:
1. Click Where Used from the drop-down menu. A pop-up box is displayed with the list of transactions where the current layout is used.
2. Click the x icon to close the Where Used pop-up box.
The following screen displays Where Used in Page Layout Header:
Copying Pre-configured Page Layout Details on Adding or Removing Related Objects
This following section is about the general behavior of the Layout Editor while adding or removing Related Objects.
Add or remove objects to an existing transaction without losing the underlying page layout configurations. On adding or a new object to the transaction, the process is marked as incomplete. You need to switch to the Page Layout and click Save to mark the process as complete.
On Adding a Related Object
In case the Page layout is not associated with any other transaction, the additional section(s) related to the newly added object(s) are added to the existing layout.
In case the Page layout is associated with any other transaction, the existing layout is cloned and the additional section(s) related to the newly added object(s) are added to the layout.
On Removing a Related Object
In case the Page layout is not associated with any other transaction, the section(s) related to the removed object(s) are removed from the existing layout.
In case the Page layout is associated with any other transaction, the existing layout is cloned and the section(s) related to the removed object(s) are removed from the layout.
It is a necessary step to save the page layout whenever you edit a transaction to add or remove an object(s).