Create or Cancel an Approval Workflow
Create approval workflows to route procedures for review before automatically publishing them.
Here are a few things to keep in mind when creating approval workflows:
• Once a user is assigned as an approver on a procedure, they will remain as an approver for future versions; the list of assigned approvers can be edited as needed at any time.
• Editing a list of assigned approvers on a procedure does not modify the approvers on a pending release candidate for that procedure.
• All approval workflows created by you are displayed on your Tasks page.
Create an Approval Workflow
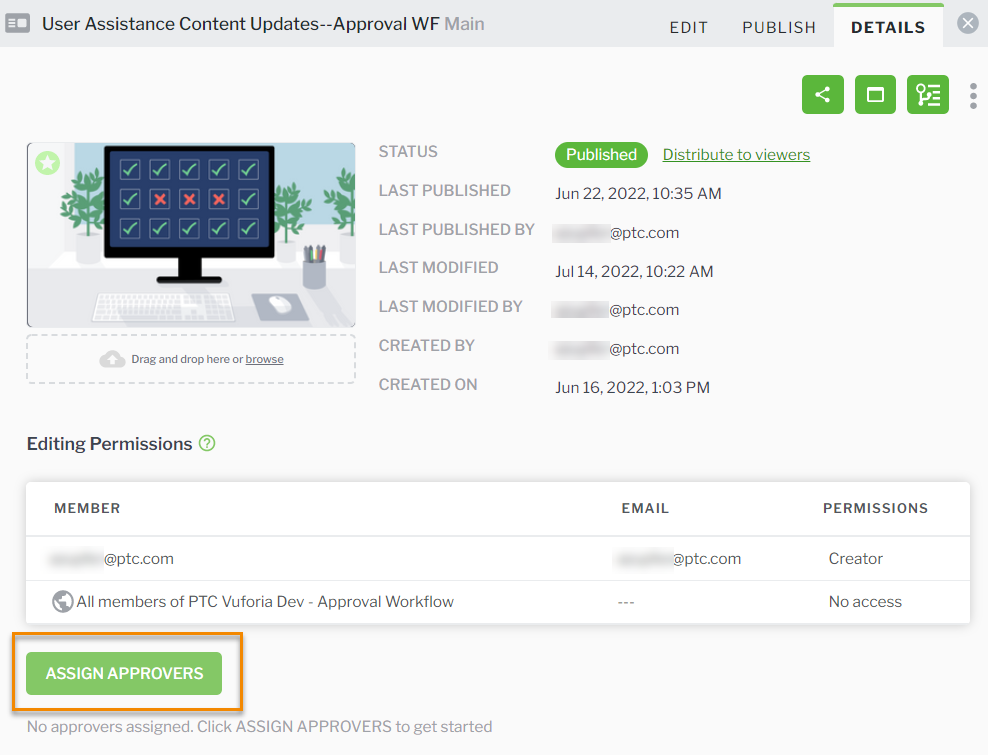
1. Navigate to the DETAILS tab of your procedure, and click ASSIGN APPROVERS.
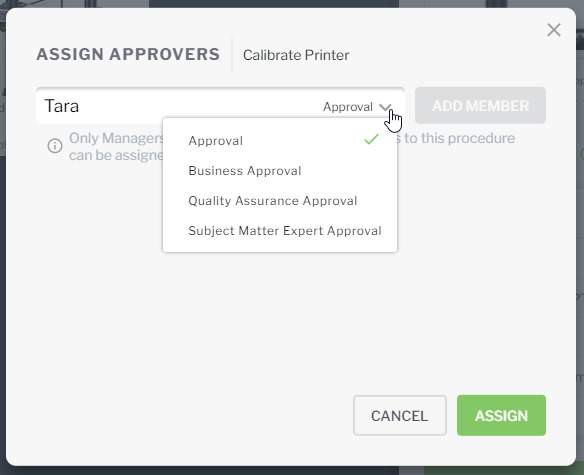
2. Enter the name of the user you want to add as an approver. Assigned approvers must either be a manager with edit access to the procedure, or an administrator.
Once you’ve found the user and selected them, you can also select the type of approval to assign them. If no specific approval type is needed, select Approval.
3. Click ADD MEMBER. You can search for and add up to 20 approvers to your approval workflow.
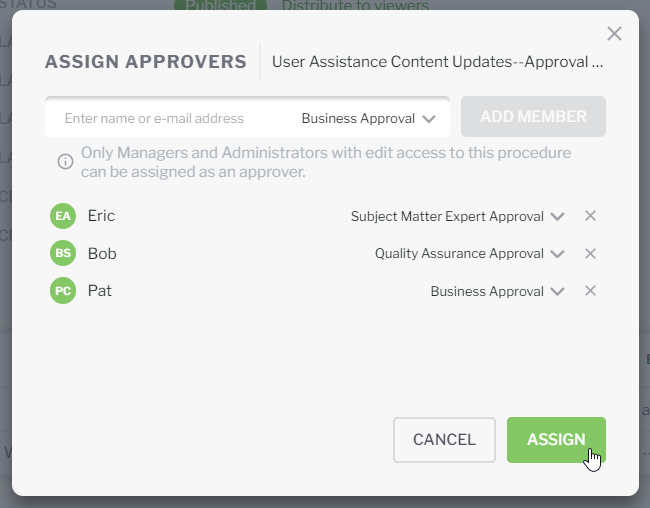
4. Once you’ve added all approvers, click ASSIGN.
5. You’ll see the new approvers displayed in the approval workflow table on the DETAILS tab.
| You can edit the list of assigned approvers at any time by clicking ASSIGN APPROVERS. |
6. You can then use the move icons (

) to reorder the list of approvers if you need to.
| The last person in the approval workflow will be listed as the user that published the procedure. |
7. Next, navigate to the PUBLISH tab, and click SUBMIT FOR APPROVAL.
8. The NEW RELEASE window appears. Enter a description for the new release in the Description field, and click SUBMIT.
9. Once the approval workflow has been started, a new
release candidate is created, and the first person in the workflow will see a notification icon appear on their
Tasks tab. Once they navigate to the
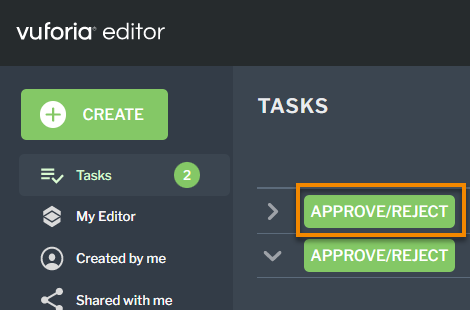
Tasks page, they will see a new task is available to
approve or reject a procedure.
| All approvers must approve the procedure in sequential order before it is automatically published. |
Cancel an Approval Workflow
The creator of the approval workflow or an administrator can cancel the workflow at any time before the workflow is completed. To cancel an approval, use one of the following methods:
Cancel from... | Description |
PUBLISH tab of a procedure | Navigate to the PUBLISH tab of the procedure, and click CANCEL APPROVAL. |
Tasks page | Right-click on the approval workflow task row, and select Cancel Approval. |
If an approval is canceled, the version number is reduced to a minor version. For example, 3.1 instead of 4.0.
There may be several reasons an approval workflow needs to be canceled.
• The author may need to make additional changes
• The wrong approvers were assigned
• One or more assigned approvers are unavailable and will stall the routing


