Manually Scheduling Project Tasks
After you import your project file, you can manually assign Resources to Project Tasks by using the Assignment Grid or the Task Information dialog box, or assign Resources automatically by using Schedule Proposals. Although you can generate Schedule Proposals to quickly assign technicians to all Tasks in a Project, multiple-Resource assignments are not supported, which requires you to manually assign additional Resources. In cases where you want all Project Tasks to be performed by multiple Resources, or you want to partially publish Projects, you might prefer to assign Project Tasks manually.
|
|
• Manual Project Task assignment is enabled until Project Tasks are 100% completed, which means that you can modify Project Task assignments after you publish.
• Schedule Proposals support only Projects that contain 100 Project Tasks or fewer. Your Service Board administrator can configure this maximum threshold in the Maximum Project Tasks Per Propose Schedule Execution setting.
|
To manually assign Project Tasks:
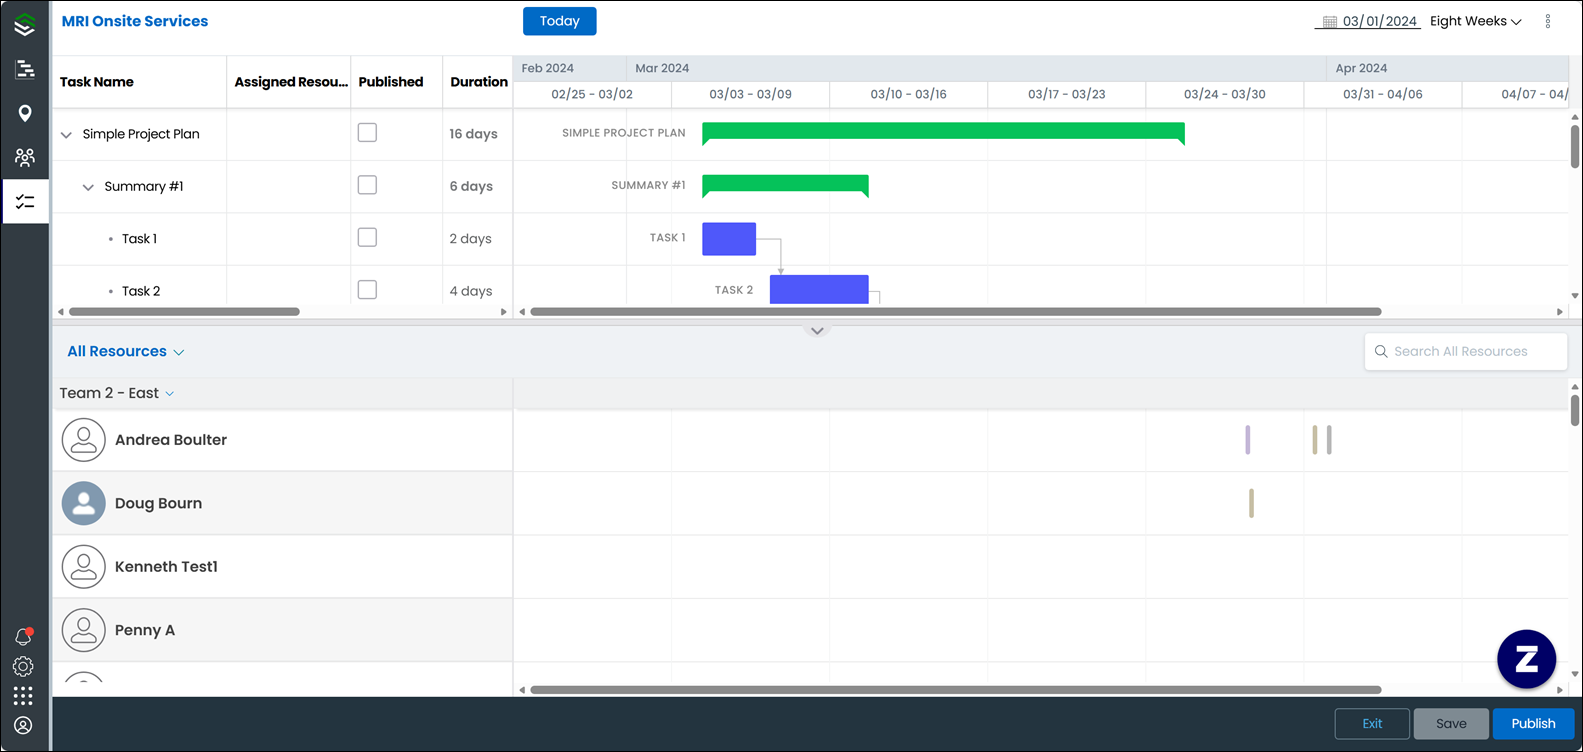
1. After you import your project file, at the center bottom of the Project Gantt, click the up arrow to open the Scheduler Calendar, and then in the picklist, click a Project Resource List.
2. To assign Project Tasks in the Assignment Grid,double-click in the Assigned Resources cell for the Project Task you want to assign, and then select Resources.
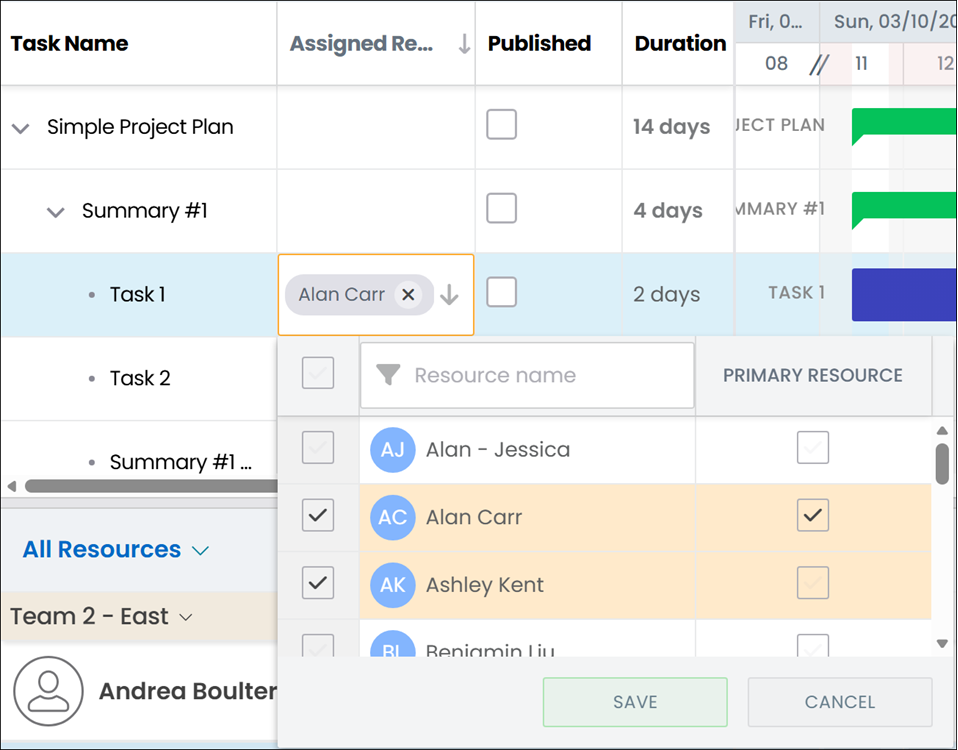
|
|
By default, the first Resource that you assign to a Project Task is set as the Primary Resource. When you assign additional Resources, they are set as Non-Primary Resources. To change the Primary Resource assignment, double-click the value in the Primary Resource column and select the check box to modify the setting.
|
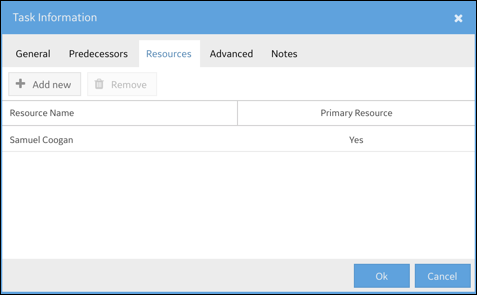
3. To assign Project Tasks in the Task Information dialog box, in the Project Gantt, double-click a Project Task, and then click > .
4. In the Resource Name drop-down list, click a Resource, and then repeat as needed.
5. If needed, to change the default Primary Resource setting, in the Primary Resource column, double-click a value and select the check box, and then click Save and Close.

6. After you finish assigning Project Tasks, in the bottom right corner, do any of the following:
◦ To publish assigned Project Tasks, click Publish.
◦ To save settings for unpublished Project Tasks, or for already-published Project Tasks and their associated Jobs in Service Board, click Save.
Manually Scheduling Project Tasks in Classic Mode
The Classic user interface retires on November 8, 2026. All features are available in the Service Board Modern interface. We recommend switching to Service Board Modern at your earliest convenience to access the latest features. |
After you import your project file, you can manually assign Resources to Project Tasks by using the Assignment Grid or the Task Information dialog box, or assign Resources automatically by using Schedule Proposals. Although you can generate Schedule Proposals to quickly assign technicians to all Tasks in a Project, multiple-Resource assignments are not supported, which requires you to manually assign additional Resources. In cases where you want all Project Tasks to be performed by multiple Resources, or you want to partially publish Projects, you might prefer to assign Project Tasks manually.
• Manual Project Task assignment is enabled until Project Tasks are 100% completed, which means that you can modify Project Task assignments after you publish. • Schedule Proposals support only Projects that contain 100 Project Tasks or fewer. Your Service Board administrator can configure this maximum threshold in the Maximum Project Tasks Per Propose Schedule Execution setting. |
To manually assign Project Tasks:
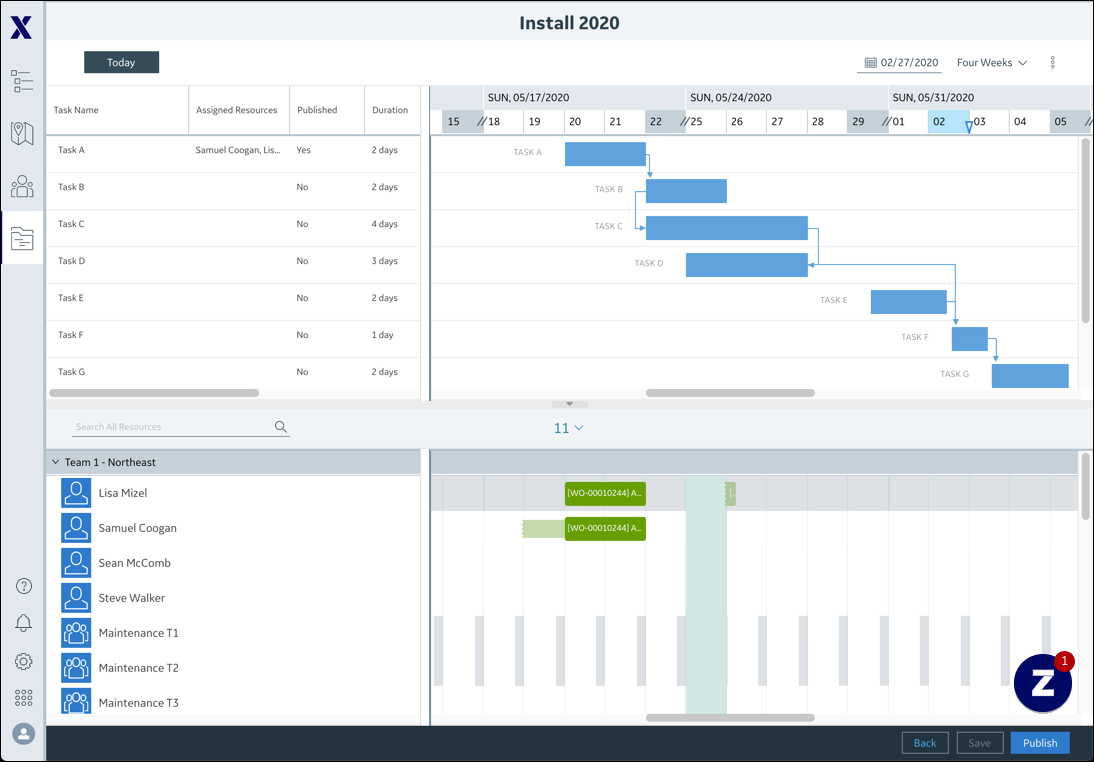
1. After you import your project file, at the center bottom of the Project Gantt, click the up arrow to open the Scheduler Calendar, and then in the picklist, click a Project Resource List.
2. To assign Project Tasks in the Assignment Grid,double-click in the Assigned Resources cell for the Project Task you want to assign, and then select Resources.
By default, the first Resource that you assign to a Project Task is set as the Primary Resource. When you assign additional Resources, they are set as Non-Primary Resources. To change the Primary Resource assignment, double-click the value in the Primary Resource column and select the check box to modify the setting. |
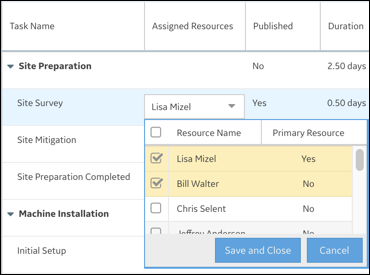
3. To assign Project Tasks in the Task Information dialog box, in the Project Gantt, double-click a Project Task, and then click > .
4. In the Resource Name drop-down list, click a Resource, and then repeat as needed.
5. If needed, to change the default Primary Resource setting, in the Primary Resource column, double-click a value and select the check box, and then click Save and Close.
6. After you finish assigning Project Tasks, in the bottom right corner, do any of the following:
◦ To publish assigned Project Tasks, click Publish.
◦ To save settings for unpublished Project Tasks, or for already-published Project Tasks and their associated Jobs in Service Board, click Save.
Related Topics