Defining Security Group Objects
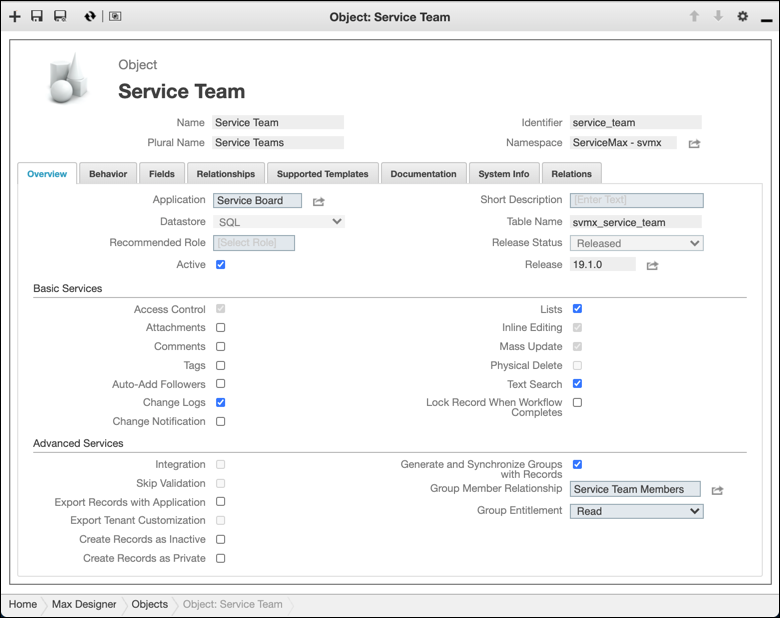
To configure security group functionality, you must first define a new or existing object as the target security group object. The following procedure shows an example of how to enable security group functionality for the Service Team object.
To define security group objects:
1. In Max Designer, on the Developer Tools ( ) launchpad menu, click Objects, and then in the list view, click Service Team.
2. On the record page, on the Overview tab, select the Generate and Synchronize Groups with Records check box, and then in the top right corner, click Save and Close ( ).
).
3. On the Developer Tools ( ) launchpad menu, click Object Designer, and then in the left pane, search for and select the Service Team object.
4. In the left pane, click Relationships, and then in the right pane, in the list, click Create ( ).
).
5. In the right pane, in the Create New Multiple Relationship dialog box, complete the fields as follows, and then click Save.
Field | Value |
|---|---|
Name | The name you want to use for the relationship, for example, Service Team Members. |
Identifier | By default, this field auto-populates based on the text you enter in the Name field. |
Ordering Multiple Relations | Target Records |
Target Object(s) | The target object for the relationship, for example, User. |

6. On the Developer Tools ( ) launchpad menu, expand the Development Tools section and click Relationships, and then in the list, click to open the newly created relationship.
7. On the record page, on the Overview tab, in the Notify Link Change To list, click Source and Target Records, and then in the top left corner, click Save and Close ( ).
).
8. Reopen the target security group object, and on the Overview tab, in the Group Member Relationship field, select the newly created relationship, for example, Service Team Members, and then in the Group Entitlement list, click Read to grant read-only access, or Full to grant full CRUD rights.

9. In the top left corner, click Save and Close ( ), and then on the Development Actions (
 ) launchpad menu, click Synchronize.
For more information: