Configuring Custom Validation Confirmation Messages
You can add custom validation logic to verify field values when records are created or updated, and present a custom validation confirmation message to dispatchers. For example, custom validation logic can be applied when dispatchers drag and drop jobs into or within the Scheduler Calendar, or update records in the relevant Edit dialog box. In cases where multiple errors are reported in a single message, you can include links to the related records for easy identification.
To configure custom validation confirmation messages:
1. In Max Designer, click Developer Tools ( ) > , and then in the list view, in the top left corner, click Create (
 ).
).
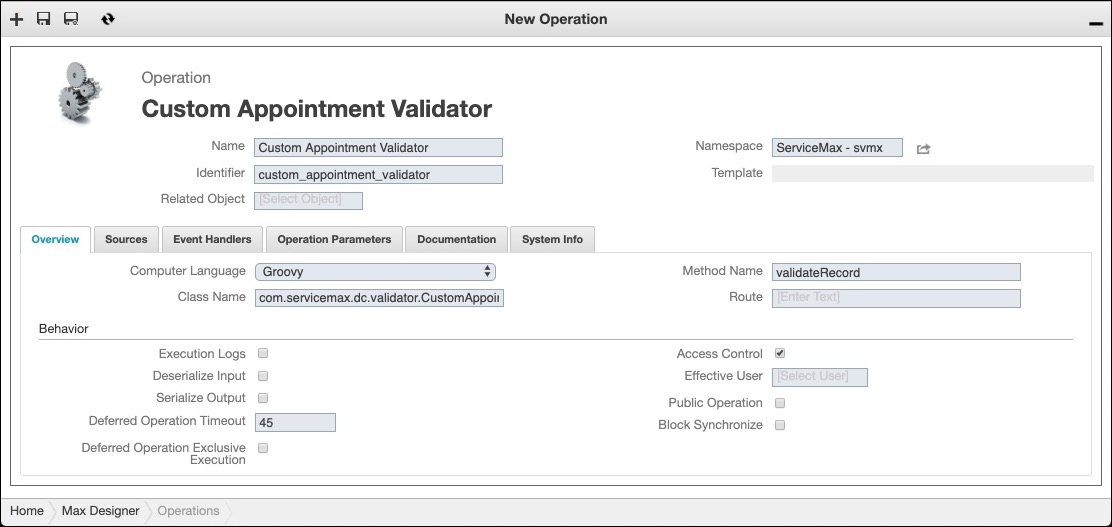
) > , and then in the list view, in the top left corner, click Create ().2. On the Operation record page, specify the following values, and then in the top left corner, click Save ( ).
).
).|
Field
|
Value
|
|---|---|
|
Name
|
Name of the validator.
|
|
Identifier
|
Internal identifier. By default, this value is automatically populated based on the value in the Name field, but can be modified as needed during record creation.
|
|
Namespace
|
Namespace for the relevant Service Board instance.
|
|
Computer Language
|
Groovy
|
|
Class Name
|
The name of the class used to implement custom validation logic.
|
|
Method Name
|
validateRecord
|
3. In the Sources tab, in the top left corner, click Create (), and then in the Create New Source dialog box, in the Name and Application fields, enter values and click Save and Close.
), and then in the Create New Source dialog box, in the Name and Application fields, enter values and click Save and Close.
4. Create Groovy code to implement the desired custom validation logic, and then in the Sources tab, click the newly created source and update the code.
5. Define a relationship between the newly created validation operation and the target object, and then add permissions for the operation.
6. In the top left corner, click Save and Close ( ), and then optionally, to add contextual links to multiple Work Orders for which errors are reported in the same message, click Developer Tools () > > .
), and then optionally, to add contextual links to multiple Work Orders for which errors are reported in the same message, click Developer Tools () > > .7. In the list view, click Add Context to Validation Message, and then on the record page, on the System Info tab, select the Active check box.
|
|
You can enable the Add Context to Validation Message operation parameter only for the Commit MA Changes, Persist Optimax Result Operation, and Commit Planning Changes operations. Each parameter must be enabled separately to apply it to the relevant operation.
|
8. In the top left corner, click Save and Close (), and then click Development Actions ( ) > .
) > .
), and then click Development Actions () > .