Generating Service Report
Android and iOS
To generate a service report when it is set to Server Generation:
1. Tap the Output Documents SFM wizard from the Actions menu to launch the formatted report. The formatted Output Documents report is generated.
2. Tap Finalize. The report is generated and prepared for sync.
|
|
• The report is generated on your device locally.
• The Sync Status icon is changed to Pending update.
• If your administrator has enabled the Server Generation option for the Output Documents, each generated document is queued for synchronization in a new row. Refer to the Check PDF Generation Status section to learn more about the PDF generation status.
• The generated Output Document is synchronized with the server with the next incremental sync.
• A download arrow is displayed on the PDF when the PDFs are configured to be generated in the server and:
◦ Sync on Finalize setting is set to Smart Sync, or
◦ Sync on Finalize is set to Default and SET019 is set to Smart Sync. For more information, refer to the Output Document Properties section.
|
3. Tap any output documents in the Documents section to view them in the PDF Reader.
|
|
On Android devices with Android System Webview version 102.0.5005.125, the Output Document preview displays unreadable characters.
|
Windows
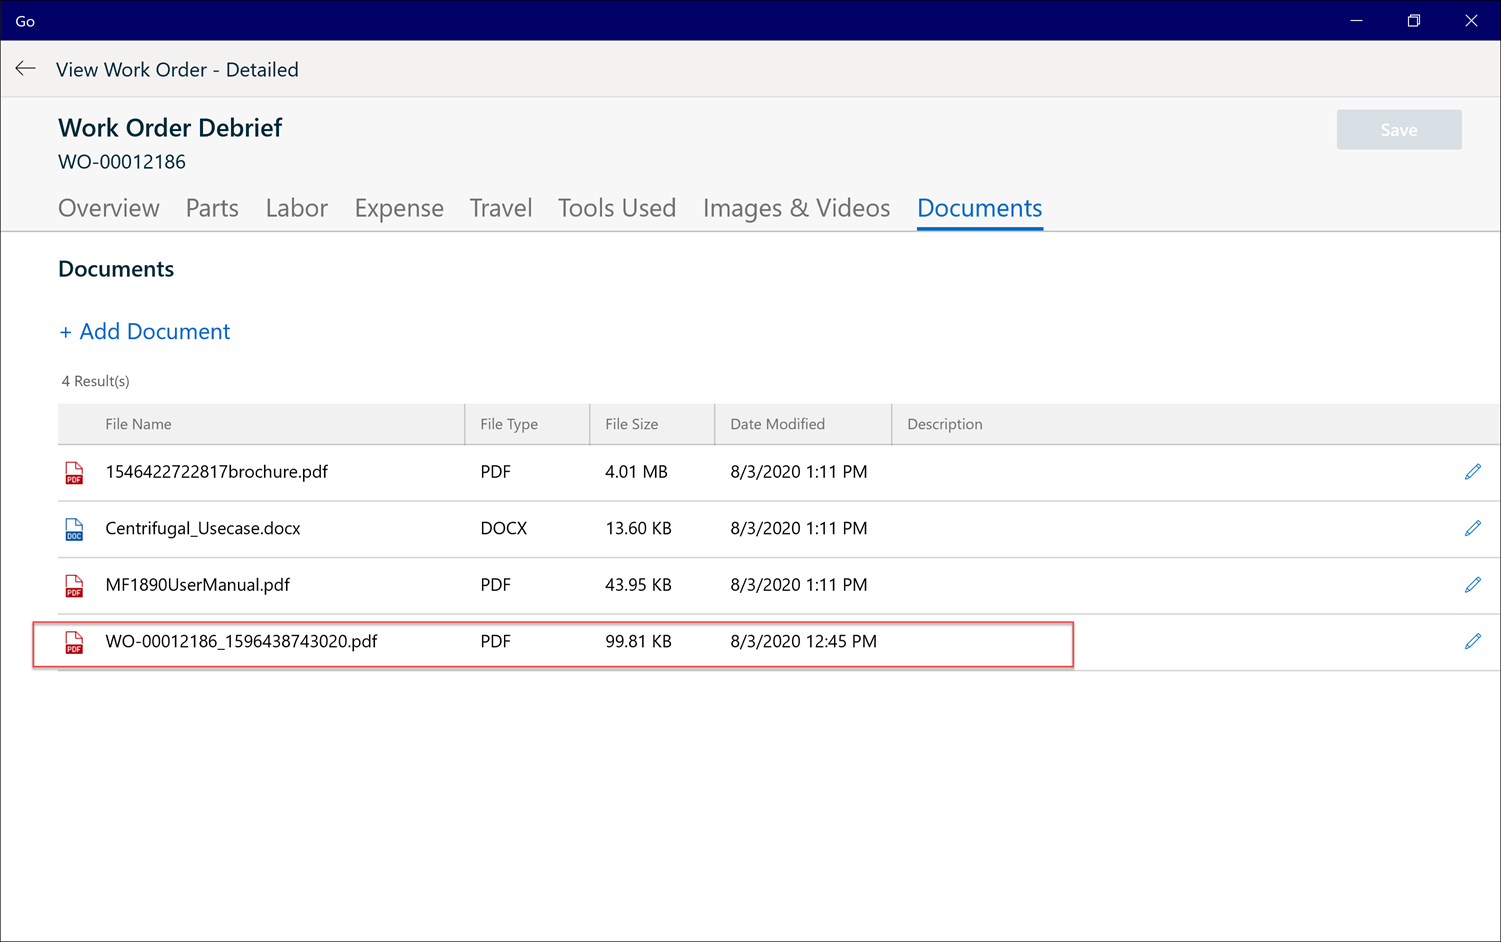
After debriefing the word order, generate the service report, commonly known as an Output Document. When a service report is generated, it is available in PDF format as an attachment in the Documents section.
• Client-side PDF Generation: By default, PDF generation is carried out on the client app if the necessary files are available on the client app. If the files are unavailable, download the necessary files from General Settings > Download files to generate the offline documents. For more information, see General Settings. Files are automatically downloaded during the initial sync if the Custom Setting is set to client-side Output Document generation.
|
|
You need internet connectivity to download the files to the client. After the necessary files are downloaded, you can generate the PDF offline.
|
• Server-side PDF Generation: Configure a custom setting to generate the PDF on the server. For more information, see Enabling Output Document Generation on Server.
To generate a service report when it is set to Server Generation:
1. Click Work Order appointment on the Calendar screen. The Work Order view process is displayed.
2. Click Actions to launch the appropriate SFM to debrief the Work Order and add Time and Materials (T&M) detail.
3. Click Save to save all the work detail lines and calculate the total price.
4. Click Actions and invoke the Print Service Report SFM.
5. Click Customer Signature and get the signature of the customer.
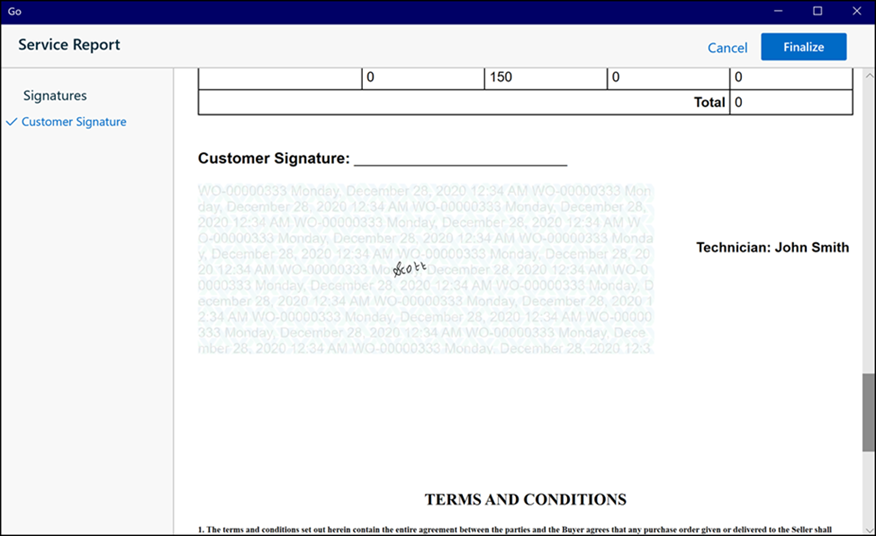
6. Click Finalize to process the output document and save the report in PDF format. You can access the report in the Documents section of the Work Order record.
|
|
• The report is generated on your device locally.
• The Sync Status icon is changed to Pending update.
• If your administrator has enabled the Server Generation option for the Output Documents, each generated document is queued for synchronization in a new row. Refer to the Check PDF Generation Status section to learn more about the PDF generation status.
• The generated Output Document is synchronized with the server with the next incremental sync.
• A download arrow is displayed on the PDF when the PDFs are configured to be generated in the server and:
◦ Sync on Finalize setting is set to Smart Sync, or
◦ Sync on Finalize is set to Default and SET019 is set to Smart Sync. For more information, refer to the OPDoc Properties section.
• During server-side PDF generation, the following error message is displayed if you click Finalize without internet connectivity.Unable to connect to the server. Please try again once the network connectivity has been restored.
|
If you click Cancel without saving the changes, a pop-up window is displayed, prompting you to choose to discard your changes.
7. Click Discard Changes to clear the changes and exit the screen.