Day View
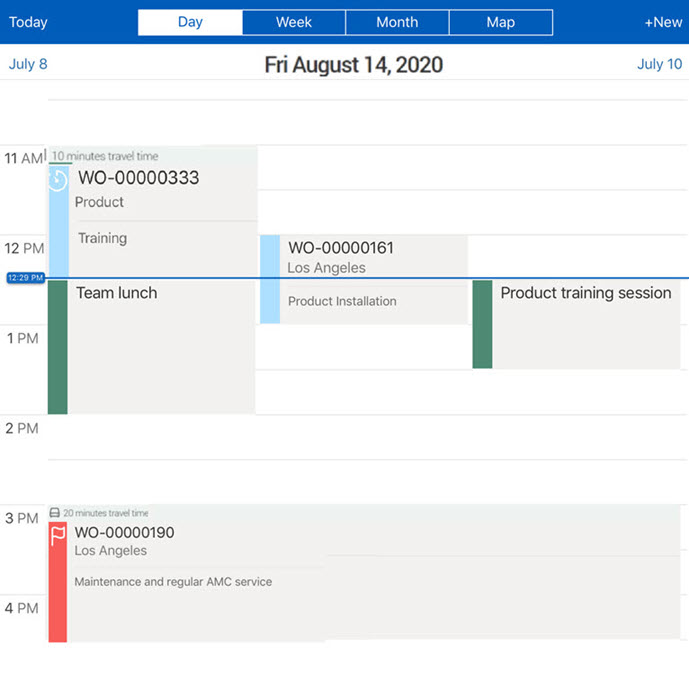
The Day View displays all the events scheduled for the logged-in technician for a particular day. By default, it shows the current day’s events. The start time of the calendar is set to display the pending events for the next 8 hours.
Clicking the event displays the details on a new page. The information displayed on the work order event in the day view of the calendar is determined by settings configured by your administrator and downloaded to your app. For more details, refer to the section Event Display Value.
The Calendar Day view page can be split into two sections:
• Top Panel
• Calendar page
Top Panel
The Top panel, which comprises View buttons, allows you to switch between Day, Week, Month, Map View, and the New button to add user events. The following table explains the section of the top panel and its functionality.
Section | Functionality |
|---|---|
Week | Switch to the week view of the selected date. |
Month | Switch to the month view of the selected date. |
Map | View the route for the selected day, starting from the first work order to the last work order for the day, based on the scheduled time. |
Today | Navigate to the work schedule for the current date. |
+ New | Create new user events |
Calendar
The following are the sections and behavior of the Calendar page section:
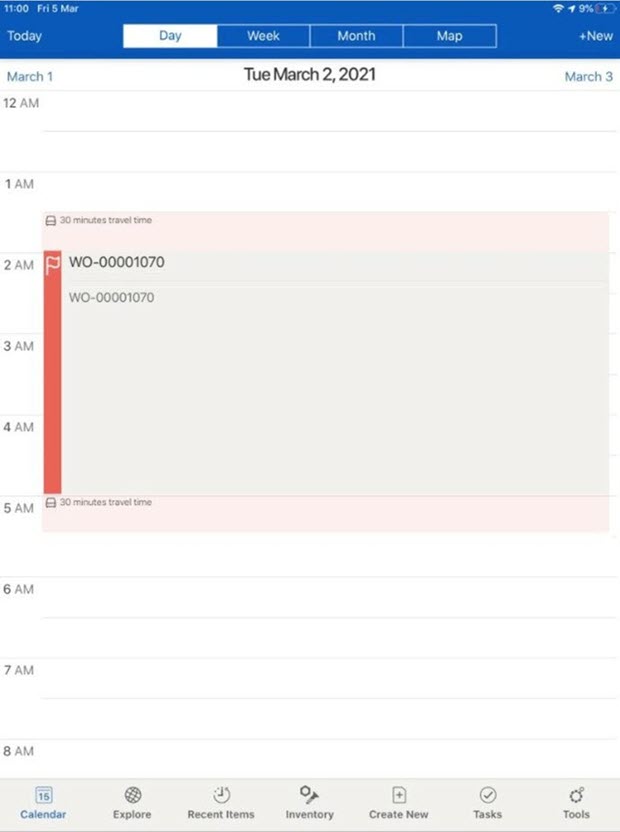
• This calendar page lists all the events scheduled for that day.
• <previous date> /<next date> buttons are used to view the events for that date.
Alternatively, you can also swipe left or right anywhere on the Calendar page to view events for the previous day or events for the next day, respectively. |
• Work order events are color-coded based on the priority of a work order. To know more, refer to color-coding.
• The travel time (in minutes) allocated for the technician to reach the work order destination and return from work to the home location is displayed above and below the Event, respectively. This is applicable for both Work Order and Non-Work order events. The travel time is the value of the Travel Time to Work order Location (Mins) field on the Event record for Work Order events. Travel time is not displayed for All-day events.
• Consecutive events are displayed one after the other in the same row.
• Overlapping or Concurrent events are displayed in different rows parallel to each other.
• All-day events are displayed as any other event starting at midnight.
• Multi-day events include a badge indicating the number of the day in the sequence. For example, A two-day event is displayed with Day 1 and Day 2 badges on those two days in the calendar.
• If your device is set to 12-hour format, then the time indicators are displayed in AM and PM format and are scrollable. The time indicators are displayed starting from 12:00 AM (midnight) to 12:00 AM (midnight).
• If your device is set to 12-hour format, then the current-time indicator is displayed on the current day in AM or PM format. If the user is on day view of the current day, after the completion of data sync, the view will adjust so that the current time indicator is in the user's view.
The following can be performed in the Day view page:
• Tap event and then tap the pencil icon to edit the event. On Windows Laptop, hovering on the event displays the pencil icon.
• Drag and drop the event to re-schedule the event.
• Tap any event to view the event/related record details on a new page. If it is a work order event, the related work order details are displayed along with the Work Order Summary; else, the event details are displayed.
The following table explains the icons and their functions:
Icons | Functionality |
|---|---|
Sync Error | Indicates sync conflict for that work order |
Ref Flag | Indicates high priority work order |
SLA Clock | Indicates that SLA is configured for that work order |