Custom Action for an Email
Prerequisite
You must install the ServiceMax Core 23.1 or later server package and then run the configurator for the Custom Action of type Email to be available for configuration.
To configure a custom action of type email:
1. Go to ServiceMax Setup > Service Flow Manager > Custom Actions.
2. Select the object for which you want to create a custom action.
3. Click New in the User-defined Custom Actions section.
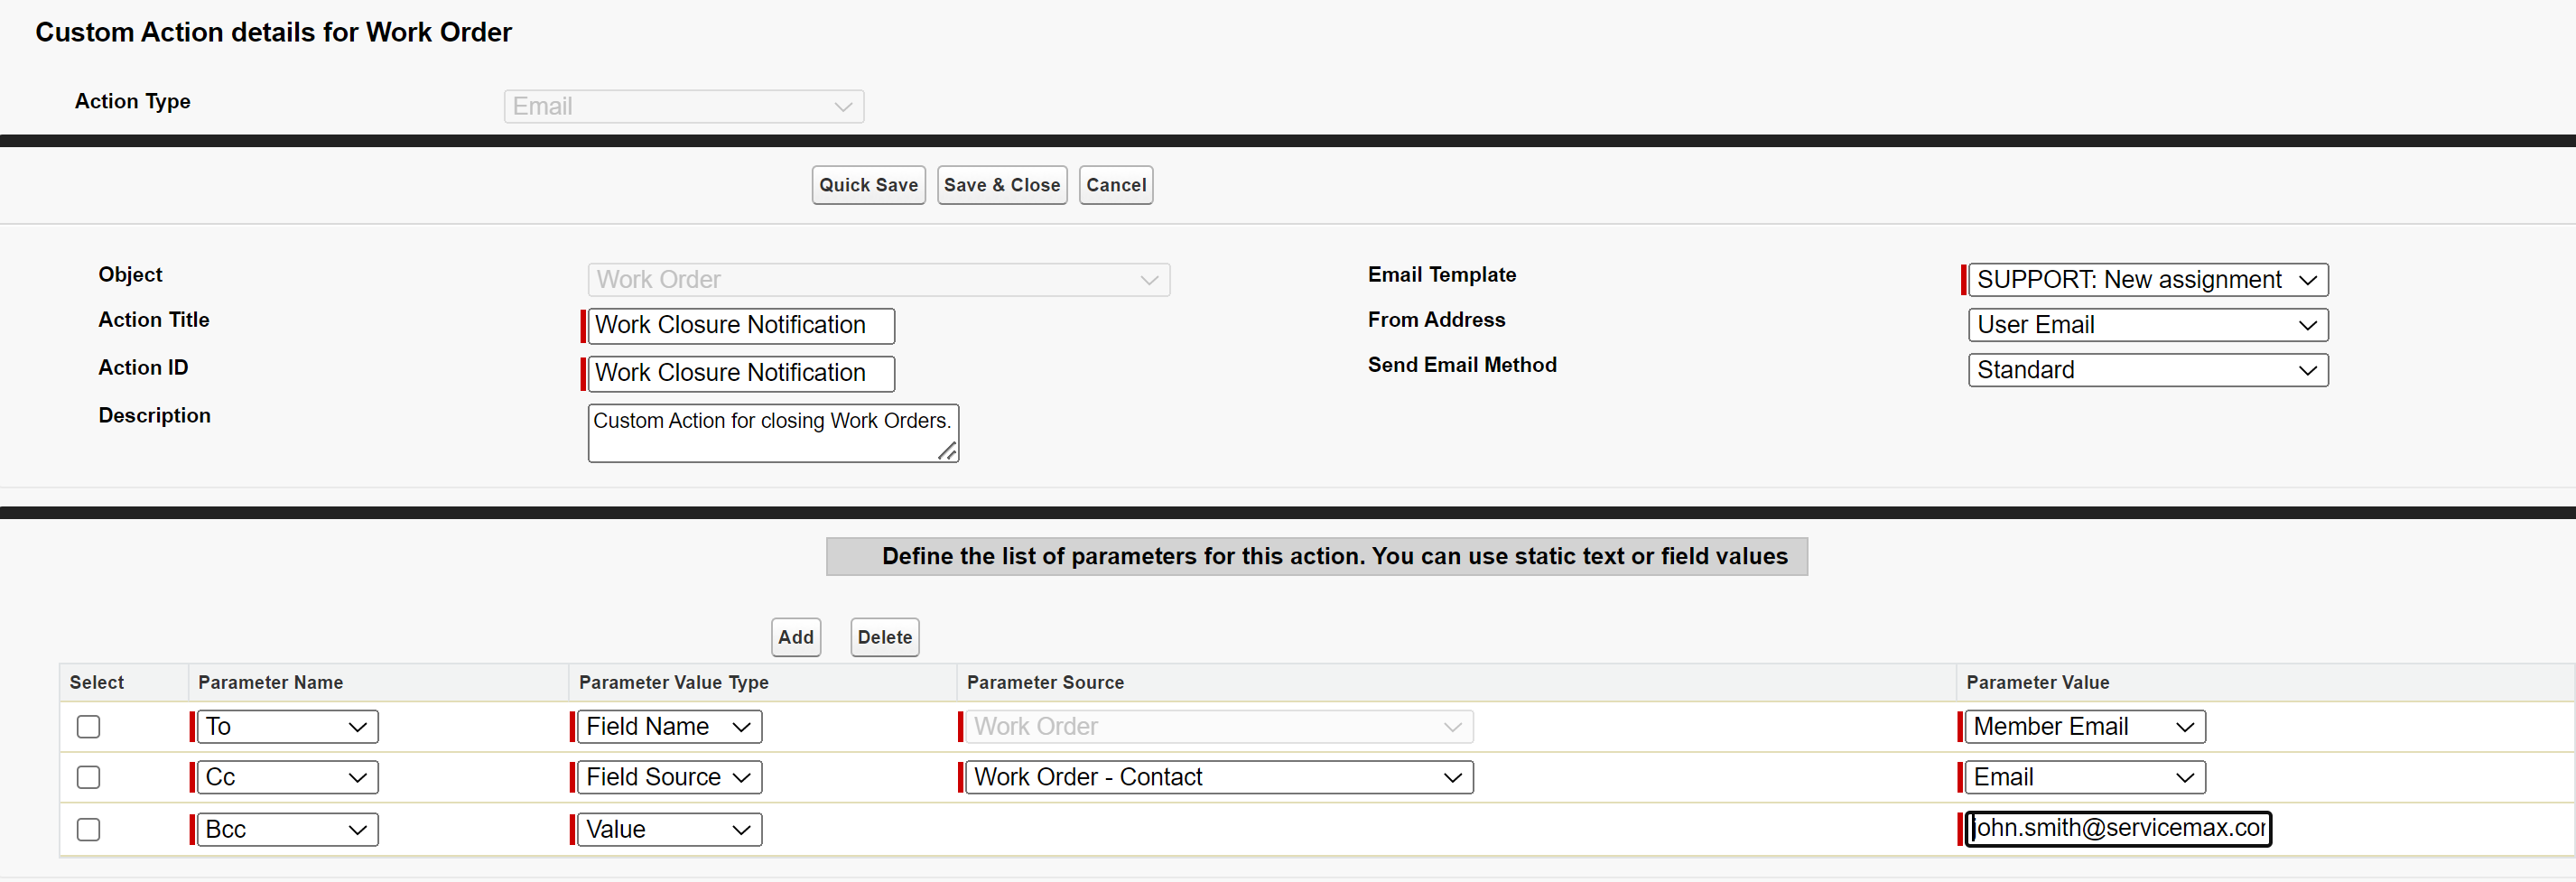
4. Select the Action Type as Email. The following SFM Custom Action screen is displayed.

5. Enter the details for the fields as described in the following table:
Fields | Description | ||
|---|---|---|---|
Action Title* | Enter a title for the SFM custom action. | ||
Action ID* | Enter a unique ID for the SFM custom action. | ||
Description | Enter a description for the SFM custom action. | ||
Email Template* | Select an Email template from the drop-down list. The drop-down list displays all the Email templates configured in the org. You can create an email template in Salesforce Classic and Lightning using the App Launcher. Search for Email Template in the App launcher and create an email template, so that the same is available in the Email Template list.
| ||
From Address* | Select the email address from which the email needs to be sent. • User Email — The From email address of the user who invokes the custom action. For the Go app user, the From address is from the technician’s email. • Organization-Wide Email Addresses — The list of Organization-Wide Email Addresses configured in the Salesforce org are available to all the profiles.
| ||
Send Email Method | Select the type of web service invoked to send the email, Standard or Custom. • Standard web service — Sends the email using Salesforce Email API. • Custom web service — Sends the email using the custom Apex logic.
| ||
Class Name* (Available only when the Send Email Method field is set to Custom) | Create a custom Apex class and enter that custom class name in this field. For more information on creating a custom class, see Sample Custom Apex Class to Send Email | ||
Method Name* (Available only when the Send Email Method field is set to Custom) | Create a custom Apex method and enter that custom method name in this field. For more information on creating a custom method, see Sample Custom Apex Class to Send Email | ||
Click Add to define the list of parameters for the custom action. You can use static text or field values. | |||
Parameter Name | Select a parameter name: To, CC, BCC, Recipient ID. Enter the email id to whom an email needs to be sent, or cc'd or bcc'd. The Recipient Id is the reference contact Id required by Salesforce to send an email. It can be the contact's ID related to the Work Order object or any dummy contact id. The To and Recipient ID parameters are mandatory.
| ||
Parameter Value Type | Select a parameter value type: Field Name, Field Source, or Value. | ||
Parameter Source | Select a parameter source. For the To, CC, and BCC parameters, the parameter source lists the source object's related object's email fields. For the Recipient ID parameter, the parameter source lists the source object's contact reference lookup fields. | ||
Parameter Value | Select or enter the parameter value. The options listed here are based on the Email ID of the Contact lookup fields. | ||
6. Click Save & Close.