Data Validation Rules - Transactions Editor
Data Validation Rules (DVR) tab in the Transactions Editor allows the user to associate Data Validation Rules to the Header and the Child Cards. This tab is enabled for all four types of SFM Transactions.
|
|
The Data Validation Rule does not support the Mobile view process.
|
The following image shows the Landing page of the Data Validation Rules Tab:
Parent or Header Object
The Data Validation Rules are displayed based on the Header Target object. For example, if the Header Object is Work Order, all the Data Validation Rules associated with Work Order are displayed.
Related Child Object
The Data Validation Rules are displayed based on the Related Child objects. For example, if the Related Child object is Work Detail (Work Order), all the Data Validation Rules associated with Work Detail are displayed.
The up arrow is used to collapse the description content on the screen, and the down arrow is used to expand the information to the user.
Add Rule from Library
The Add Rule from Library button allows the user to add an existing Data Validation Rule from the library.
On clicking this Add Rule from Library button, a pop-up window appears and displays the Data Validation Rules associated with the Target object. The user can select the relevant Data Validation Rule as per requirement.
After selecting the relevant Data Validation Rule/Data Validation Rules, the user can click on the Apply button. All the selected Data Validation Rules will be added to the Target object. The user can select one or multiple Data Validation Rules based on the requirements.
The following figure shows the pop-up window that is displayed with the selected Data Validation Rules:

The following columns are seen on the pop-up window when the user clicks on the Add Rule from Library button:
|
Fields
|
Description
|
|---|---|
|
Data Validation Rule Name
|
This column displays the names of the Data Validation Rules. The downward and upward arrow mark is used to rearrange the names in an ascending or descending manner.
|
|
Object
|
This column displays the current target object.
|
|
Type
|
This column shows the type of the Data Validation Rule. There are two types of Data Validation Rules: Error and Warning.
|
|
Where Used
|
Where Used allows the user to determine the wizards and other areas under which this Data Validation Rule is used.
|
|
Last Edited
|
The Last Edited column displays the date when the Data Validation Rule was last edited. The user can view the name of the person who last edited the map and the time when it was done, on hovering on the value.
|
After selecting the relevant Data Validation Rule/Data Validation Rules, the user can click on the Apply button. All the selected Data Validation Rules will be added to the Target object. The user can select one Data Validation Rule or multiple Data Validation Rules based on the requirements.
The following figure shows the selected Data Validation Rules displayed:
|
Fields
|
Description
|
|---|---|
|
Up-Down Icon
|
On clicking the Data Validation Rule name, the edit, delete, and up-down buttons will be displayed.
The Up-Down icons will allow the user to rearrange the Data Validation Rule either up or down the list.
|
|
Delete Icon
|
The x icon will allow the user to remove the Data Validation Rule from the list.
|
|
Edit Description Icon
|
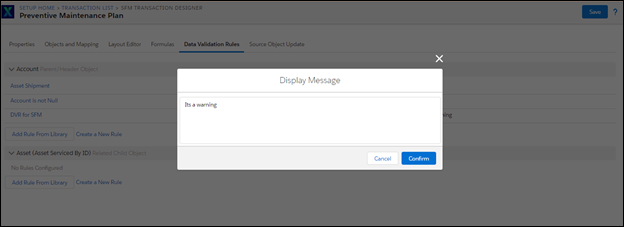
The edit icon will allow the user to edit the Display message of the Data Validation Rule to be displayed at runtime. On clicking the edit icon, a pop-up box will appear. The user can change the description accordingly and click on Confirm or click on Cancel to close the box.
The following figure shows the Edit pop-up box:
 |
|
Refresh List Button
|
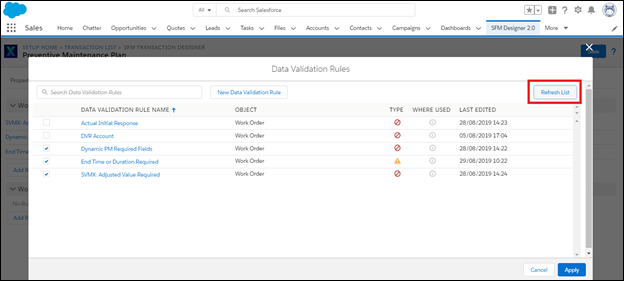
The user can see the updated list of Data Validation Rules with a click on the Refresh List button. Any addition or removal of a Data Validation Rule is reflected for the user with a click on the Refresh List button.
The following image highlights the Refresh List button:
 |
|
New Data Validation Rule
|
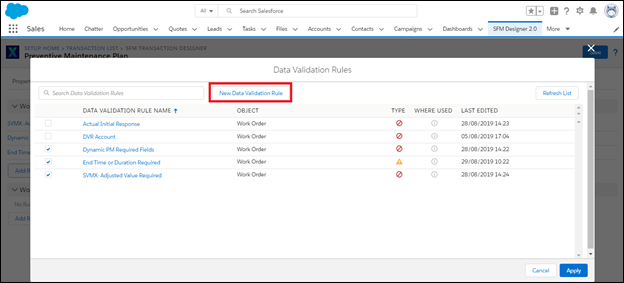
A click on the New Data Validation Rule button opens a new tab and allows the user to create a new Data Validation Rule.
Once the Data Validation Rule is created the user can go to the previous tab and click on the Refresh List button and the newly created Data Validation Rule will be available to be selected.
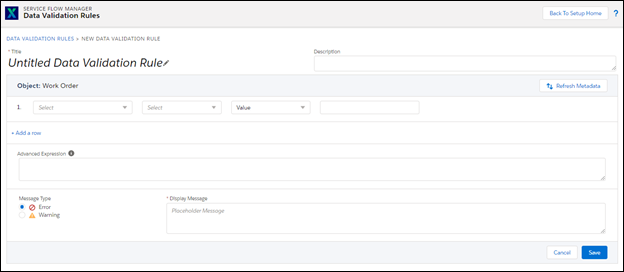
The following figure displays the New Data Validation Rule button:
 On clicking the above button, a new tab opens where the user can create a new Data Validation Rule.
 |