Related Section Properties
This topic explains the related list properties to build the form for a transaction. Perform the following steps to add a related section to the form:
1. Click the + button against Add a related list.
2. Select the object from the drop-down list and edit the title as required.
3. Select a data source from the available list.
4. Click Done.
The following screen displays the related section properties for a Transaction record.
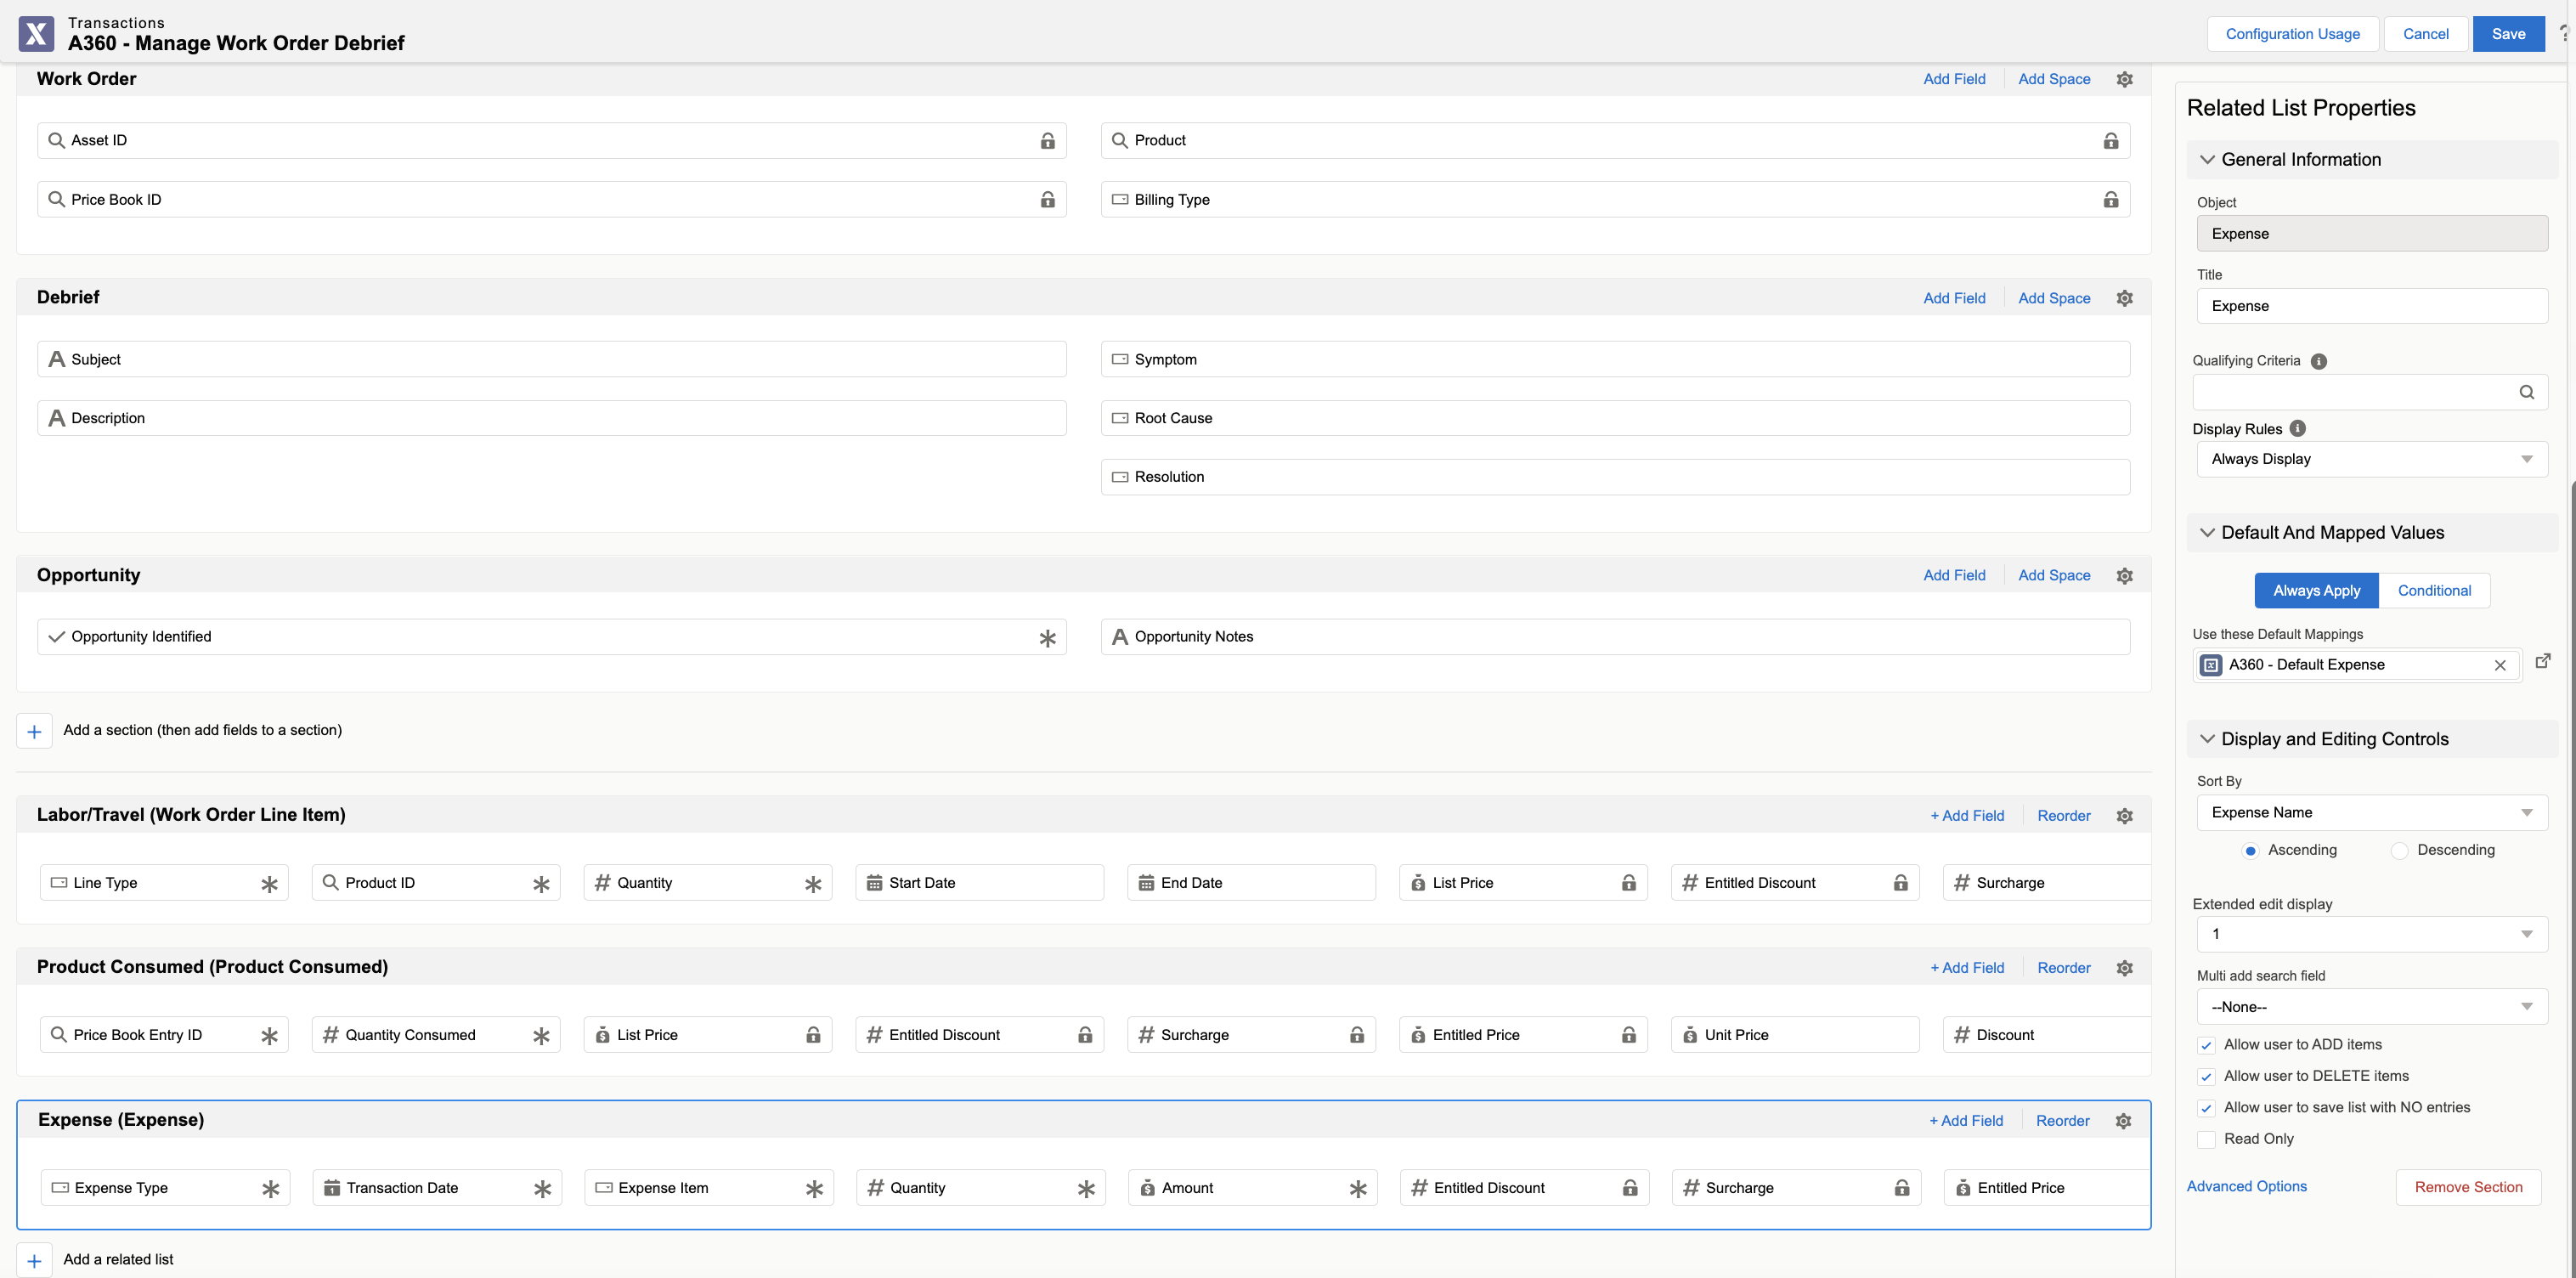
Provide the details in the following table to edit the related list properties.
|
Actions
|
Action Description
|
||
|---|---|---|---|
|
Add Field
|
Click to add fields to the object.
|
||
|
Reorder
|
Click to reorder the fields. This option enables you to move the fields by the drag-and-drop feature to the desired positions. Click Done Reordering to save the changes.
|
||
|
General Information
|
|||
|
Object
|
This field is not editable, as it takes the value you have selected while creating the related list.
|
||
|
Title
|
Enter a title for the related section.
|
||
|
Data Source
|
This field is not editable.
|
||
|
Qualifying Criteria
|
Click the Search icon to select the required qualifying criteria from the available expressions.
|
||
|
Field Mapping
|
Click the Search icon to select a field mapping from the available list. You can configure the field mapping to allow your users to create new items.
|
||
|
Value Mapping
|
Click the Search icon to select a value mapping from the available list. You can configure the value mapping to allow your users to add new items.
|
||
|
Display Rules
|
Select a display rule for the section to show them dynamically on different conditions. The available options are:
• Always Display: display the section always.
• Evaluate On Load: set an expression to display the section when the page loads or reloads.
|
||
|
Expression*
|
Select or create an expression for the dynamic section.
|
||
|
Default and Mapped Values
|
|||
|
Always Apply: This mapping is always applied to the Transaction record to populate field values.
|
|||
|
Use these Default Mappings
|
Select the default values from the available mappings. It also allows you to create a mapping for seeding the default values for the transaction.
|
||
|
Conditional: This mapping is applied to the Transaction record when a specific expression is met.
|
|||
|
When Expression is True
|
Select the expression from the list.
When this expression is met, a specific mapping is applied to the Transaction record to populate the values.
Click New Configuration to create the desired expression. You are redirected to a new browser tab to create an expression. Refer to the Create Expression section for more details.
|
||
|
Use these Default Mappings
|
Select the default values from the available mappings. It also allows you to create a mapping for seeding the default values for the transaction.
|
||
|
Display and Editing Controls
|
|||
|
Sort By
|
Select a field from the drop-down list and select either the Ascending or Descending radio button to sort the list.
|
||
|
Extended Edit Display
|
Select either 1 or 2 from the drop-down list. This value represents the number of columns for the Edit screen for your user. The value 1 means the Edit screen is loaded with one column for your user. The value 2 indicates the Edit screen is loaded with two columns for your user.
|
||
|
Multi add search field
|
Select the option to allow users to add multiple child items in a grid from the lookup.
|
||
|
Allow user to ADD items.
|
Click this checkbox to allow users to add new items to the list.
|
||
|
Allow user to DELETE items.
|
Click this checkbox to allow users to delete items from the list.
|
||
|
Allow user to save list with NO entries.
|
Click this checkbox to allow users to save the list even when there are no entries.
|
||
|
Read Only
|
Click this checkbox to make the section read-only for your users in the Runtime.
|
||
|
Read Only
|
Click this checkbox to make the section read-only for your users in the Runtime.
|
||
|
Selectable Grid
|
Click this checkbox to allow users to select the grid view.
|
||
|
Advanced Options
|
Click the Advanced Options link to select the Salesforce Fieldset to the form.
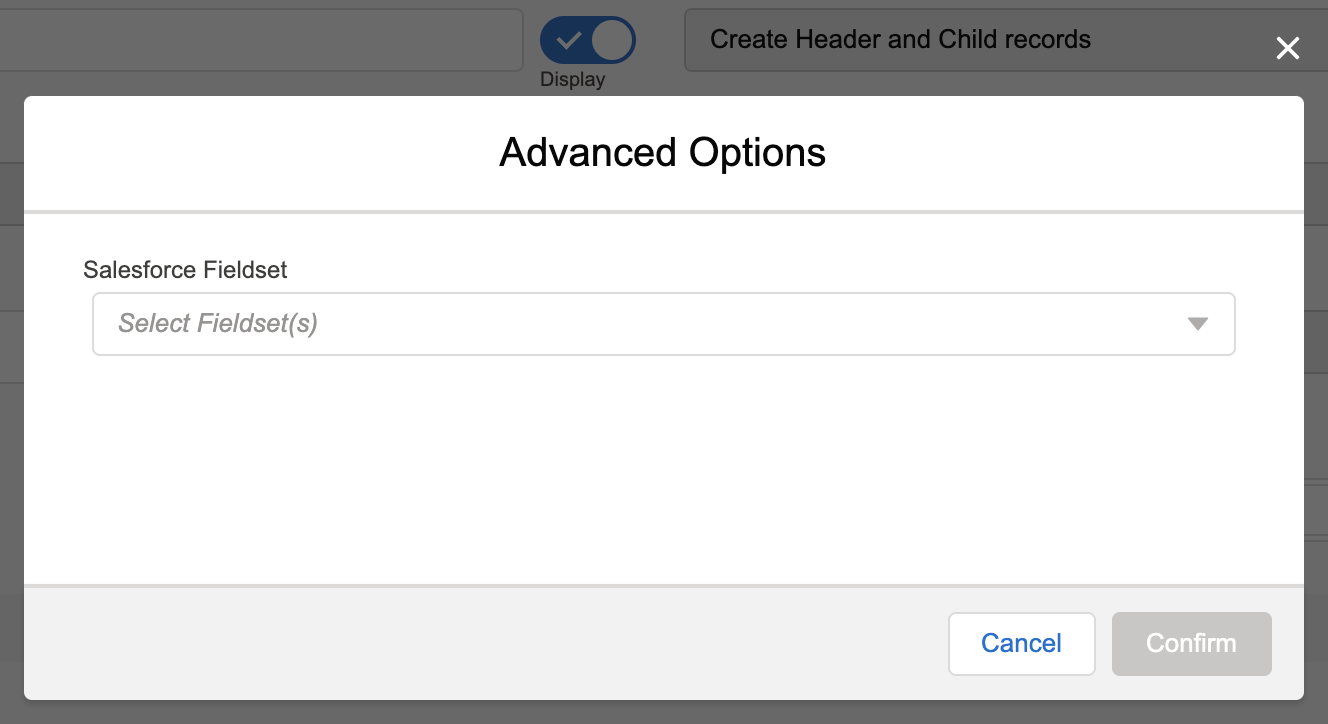 Select the Fieldset from the available list and click Confirm. The query is triggered for the fields available in the Fieldset. Select the Fieldset from the available list and click Confirm. The query is triggered for the fields available in the Fieldset.
|
||
|
Remove Section
|
Click this option to remove the related section from the form.
|
||
|
|
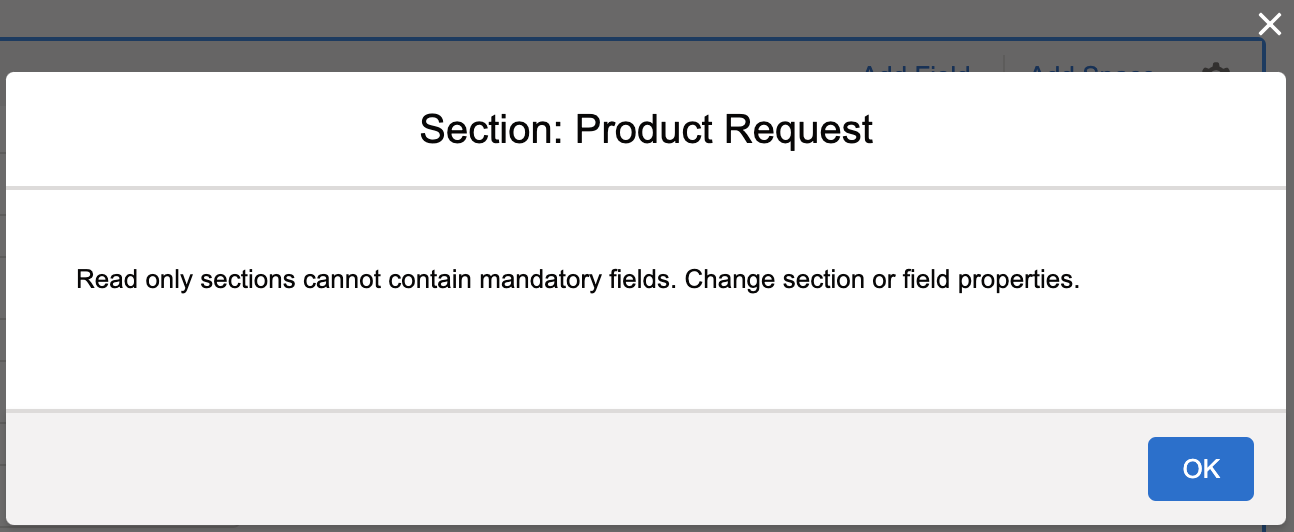
• The related section must have at least one field. An error is displayed for a blank section.
• By default, you can configure a maximum of four child sections. To extend up to eight child sections, contact the ServiceMax Support team.
• If the order of the related sections is changed, the flow component displays blank fields. You cannot save the flow. You must select the record ID for the child items as per the new order.
|