Creo+ Administration
Getting Started with Creo+ Administration
After PTC creates a new organization, as an Administrator perform the following steps from the Creo+ portal.
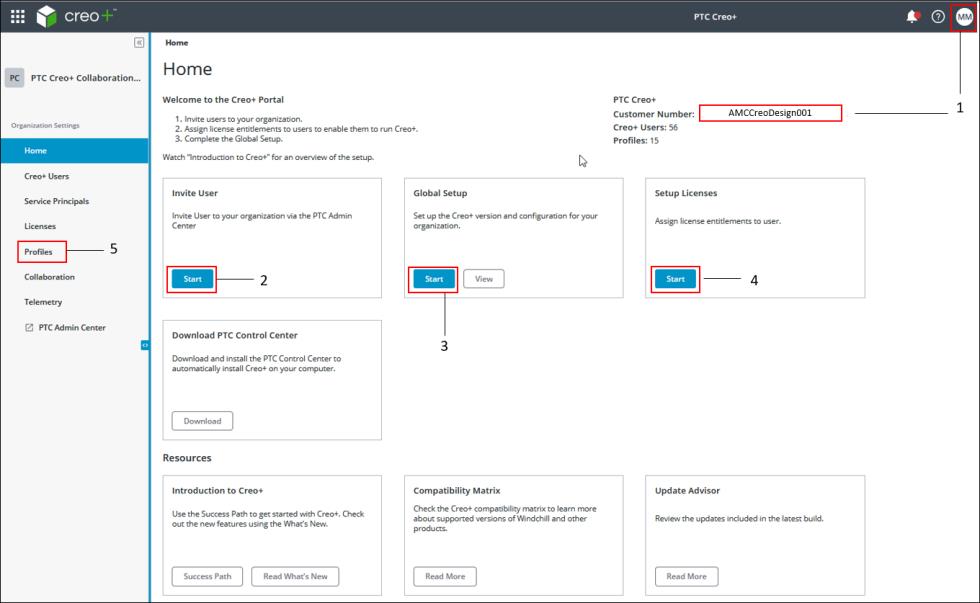
1. Log in to the Creo+ portal as an Administrator. At the top right-hand corner of your screen you will see a customer number for your organization. The customer number is a unique identification number that you must quote when contacting the PTC support team.
2. Click Start on the Invite People box to navigate to the PTC Admin Center and invite users to the organization with a specific role—administrator or user.
3. Click Start on the Global Setup box to open the Global Creo+ Settings dialog box and configure Creo+ for the organization.
Ensure that you designate a license to run as the default license to be automatically assigned to every new user.
4. After users accept the invitation and log in to the Creo+ portal, click Start on the Setup Licenses box to open the Licenses page and assign named or shared License to Run licenses to the added users.
5. Create a profile to be used as the default profile and add users to it.
A user must be a member of at least one profile in order to run Creo+. When creating the default profile ensure that the Auto Assign check box is selected. Auto Assign ensures that all new users are added as members to the profile. |
Here is a summary of tasks that an Administrator performs from the Creo+ Portal :
• Invites users to the Creo+ Portal.
• Creates global configuration settings for the organization. Assigns a license to run to be automatically assigned to every new user who is invited to the Portal.
• Assigns named or shared License to Run licenses to users. Optionally, assign named Extension licenses to users based on roles in the organization.
• Creates profiles based on roles or functional areas.
• Creates common configurations for an organization, or for a profile.
• Adds members to profiles.
• Assigns floating licenses to profiles.
• Monitors license usage.
• Creates and configures service principals.
• Analyzes the telemetry data of licenses usage.
• Downloads and installs the PTC Control Center.
• Reviews notifications about new builds on the Creo+ Portal.
• Reads about features available in new releases.