|
|
Windchill meetings are only available for Windchill ProjectLink users.
|
|
|
Windchill meetings are only available for Windchill ProjectLink users.
|
|
1. Double-click an email message to open it in a new window. Select the Windchill tab in the actions ribbon: 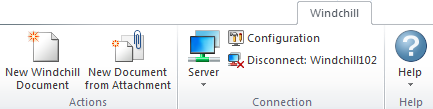 2. Select one of the following actions: ◦ New Windchill Document—Open the New Document window. From here you can create a new document from the message content. The document is uploaded as a Microsoft Outlook message format  (.msg). For more information, see Create Documents Using DTI. (.msg). For more information, see Create Documents Using DTI.◦ New Document from Attachment—Open a new window in which you can select the files you want to upload to Windchill. The files you select are added to the Attributes table in the New Multiple Documents window. For more information, see Create Documents Using DTI.
|
 .
. to search for a project. Click Next.
Attribute | Description | ||
Type | Define the meeting type: • Standard—A standard meeting is held in-person at a set location or through a teleconference. • Web-based—A web-based meeting is conducted online and powered by WebEx. | ||
Subject | Enter a name for the meeting. | ||
Date and Time | Click the calendar icon  to navigate to the date you want the meeting to take place. Use the drop-down menu to provide a specific time for the meeting to start. to navigate to the date you want the meeting to take place. Use the drop-down menu to provide a specific time for the meeting to start. | ||
Duration (minutes) | Enter the expected duration of the meeting. | ||
Teleconference Phone Number | Enter the number participants need to dial to call in. | ||
Teleconference Information | Provide any supplementary information for participants calling in to the meeting, such as a passcode or the name of the conference call leader. | ||
Meeting Location | Enter the room name or number in which the meeting is located.
| ||
Meeting Password Confirm Meeting Password | Enter the password required to enter the WebEx meeting. The password is included in the email notification sent to meeting participants.
| ||
Agenda | Provide a brief meeting agenda that will be included in the body of the email notification sent to participants. You can also use this information to generate an agenda report. For more information, see Meeting Agenda. |
|
 on the Meeting Participants table toolbar. For more information, see Finding Participants. Click Next.
 . For more information, see Canceling a Meeting.