|
|
If you are planning on using SSO as your authentication method, see Prepare for Single Sign-On (SSO) to ensure that you’ve completed all prerequisites before continuing with the installation.
|
|
|
If you are planning on using SSO as your authentication method, see Prepare for Single Sign-On (SSO) to ensure that you’ve completed all prerequisites before continuing with the installation.
|
|
Mode
|
Description
|
|
xwindow
|
Run the installer with a graphical user interface using X-Windows and the default UI widgets.
|
|
gtk
|
Run the installer with a graphical user interface using X-Windows and GTK UI widgets.
|
|
text
|
Run the installer using a text only interface.
|
|
unattended
|
Run the installer in a mode that does not require input from a user. For more information, see Unattended Mode.
|
|
|
When upgrading, if the previous installation was performed by a root user or was performed using sudo and the upgrade is being performed by a non-root user without using sudo, then the file permissions and ownership of the installation directory and its parent directory will most likely need to be updated before proceeding with the installation.
|
|
|
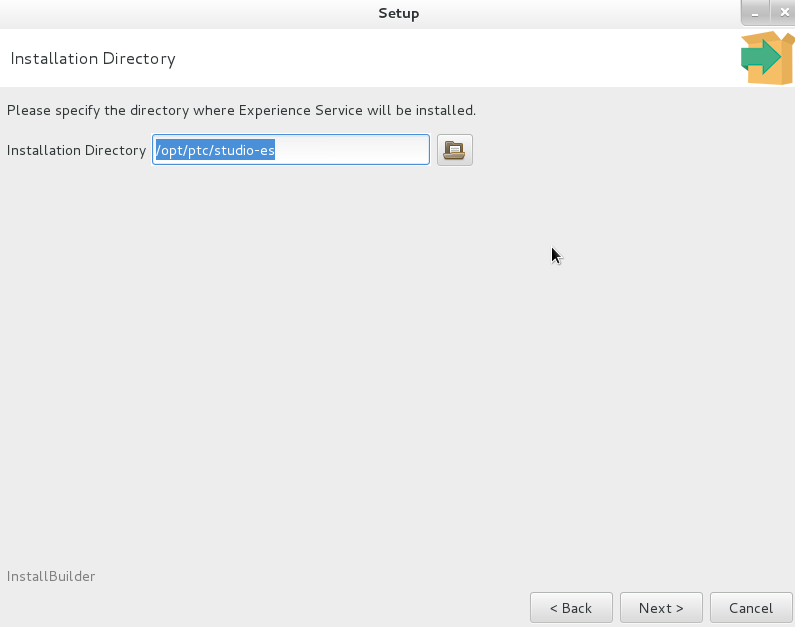
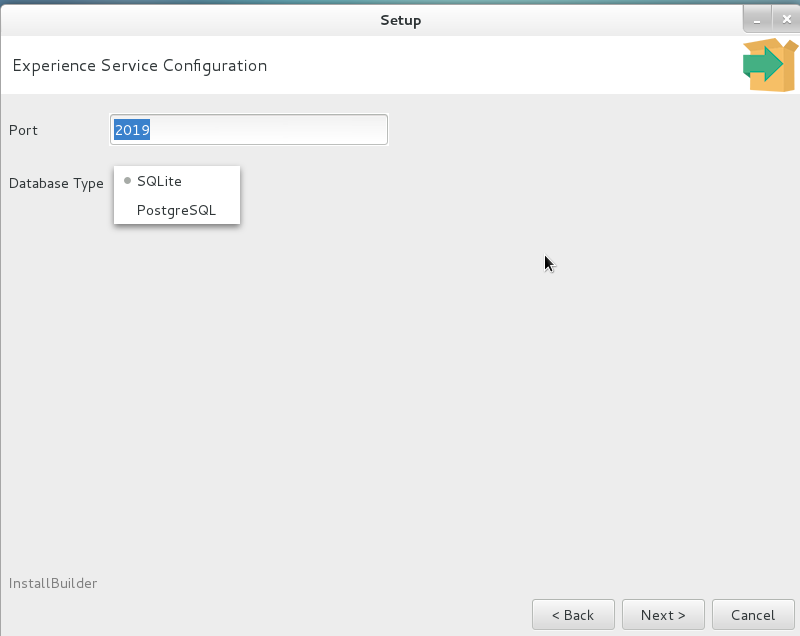
These steps assume that the installer is being run in one of the graphical execution modes. However, all modes are functionally equivalent.
|
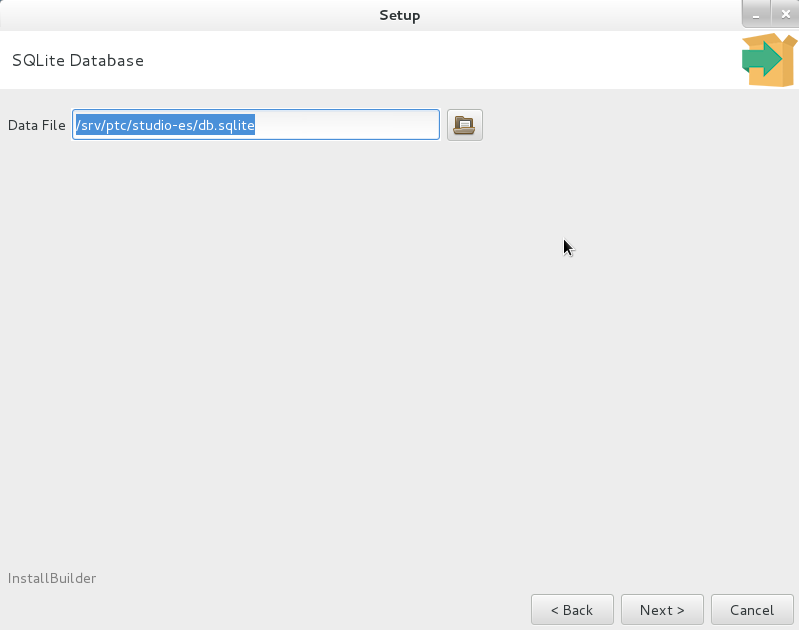
You cannot select a file that already exists. |
If you are using the same PostgreSQL instance that is used by the ThingWorx server then the database name and log in/user name used by the Experience Service must be separate from the database name and log in/user name used by the ThingWorx server. |
This is not the certificate for the root CA. |

If the Experience Service is being deployed in a cluster, ensure that the key and certificate file locations are accessible by all instances running in the cluster. |
If the Experience Service is being deployed in a cluster then ensure that the data store directories are accessible by all instances running in the cluster. |

Field | Description |
Base URL | URL for the Model Target service. This field is populated for you. The value is: https://vws.vuforia.com |
Token Path | HTTP request path for OAuth2 authentication. This field is populated for you. The value is: oauth2/token |
AMTG Path | HTTP request path for Advanced Model Target generation. This field is populated for you. The value is: modeltargets/advancedDatasets |
Access Key | The value for this field must be obtained from PTC Technical Support. For more information, see Request Information to Enable Advanced Model Target Generation. |
Secret Key | The value for this field must be obtained from PTC Technical Support. For more information, see Request Information to Enable Advanced Model Target Generation. |
If you selected Basic Authentication, skip Step 15. |
Field | Description | ||
Select OpenID Provider for Single Sign-On | Select one of the following based on your provider: • Entra ID • OKTA | ||
Issuer URL | Set this equal to the <as-base-url> parameter identified in SSO Configuration Parameters. | ||
Client ID | Set this equal to the <es-client-id> parameter identified in SSO Configuration Parameters. Choose a unique value to use as the client ID for the Experience Service. For example: studio-es.
| ||
Client Secret | Set this equal to the <es-client-secret> parameter identified in SSO Configuration Parameters. When configuring the Experience Service client, PingFederate gives you the option to generate a secret for the client. If you choose to generate a secret for the client, capture the value generated, as it will be required to complete other installation and configuration steps. Alternatively, you can choose your own client secret. In this case, ensure that the secret you choose is a strong password and cannot be easily guessed. | ||
Redirect URL | Set this equal to the <es-redirect-uri> parameter identified in SSO Configuration Parameters. | ||
ES Scope | If you are using PingFederate as your OAuth provider, set this equal to the <es-scope> parameter identified in SSO Configuration Parameters. If you are using Entra ID as your OAuth provider, set this to api://<applicationId>/THINGWORX"
| ||
External Scope | By default, this is set to THINGWORX. If using Entra ID as your Open ID provider, you must add the following additional scope: “offline_access openid api://<applicationId>/THINGWORX” | ||
ThingWorx Access | Select one of the following: • Use Application Key—select this option to use application keys in ThingWorx • Use Credentials—select this option to use an account in your IdP For more information, see ThingWorx Authentication. | ||
Username | If you are using PingFederate as your OAuth provider, set this equal to the value of the sub attribute identified in your OpenID Connect Policy. If you are using Entra ID as your OAuth provider, set this value equal to the claims attribute identified in your OpenID Connect Policy. | ||
Timeout (minutes) | When the Experience Service is authenticated using OpenID Connect, a session is created for the user that authenticated it. This property specifies how much time (in minutes) must elapse before the session is invalidated and the user must re-authenticate. | ||
Client ID (Studio Client) | Enter the name of the Studio client ID. The default value for this field is PTC_Studio_Client_ID. However, if this has been configured to something different, that must be entered here. |
Field or Setting | Description |
ThingWorx Server URL | This is a required field. Enter the URL to your instance of ThingWorx in the ThingWorx Server URL field. For example, https://twx.example.com:8443/Thingworx. |
Configure Public Access to ThingWorx Server | Select this checkbox to allow public Experiences to access ThingWorx data. For more information about public Experiences and configuring public access to ThingWorx, see Configuring Public Access to ThingWorx. |
Administrator Credentials for ThingWorx Server | • Basic Authentication—Provide the username and password for an account that has Administrative permissions on your ThingWorx Server. These credentials are used to configure access to the ThingWorx Server that is required by the Experience Service. • Single Sign-On (OpenID Connect)—Provide the access token that you acquired in Obtain OAuth Access Token for ThingWorx Administrator Using Postman. For more information, see Configure Access to ThingWorx Group Memberships and Configuring Public Access to ThingWorx. |