Track Deployments
After deploying a package, you can track its deployment status by package. You can view and filter a list of a selected package or package’s production deployments. Additionally, you can delete, edit, or cancel a deployment.
Use the following steps to open the Track Deployments page:
1. From the ThingWorx Software Content Management dashboard, click any of the following:
a. On the left pane, go to > . The edit function is disabled in this case.
b. On the left pane, go to > .
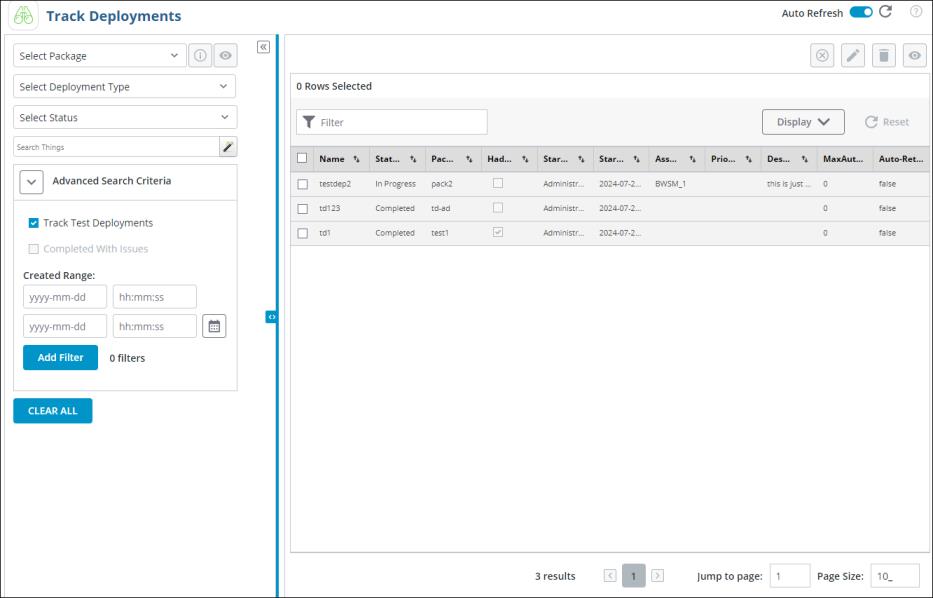
2. In the filters pane on the left, use the following filters to find the packages for which you want to track the deployment:
◦ Click Select Package to select the package you want to track.
◦ Click Select Deployment Type to select the One Time or Perpetual deployment type. If you select the Perpetual type, it will be highlighted by the  icon.
icon.
◦ Click Select Status to specify the deployment statuses you want to track, or in the Select Status list, specify the deployment statuses to track.
|
|
To enable the Completed with Issues checkbox, select the Completed status in the Select Status field.
|
◦ Click  to search Things.
to search Things.◦ Expand Advance Search Criteria to monitor deployments under test.
▪ The Track Test Deployment checkbox is selected by default in when the page was launched from > .
▪ The Completed with Issues checkbox is selected when the Completed status is selected from the Select Status list.
▪ For Created Range, use the calendar to select the start and end dates and times for a date range. This will track all the deployments within that range.
When a new deployment is created using saved search criteria, the asset count initially appears as 0. This is because the scan timer needs time to add assets. If the saved search query for the deployment includes many assets, the asset count may take some time to display on the Track Deployments page. However, the asset count will be updated once the scan timer adds the assets.
You can use any combination of available filters to set up the deployment table on the right side of the Track Deployments page. The deployments table display is configured by default parameters, but you can configure the table according to your requirements.
For more information about the package that you deployed, see View Assets for Deployment.
For more information about delivery target states, see Delivery Target Status Messages during Deployment
You can perform the following actions from the Track Deployments page:

•  —Delete the selected deployment.
—Delete the selected deployment.•  —Edit the selected deployment. You can edit the following details of a deployment :
—Edit the selected deployment. You can edit the following details of a deployment :◦ Name
◦ Description
◦ Download and Install times for file-based package deployment or Deployment start time for instruction-based package deployment.
|
|
You can edit the time only for scheduled deployments. Once the Start Time and Install Time have been reached, you cannot edit them.
|
◦ Priority
◦ Scan Frequency
◦ ReInstall
◦ Auto Retry Settings—You can edit the interval and window settings of the deployment. If you enabled Unlimited attempts while creating the deployment, you can remove them. In this case, the deployment will revert to using the global configuration of Default Max Auto-Retries, and only the number of retries will be attempted. If the attempts have already exceeded the max auto retries, no further retries will be attempted.

The Track Deployments page also displays the following states of the asset (delivery target) during deployment and the number of assets (for all deployments) that are in each state:
• Created
• In Progress
• Completed
• Failed
• Ineligible
• Aborted
• Canceled By User
|
|
If multiple deployments are selected the numbers displayed are the aggregate numbers.
|
|
|
If a target asset for a perpetual deployment is aborted for any reason, no further action happens on that asset after future scans for that deployment. Create a new deployment for that asset after analyzing and addressing the root cause for the abortion.
|
