Adding and Deleting Rows on the Grid
You can add or delete rows on the grid run time using the widget RowAddButton and RowDeleteButton properties. Data changes to the grid are stored in the EditedTable and DeleteTable widget properties. Grid edits are stored on the client side. To update the data on the server, bind these infotables to custom data services.
Adding Rows to the Grid
1. In Mashup Builder, select the Grid widget.
2. On the Properties panel, set the RowAddButton property to True.
3. Click Save, then View Mashup.
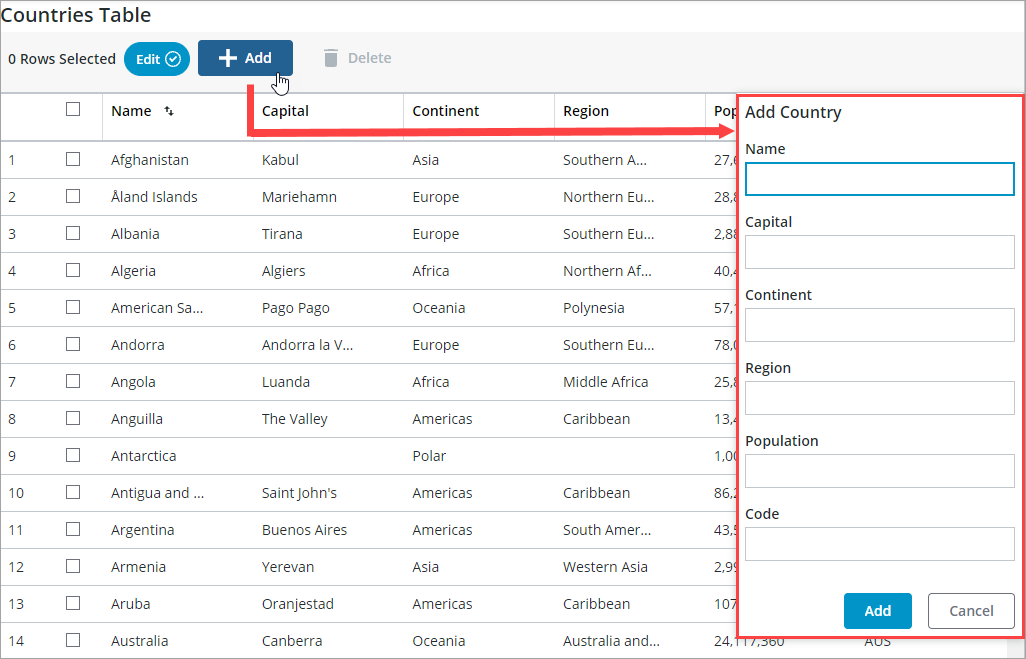
To add a new row at run time, click Add, and then use the form to set the cell values. By default, new rows are added to the bottom of standard and tree grids. The row data is stored in the EditedData infotable property. You can use this property to add the new data rows to the server using a custom data service. When the grid data is paginated, the new row is added to the current page. For example, if the maximum number of results on a page is to 10, and a user adds a new row at run time, the number of rows on the current page changes to 11.
Adding new rows to the grid resets the current filter when using the filter box. When the grid uses external filtering such as the chip-based data filter or a service, the filter persists. To apply the filter when new rows are added, you must trigger the filter service. When sorting is applied to the grid, the new row is automatically sorted. In tree grids, by default, new rows are added to the end of the data. To add a new row as a child of a parent row, select the parent row or include a parent row ID in the data.
|
|
To verify that the row data is valid, configure validation for each column.
|
Highlighting New Rows on the Grid
In ThingWorx 9.4. or later, you can enable the HighlightNewRows property to display an indicator next to new rows on the grid. This makes it easier to find new rows when sorting or filter data in a large data set. The indicator is removed when the row is selected or the page is refreshed.

Deleting Rows from the Grid
You can select and delete rows when the widget RowSelection property is set to Single or Multiple. To delete rows, perform the following steps:
1. In Mashup Builder, select the Grid widget.
2. On the Properties panel, set the RowDeleteButton property to True.
3. Click Save, then View Mashup.
At run time, select the rows that you want to delete, then click Delete. The deleted rows are added to the DeletedData infotable. To delete these rows from the grid data source, bind the infotable to a custom data service.
When deleting a parent row from a tree grid, all children under the row are also deleted. |
Showing a Confirmation Message when Deleting Rows
You can use widget events and services to bind the delete action to a confirmation dialog box in ThingWorx 9.3.1 and later. This enables you to display a confirmation message when one or more data rows are deleted. To add and configure a confirmation message, perform the following steps:
1. In Mashup Builder, create a Confirmation on the Functions panel, and then configure the function as follows:
◦ Define a title and a message for the confirmation dialog box.
◦ Define a label for the action button.
For more information about Confirmation functions, see Confirmation.
2. Bind the DeleteRowClicked event on the Properties panel of the grid widget to the OpenConfirmation service of the Confirmation function on the Functions panel.
3. Bind the ActionClick event of the function to the ConfirmDelete service of the grid.
4. Click Save, then view the mashup.
When you select and delete one or more rows on the grid, a confirmation message is displayed.
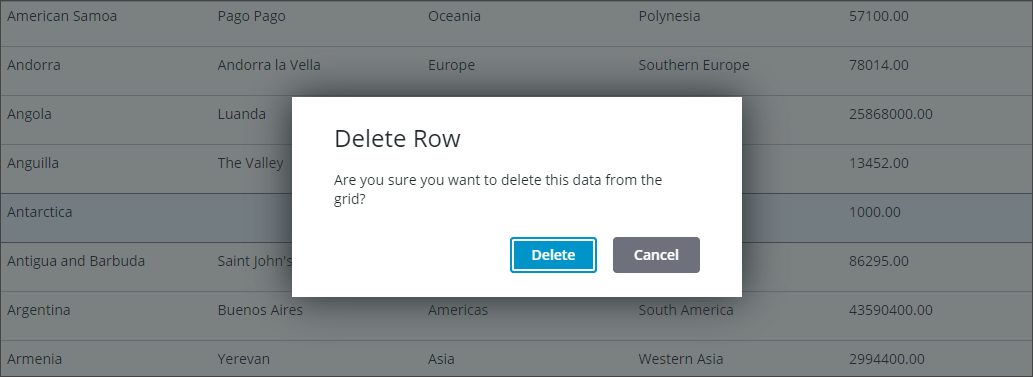
When you click Delete, the ConfirmDelete service of the grid widget is executed and the rows are removed from the grid.
To permanently delete data from the grid, you must use a data service that deletes data on the data service level. |