Migrating a Mashup
A legacy mashup is a mashup that contains widgets and layouts that are listed as legacy in the current version of ThingWorx. You can use the Mashup Migration dialog box to update your legacy mashups to the latest themed widgets and responsive layouts. You can skip the migration and hide the dialog box. However, we recommend that you migrate your legacy widgets as soon as possible to benefit from the latest web-component widgets and theming.
|
|
Custom standalone widgets or widgets that are part of extensions that are imported into the platform are not migrated.
|
Before You Migrate
1. We recommend that you create a copy of the mashup before you migrate. This enables you to preserve the mashup if something unexpected happens. To create a copy, perform one of the following actions:
◦ Duplicate the mashup:
a. On the mashup entity level, click >
b. Enter a name for the mashup copy, and then click Save.
◦ Export the mashup:
a. On the mashup entity level, click >
b. Save the mashup to a safe location on your system.
2. Make sure that you understand the full implications and the effect of the migration on your mashups. You can migrate, save, and preview a mashup at run time. However, you cannot undo the migration after you save and close the current session. To undo the migration before closing the session, click  on the toolbar.
on the toolbar.3. Review the styles that are applied to legacy widgets in Mashup Builder. The following table lists the migration support different types of styling:
Legacy Widget Styling | Migration Support | ||
|---|---|---|---|
Default style definitions | Migrated when you apply the Legacy Styles Theme to a mashup.
| ||
Custom style definition entities | Migrated as widget style properties using the Mashup Migration dialog box. | ||
Custom CSS | Not supported. You must update CSS styling manually when it is applied to widgets in your mashup. |
Migrating a Legacy Mashup in ThingWorx 9.3.8 or Later
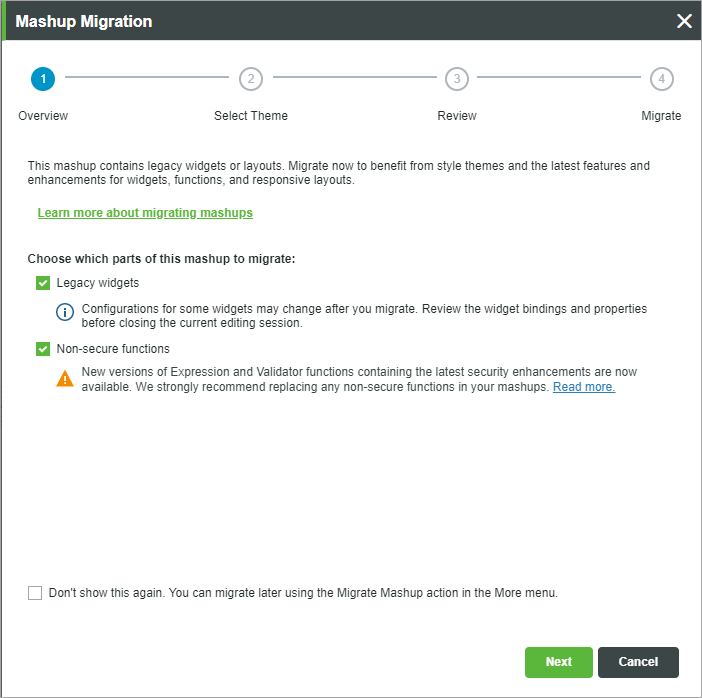
1. Open a mashup in the platform, and then click Edit to open the mashup in the Mashup Builder workspace. The Mashup Migration dialog box opens:
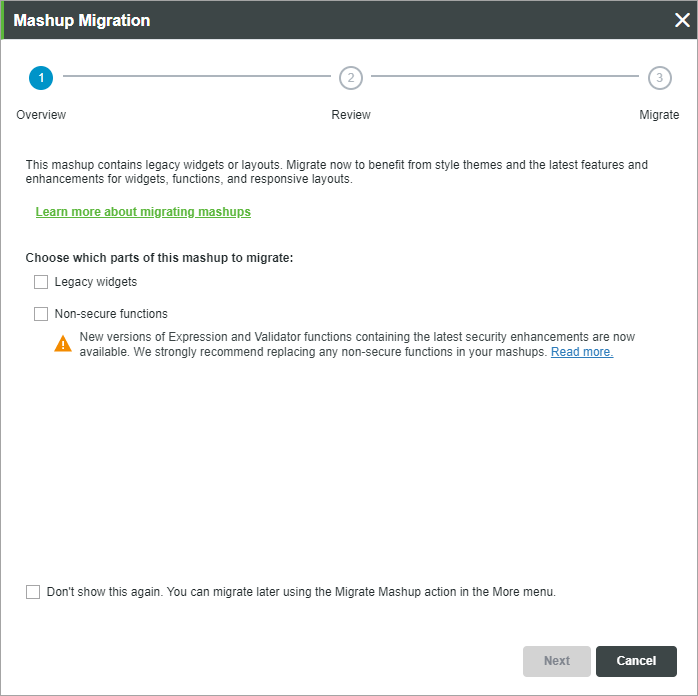
2. On the Overview tab, select what you want to migrate, then click Next.
◦ Legacy widgets—Replaces legacy widgets with the latest themed widgets that are based on web components.
◦ Non-secure functions—Replaces non-secure functions that are in the current mashup.
◦ To skip the migration for the current session, click Cancel.
◦ To hide the migration message permanently, select the Don’t show this again check box, and then click Cancel. You can migrate any mashup later using the Migrate Mashup action that is available in the More menu.
3. On the Style Theme tab, select a style theme to apply to the mashup after you migrate. You can migrate the mashup using the PTC Convergence Theme, the Legacy Styles Theme, or a Custom Theme.

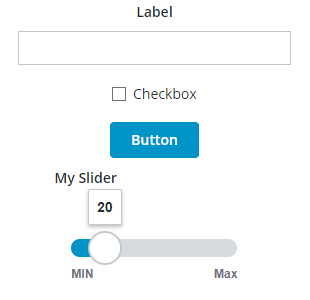
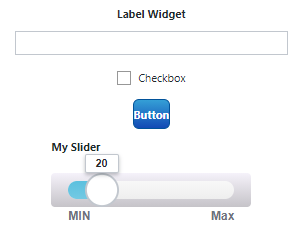
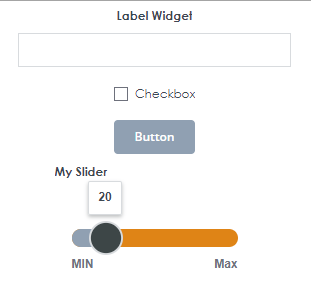
The following image shows an example mashup that uses legacy widgets with default style definitions:
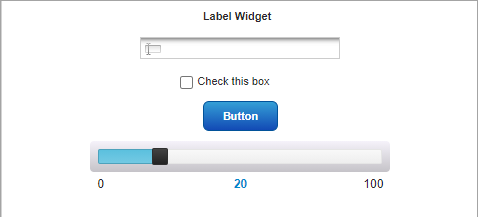
When you migrate a mashup, legacy widgets and style definitions are replaced with web-component widgets that are styled using style theme entities in Composer. Standard widgets without web component replacements are styled using style definitions.
The following table shows the available options for the legacy styles migration:
PTC Convergence Theme | Legacy Styles Theme | Custom Theme |
|---|---|---|
 |  |  |
Replace all legacy widgets and their styling with themed widgets. Custom styling that is applied to the legacy widgets is replaced by the new and updated designs within the PTC Convergence Theme. You can change style themes later. However, you cannot undo the widget replacement after you close the current editing session. | Replace all legacy widgets in the mashup with web-component widgets and apply the Legacy Styles Theme to the mashup. This style theme retains the look and feel of the default style definitions of legacy widgets. Optionally, you can migrate custom style definitions by selecting the check box next to Migrate custom style definitions to widget style properties. Any custom style definition entities that are applied to legacy widgets will be migrated as style properties on the Style Properties panel. | Choose any custom style theme entity that is available on the server. A custom style theme allows you to edit colors, fonts, lines, and other elements for all themed widgets within a mashup. To edit styles within a theme, open the Styles tab of the style theme entity in Composer. You can apply specific customizations to individual widgets using the Style Properties panel. Similar to the Legacy Styles Theme option, you can also migrate your custom style definitions as widget style properties. |
For more information about the style themes, see Choosing a Style Theme for the Migration.
To remember your selection when migrating other mashups on the server, select the Remember this selection check box. |
4. On the Review tab, review the list of legacy widgets and functions that will be replaced after the migration.
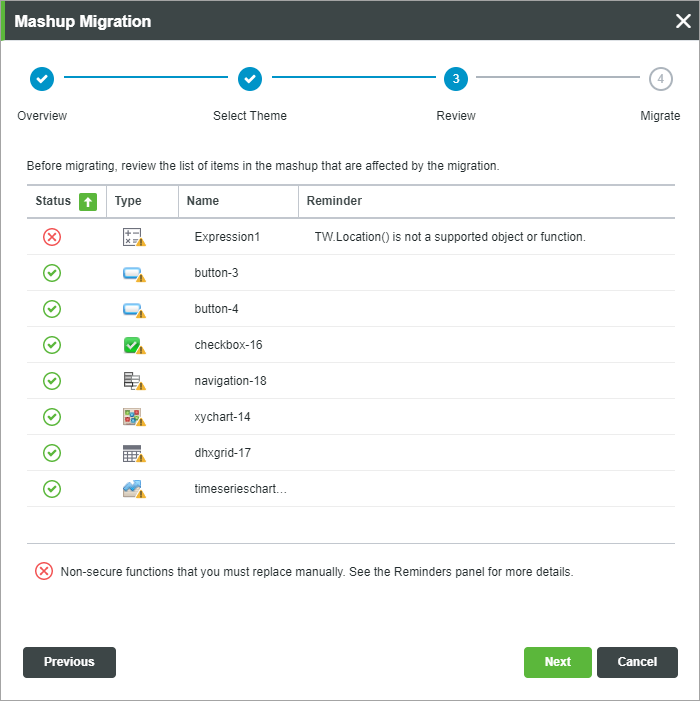
The following details are listed for each legacy widget in the current mashup:
◦ Status—Indicates whether the item is included in the migration. Widgets or functions that are marked with  are not migrated.
are not migrated.◦ Type—The legacy widget or function icon.
◦ Name—The value of the widget DisplayName property.
◦ Reminder—Additional information about the migration status.
By default, list is sorted by status. You can sort the list items by name, type, or description.
5. On the Migrate tab, review the summary of the migration configuration is displayed then click Migrate.
The legacy widgets and layouts are migrated, and the selected style theme is applied to the mashup.
To undo the migration, click on the toolbar before closing the current editing session. |
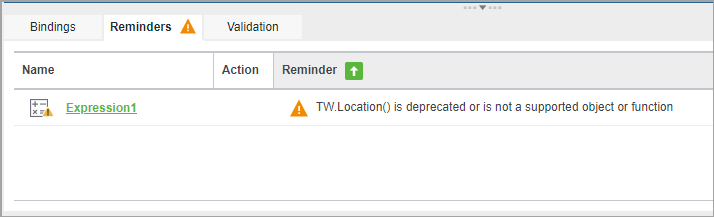
6. If your mashup contains non-secure functions that were not migrated, review the Reminders panel or the Functions panel and migrate these functions manually.
7. Click Save to save the updated mashup.
Migrating a Legacy Mashup in ThingWorx 9.3.6 or Later
1. Open a mashup in the platform, and then click Edit to open the mashup in the Mashup Builder workspace. The Mashup Migration dialog box opens:
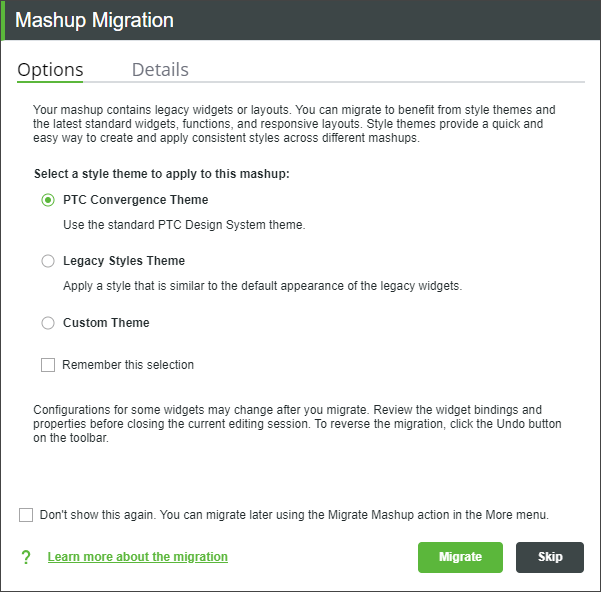
2. On the Options tab, select a style theme to apply to the mashup after you migrate. You can migrate the mashup using the PTC Convergence Theme, the Legacy Styles Theme, or a Custom Theme.
When you migrate a mashup, legacy widgets and style definitions are replaced with web-component widgets that are styled using style theme entities in Composer. Standard widgets without web component replacements are styled using style definitions.
For more information about the style themes, see Choosing a Style Theme for the Migration.
◦ To remember your selection when migrating other mashups on the server, select the Remember this selection check box.
◦ To skip the migration for the current session, click Skip.
◦ To hide the migration message permanently, select the Don’t show this again check box, and then click Skip. You can migrate any mashup later using the Migrate Mashup action that is available in the More menu.
3. On the Details tab, review the list of legacy widgets that will be replaced after the migration.
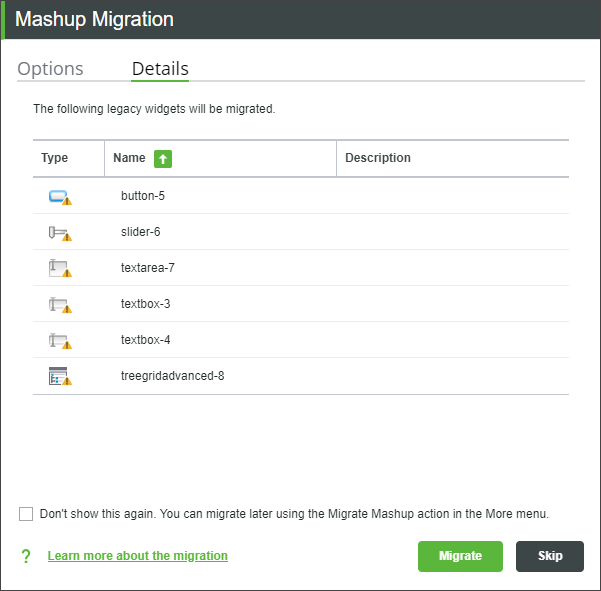
The following details are listed for each legacy widget in the current mashup:
◦ Name—The value of the widget DisplayName property.
◦ Type—The legacy widget icon on the Widgets panel.
◦ Description—The value of widget Description property.
You can sort the list items by name, type, or description.
4. Click Migrate. The legacy widgets and layouts are migrated, and the mashup is now styled using the selected style theme.
To undo the migration, click on the toolbar before you close the current editing session. |
5. Click Save to save the updated mashup.
Migrating a Legacy Mashup in ThingWorx 9.3
1. Open a mashup in the platform, and then click Edit to open the mashup in the Mashup Builder workspace. The Mashup Migration dialog box opens:
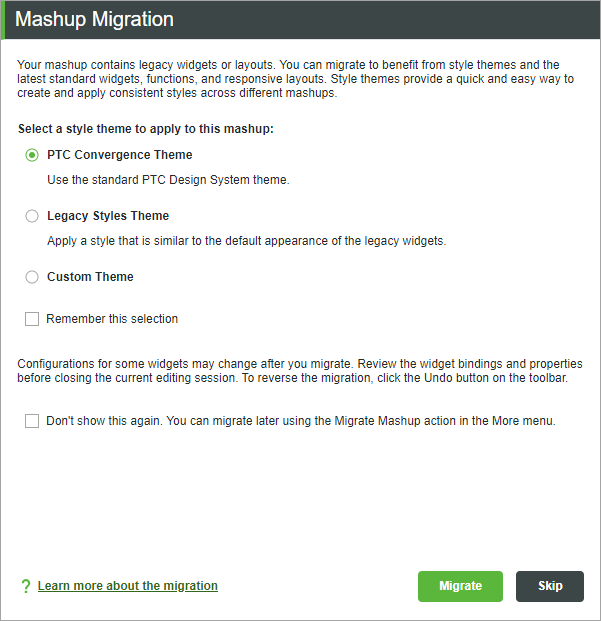
2. Select a style theme to apply to the mashup after you migrate. You can migrate the mashup using the PTC Convergence Theme, the Legacy Styles Theme, or a Custom Theme.
3. Click Migrate. The legacy widgets and layouts are migrated, and the mashup is now styled using the selected style theme.
• To undo the migration, click on the toolbar before you close the current editing session. |
4. Click Save to save the updated mashup.
Migrating a Legacy Mashup in ThingWorx 9.1 and 9.2
1. Open a mashup in the platform, and then click Edit to open the mashup in the Mashup Builder workspace. The following message appears:

2. Click Migrate. The legacy widgets and layouts are migrated.
◦ To hide the migration message for the current session, click Skip.
Migrating a Legacy Mashup in ThingWorx 9.0
1. Open a mashup in the platform, and then click Edit to open the mashup in the Mashup Builder workspace. The following message appears:
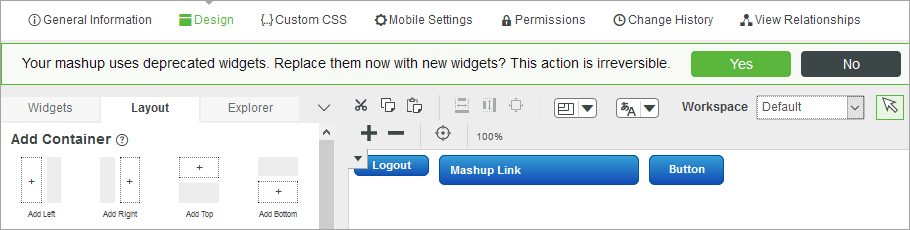
2. Click Yes. The legacy widgets and layouts are migrated.
Click No to hide the message for the current session. |
3. Click Save to save the changes.
Review the Mashup
After you migrate the mashup, complete the following steps:
• View the mashup and review the layout of containers.
◦ Select each container, and if required, configure the alignment, positioning, and wrapping options on the Layout panel.
◦ Adjust the size and margin properties of items as required. You can set the sizing properties for each widget on the Properties panel.
For more information about configuring containers, see Configuring Container Properties.
• Check how the mashup looks on multiple devices with different screen sizes and adjust the layout. You can also configure the mobile view settings on the Mobile Settings tab.
• Update any custom CSS styles on the Custom CSS tab of the mashup entity. CSS rules for legacy widgets may not be compatible with the replacement widgets.
Custom CSS styling rules for legacy widgets are not migrated. |
• Make sure that bindings in the mashup are migrated and are working correctly. Use the Bindings panel to view the bindings between items in the mashup. For more information about bindings, see Viewing Bindings in a Mashup.
• Review the functions that are created on the Functions panel and modify their options and bindings if required.
For more information about the best practices after migration, see Best Practices after Migration.