Create User
Use the Create User action to create a user.
Complete the following steps to use the Create User action in your workflow:
1. Drag the Create User action under Zendesk to the canvas, place the pointer on the action, and then click  or double-click the action. The Create User window opens.
or double-click the action. The Create User window opens.2. Edit the Label, if needed. By default, the label name is the same as the action name.
3. To add a Zendesk connector type, refer to Supported Zendesk Connector Types.
If you previously added a connector type, select the appropriate Connector Type, and under Connector Name, select the connector.
4. Click TEST to validate the connector.
5. Click MAP CONNECTOR to execute the action using a connector that is different from the one that you are using to populate the input fields. In the Runtime Connector field, provide a valid Zendesk connector name. For more information about MAP CONNECTOR, see Using Map Connector.
6. In the Name field, provide the name of the user that you want to create.
7. In the Only Private Comments list, select true if you want the user to create private comments only; otherwise select false.
8. In the Suspended field, select true if the agent is suspended; otherwise select false.
If the agent is suspended, tickets from suspended users are also suspended, and users cannot log in to the end user portal.
9. In the Agent Restricted field, select false if agent has no restrictions or if the agent is an administrator; otherwise select true.
10. Click Show additional fields, and provide the following information:
a. In the Email field, provide the email address of the user.
b. In the Alias field, provide the alias name that is to be displayed to the end user.
c. In the Phone Number field, provide the primary phone number of the user.
d. In the External ID field, provide a unique ID for the user.
e. In the Verified list, select true to create the user without sending a verification email; otherwise select false.
f. In the Locale ID and Time Zone lists, select the correct locale and time zone for the user.
g. In the Signature field, provide the signature of the user. Only agents and administrators have access to signature.
h. Enter Details and Notes about the user.
i. In the Organization ID list, select or specify the ID of the organization that you want the user to be associated.
j. In the Role list, select an appropriate role of the user.
k. In the Custom Role ID list, select or specify the ID of the custom role that you want to associate with the user.
l. In the Moderator list, select true if you want to give the user forum moderation capabilities; otherwise select false.
m. In the Ticket Restriction list, select which tickets the user has access to.
n. Under Tags, click Add, and in the Tag field, provide the tag for the organization.
Click Add to add multiple tags. Click  to delete any tag that you added.
to delete any tag that you added.o. Under the User Custom Fields group, click Add, and do the following:
a. In the Field ID field, provide the ID of the custom field that you want to add.
For information about custom fields, see User Custom Field Values.
b. In the Field Value field, provide the value for the specified field ID.
Click Add to add multiple user custom fields. Click to delete any user custom field that you added.
to delete any user custom field that you added.11. Click Done.
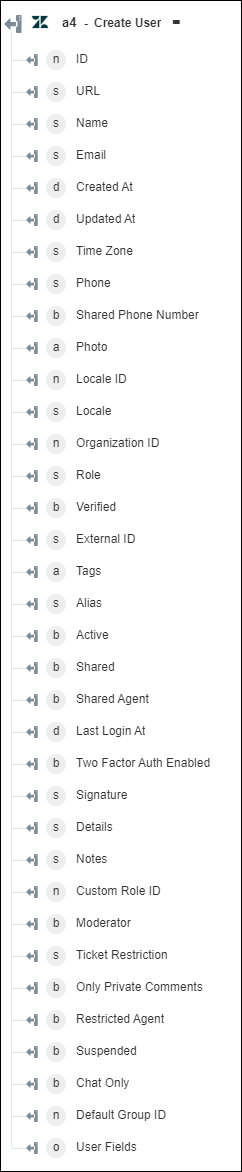
Output schema