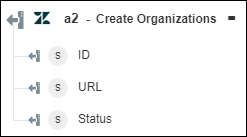
Create Organizations
Use the Create Organizations action to create one or more organizations.
Complete the following steps to use the Create Organizations action in your workflow:
1. Drag the Create Organizations action under Zendesk to the canvas, place the pointer on the action, and then click or double-click the action. The Create Organizations window opens.
2. Edit the Label, if needed. By default, the label name is the same as the action name.
3. To add a Zendesk connector type, refer to Supported Zendesk Connector Types.
If you previously added a connector type, select the appropriate Connector Type, and under Connector Name, select the connector.
4. Click TEST to validate the connector.
5. Click MAP CONNECTOR to execute the action using a connector that is different from the one that you are using to populate the input fields. In the Runtime Connector field, provide a valid Zendesk connector name. For more information about MAP CONNECTOR, see Using Map Connector.
6. Under the Organization Detail, click Add, and do the following:
a. In the Organization Name field, provide a unique name for the organization that you want to create.
b. Click Show additional fields.
c. In the External ID field, provide a unique external ID that you want to associate with the organization.
d. Under Domains, click Add, and in the Domain Name field, provide the domain name that you want to associate with the organization. Users with email addresses containing the specified domain names will be added to the respective organization.
Click Add to add multiple domains. Click  to delete any domain that you added.
e. Provide additional Details and Notes about the organization.
f. In the Group ID list, select the group where you want new tickets from users in this organization to be automatically put.
g. In the Display Tickets to All Users list, select true to display tickets of this organization to all users; otherwise, select false.
h. In the Display Comments to All Users list, select true to display comments to all users; otherwise, select false.
i. Under Tags, click Add, and in the Tag field, provide the tag for the organization.
Click Add to add multiple tags. Click  to delete any tag that you added.
j. Under the Organization Custom Fields group, click Add to provide organization custom fields that you have defined in the user interface of the Zendesk service. Provide the Field Key and its Field Value for the custom field that you want to add.
Click Add to add multiple custom fields. Click  to delete any custom field that you added.
For example, if you want to add a custom field key for Phone Number, and if you have the Field key defined in your Zendesk account as phone_number, then provide the value of Field Key as phone_number.

Click Add to add multiple organizations. Click  to delete any organization that you added.
7. Click Done.
Output schema
