Edit Item
Use the Edit Item action to edit a Windchill RV&S item.
Complete the following steps to use the Edit Item action in your workflow:
1. Drag the Edit Item action under Windchill RV&S to the canvas, place the pointer on the action, and then click  or double-click the action. The Edit Item window opens.
or double-click the action. The Edit Item window opens.2. Edit the Label, if needed. By default, the label name is the same as the action name.
3. To add a Windchill RV&S connector type, refer to Supported Windchill RV&S Connector Types.
If you previously added a connector type, select the appropriate Connector Type, and under Connector Name, select the connector.
4. Click TEST to validate the connector.
5. Click MAP CONNECTOR to execute the action using a connector that is different from the one that you are using to populate the input fields. In the Runtime Connector field, provide a valid Windchill RV&S connector name. For more information about MAP CONNECTOR, see Using Map Connector.
6. In the Entity Type list, select the type of the item that you want to edit.
The fields in the input form change dynamically based on the entity type that you select.
7. In the ID field, enter the ID of the item.
8. Under Properties, select Form to provide inputs in the form through individual input fields or select Assign JSON to specify a single JSON with all required inputs.
9. Click Done.
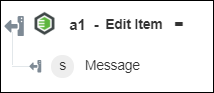
Output schema
The Edit Item action returns a message string that states the successful edit of the item. The following image shows the sample output schema: