Creating External Client App For Service Board Sync
Salesforce is modernizing its application integration framework by transitioning from Connected Apps to External Client Apps. As part of this transition, Salesforce will discontinue support for the OAuth 2.0 username-password flow for Connected Apps in Winter ’27 (October 2026). Currently, the creation of new Connected Apps are disabled by default across all Salesforce organizations.
To align with these platform changes and ensure continued secure integration, Salesforce recommends using External Client Apps .
|
|
Use this when you need to automatically synchronize data between Service Board and Salesforce through secure communication without user interaction.
The migration to External Client Apps affects both new and existing Service Board customers.
• New customers: Use an External Client App for Salesforce integrations. Do not use the out-of-the-box (OOTB) Connected App because Salesforce is transitioning away from Connected Apps authentication methods.
• Existing customers: If your Salesforce integration currently uses the OOTB Connected App or username-password authentication, migrate to an External Client Apps before the Salesforce Winter ’27 release (October 2026). After Winter ’27, Salesforce will no longer support the Connected Apps, which may impact existing integrations that have not been migrated.
To avoid service disruptions and ensure continued compatibility with Salesforce, complete the migration to an External Client App as part of your upgrade planning.
|
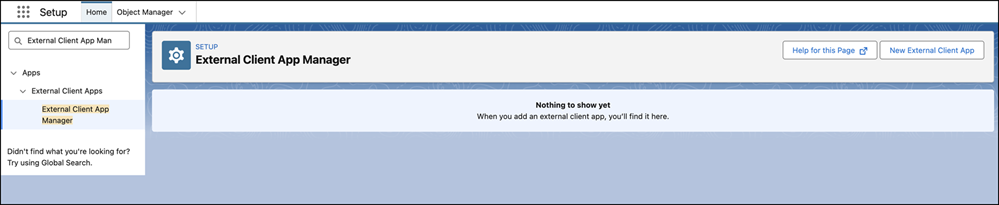
To create an External Client App in your Salesforce org.
1. Log in to Salesforce with your valid credentials.
2. Go to > > >
3. Click New External Client App.
4. Provide the following details:
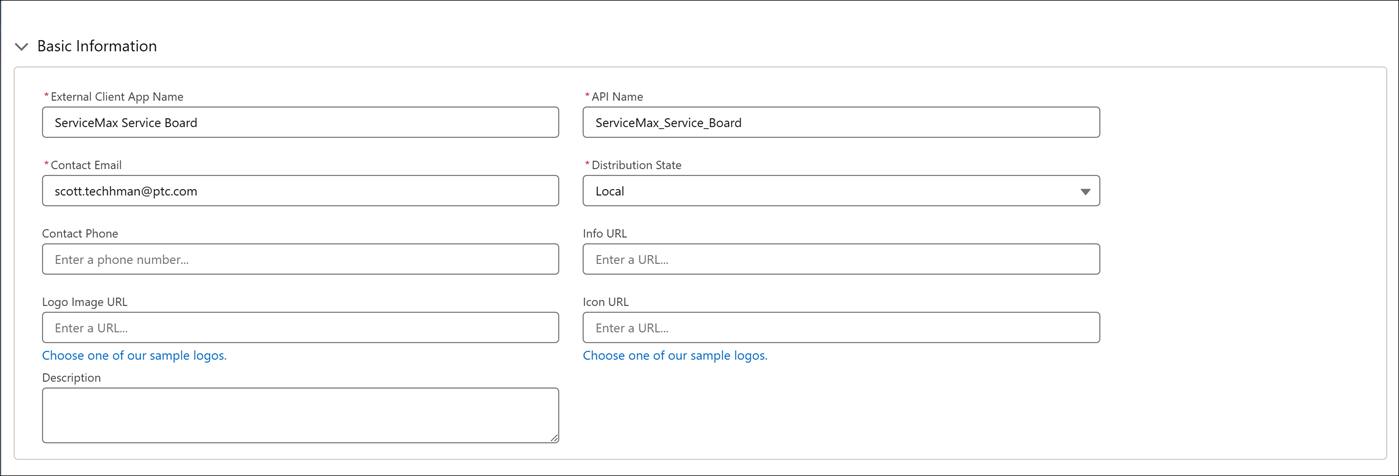
Basic Information fields for External Client App.
|
Field
|
Description
|
|---|---|
|
Fields marked with * are mandatory.
|
|
|
External Client App Name*
|
Enter a unique name for the External Client App. This name helps administrators identify the app in App Manager.
|
|
API Name*
|
Enter the API name used to reference the app programmatically. By default, the system derives this value from the app name by replacing spaces with underscores. Ensure that the API name is unique and uses
• only letters, numbers, and underscores
• starts with a letter
• does not include spaces
• does not end with an underscore
• does not contain consecutive underscores
|
|
Contact Email*
|
Enter an email address that Salesforce can use to contact you or your support team if needed. This email address is not shared with Salesforce admins who install the app.
|
|
Distribution State*
|
Select how the external client app is distributed.
Choose Local to develop the app for use only in the current org.
|
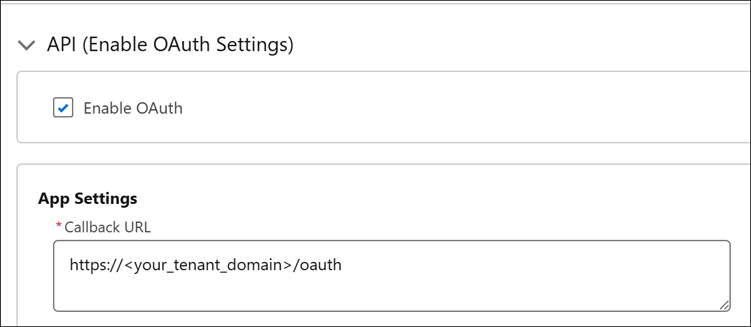
OAuth Settings for External Client App.
|
Field
|
Description
|
|---|---|
|
Fields marked with * are mandatory.
|
|
|
Enable OAuth
|
Select this checkbox to enable OAuth authentication for the external client app. OAuth must be enabled to allow secure, token-based access to Salesforce APIs.
|
|
Callback URL
|
Enter the URL that Salesforce redirects users to after successful authorization. For example: https://<your_tenant_domain>/oauth
|
|
OAuth Scopes
|
Select the following scopes from Available OAuth Scopes and move them to Selected OAuth Scopes.
• Access the identity URL service (id. profile, email, address, phone)
• Manage user data via APIs (api)
|
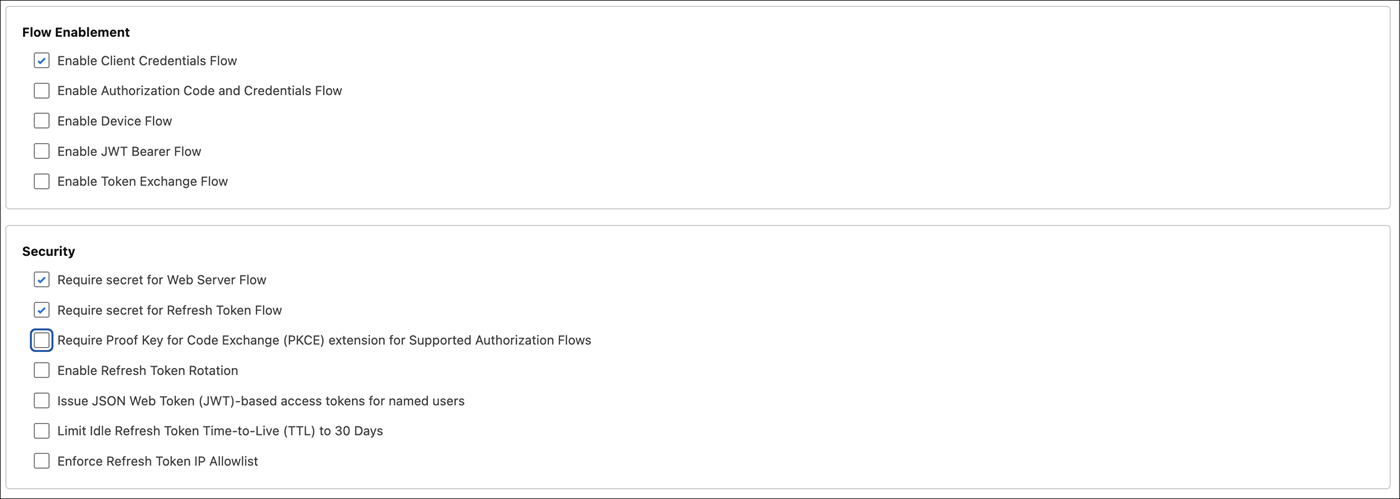
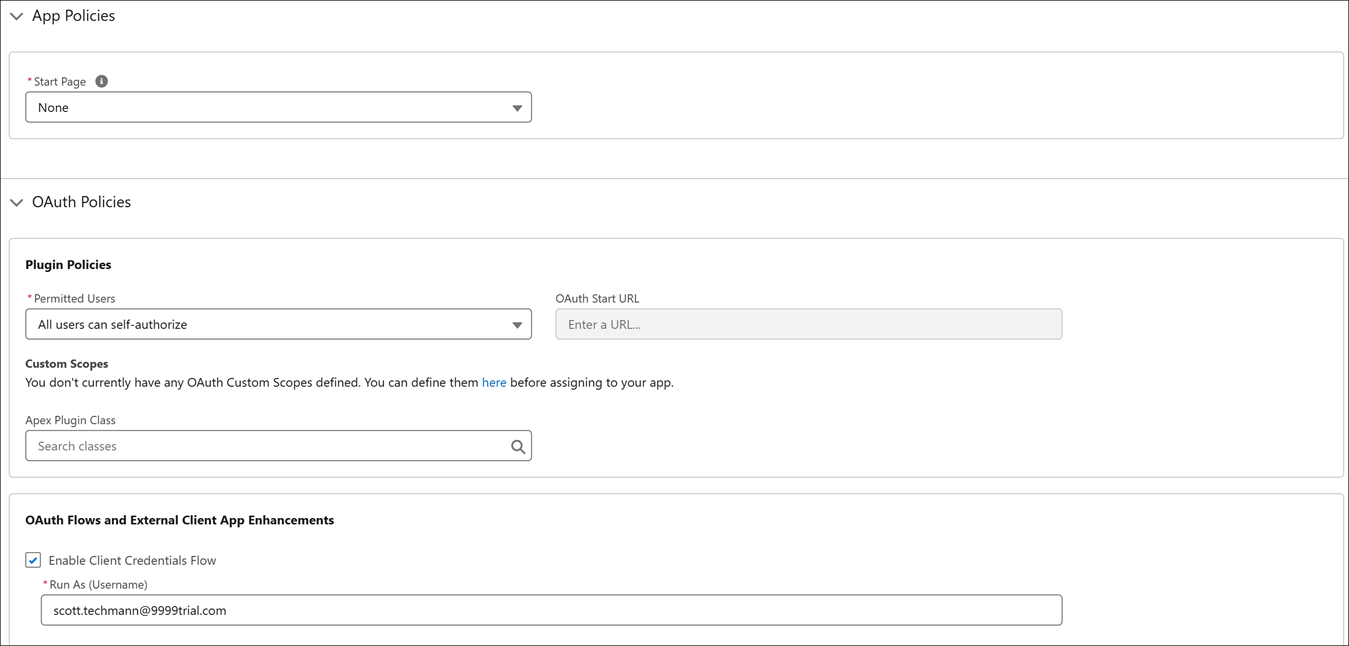
5. In the Flow Enablement section, select Enable Client Credentials Flow.
6. In the Security section, clear Require Proof Key for Code Exchange (PKCE) extension for Supported Authorization Flows option. Ensure that the Require secret for Web Server Flow and Require secret for Refresh Token Flow options are selected.
7. Click Create.
Configuring OAuth Policies
1. Go to > > >
2. Click to open the recently created External Client App.
3. In the Policies tab, click Edit.
4. In the OAuth Policies section, enable Enable Client Credentials Flow.
5. Set Run As (Username) to integration user. Ensure that the user has required permissions. For more information, see Appendix C: Access and Permissions.
6. Click Save.
Generating Client Credentials
1. Go to > > >
2. Click to open the recently created External Client App.
3. In the Policies tab, click Edit.
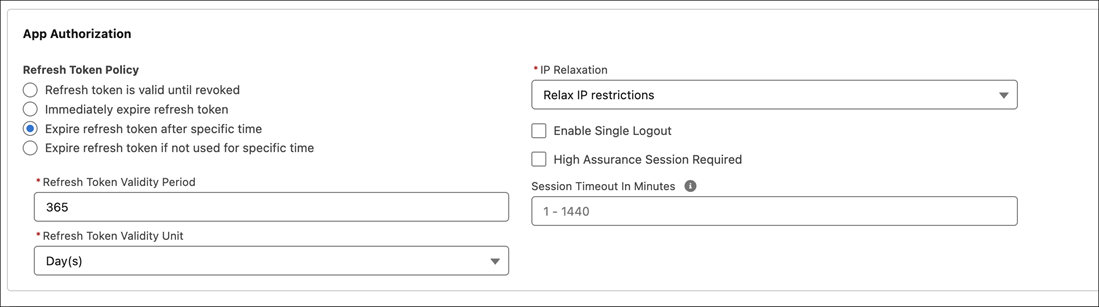
4. In the App Authorization section, set IP Relaxation field to Relax IP Restrictions.
5. Click Save.
Retrieving Client Credentials
1. Go to > > >
2. Click to open the recently created External Client App.
3. Click Settings tab.
4. Expand OAuth Policies section.
5. Click Consumer Key and Secret.
6. Verify the user identity.
7. Copy Consumer Key and Consumer Secret.

Configuring Salesforce Credentials to Service Board
The following procedure authenticates Service Board to Salesforce for metadata retrieval, user validation, or integration workflows.
1. On the Salesforce Setup page, in the Settings section, go to > .
2. Copy the My Domain Name.
3. Log in to Service Board.
4. Go to > > .
5. Click the active system setting.
6. In the System Setting record, click Authentication tab.
7. Provide the following details:
|
Field
|
Description
|
||
|---|---|---|---|
|
Salesforce Token URL
|
Enter the url: https://your-domain.my.salesforce.com/services/oauth2/token.
|
||
|
Salesforce Login Username
|
Ensure that this field is left empty.
|
||
|
Salesforce Login Password
|
Ensure that this field is left empty.
|
||
|
Salesforce Integration Client ID
|
|||
|
Salesforce Integration Client Secret
|
8. Click Save System Setting and Close.
9. Go to > > .
Related Topic