Defining Data Scanner Rules
When you create Data Scanners, you must define Data Scanner Rules that are applied to specific records to determine whether those records should be flagged for violations.
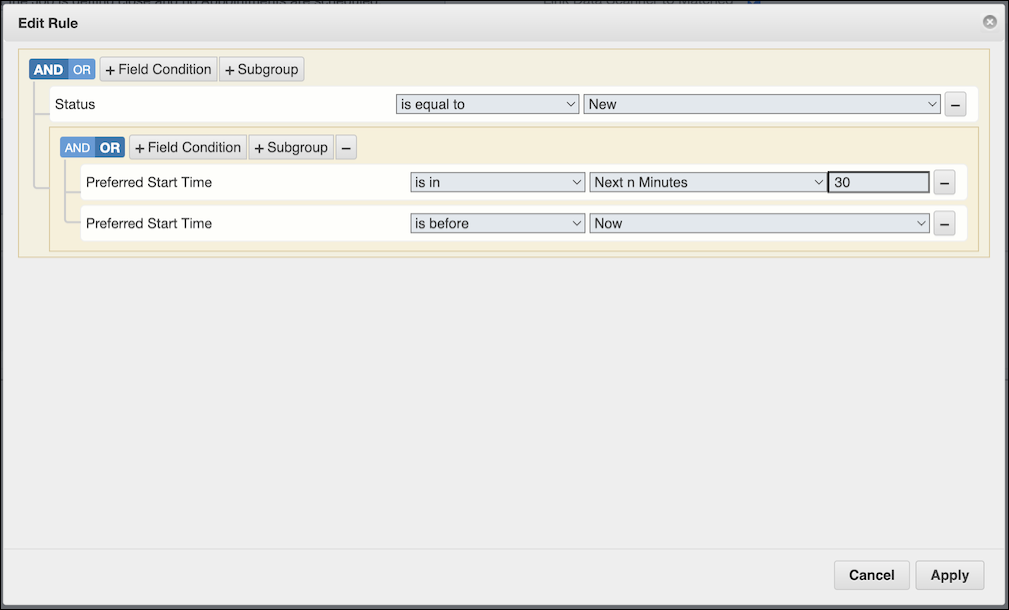
The steps in the following procedure provide an example of how to define a Data Scanner Rule to place records into a jeopardy state when the preferred start time falls in the next 30 minutes or at the current time.
To define Data Scanner Rules:
1. During Data Scanner creation, after you complete the Name, Object, and Violation Details, click inside the Rule field, and then in the Rule Editor dialog box, to define the root condition, click +Field Condition and define a field condition, for example, Status = New.
2. Above the root condition, click +Subgroup, and then to define a complex condition, click OR and +Field Condition.
3. Define the following field conditions, and then in the bottom right corner, click Apply.
◦ Preferred Start Time is in Next n Minutes = 30
◦ Preferred Start Time is before = Now
|
|
• To remove a field condition, on the far right side of its row, click Remove (–).
• After you click Apply, to save the newly created Data Scanner Rule, you must complete the remaining fields on the Data Scanner page and save and close the record.
• After you activate a Data Scanner, all Rule Editor buttons are disabled, and you can no longer edit the Data Scanner Rule.
• For field conditions that apply to dates and times, such as Today or Tomorrow, the Default Time Zone field value configured in the currently active System Setting record is used in the Data Scanner Rule.
|
4. To enable the Indexed option for fields that you want to use to define Data Scanner Rules, in Max Designer, click Developer Tools ( ) > , and then in the list view, click the target Field record.
) > , and then in the list view, click the target Field record.5. On the record page, on the Overview tab, select the Indexed check box, and then in the top left corner, click Save and Close ( ).
).
).6. Click Development Actions ( ) > .
) > .
) > .