Sending Email with Attachments
Android and iOS
To send an email from a Work Order record with its attachments, perform the following steps.
|
|
• You must run a Configuration Sync in the Go app to get the Email wizard in the Actions menu if enabled by your administrator.
• All the attachments in the record must be synchronized to the server. There should not be any attachments pending updates.
• There must not be any conflicts in the record. You cannot send emails with attachments if the record has any conflicts. You must resolve the conflicts to send the email. For more information, refer to the Conflict Resolution section.
|
1. Log in to the Go app with your valid credentials.
2. Navigate to the Work Order record and launch it.
3. From the Actions menu, tap the Send Email option as configured by your administrator. The Send Email screen is displayed.
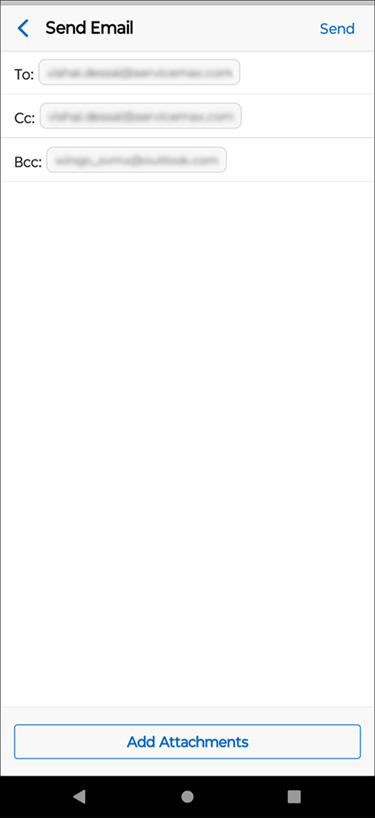
The To, Cc, and Bcc fields are populated as configured. However, you can edit the fields to add or remove email IDs. |
4. Tap Add Attachments.
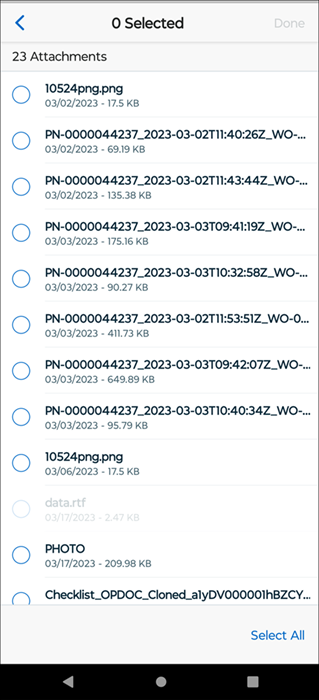
• The images, videos, and documents from the Work Order record are listed in the Attachments screen. • It is recommended to stay connected to the internet to get all the attachments from the record. |
5. Select the attachments you want to send to the customers and tap Done in the top-right corner of the screen.

You can tap Select All to send all the attachments in the email. |
6. Tap Send. A confirmation screen is displayed once the email is sent successfully if you are connected to the internet.

Note: The following warning message is displayed if you tap Send without any attachments. 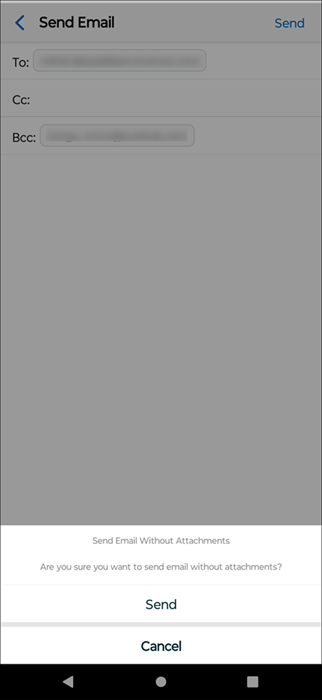 You can tap Send to send email without attachments. You can tap Cancel to navigate to the email screen to add the attachments. |
7. Tap Done. You are redirected to the Work Order record screen.
Windows
To send an email from a Work Order record with its attachments, perform the following steps.
• You must run a Configuration Sync in the Go app to get the Email wizard in the Actions menu if enabled by your administrator. • All the attachments in the record must be synchronized to the server. There should not be any attachments pending updates. • There must not be any conflicts in the record. You cannot send emails with attachments if the record has any conflicts. You must resolve the conflicts to send the email. For more information, refer to the Conflict Resolution section. |
1. Log in to the Go app with your valid credentials.
2. Navigate to the Work Order record and launch it.
3. From the Actions menu, tap the Send Email option as configured by your administrator. The Send Email screen is displayed.
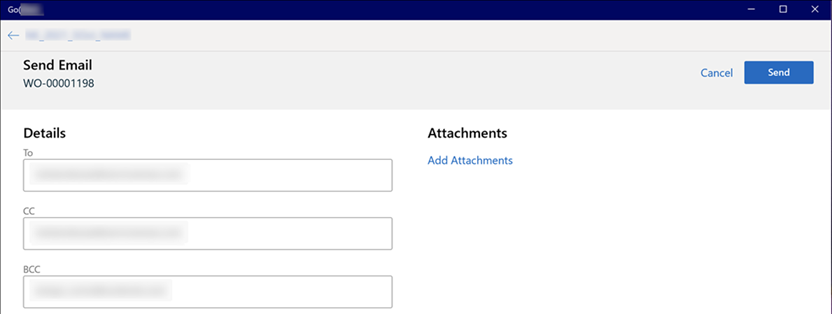
The To, Cc, and Bcc fields are populated per the configuration. However, you can edit the fields to add or remove email IDs. |
4. Tap Add Attachments.
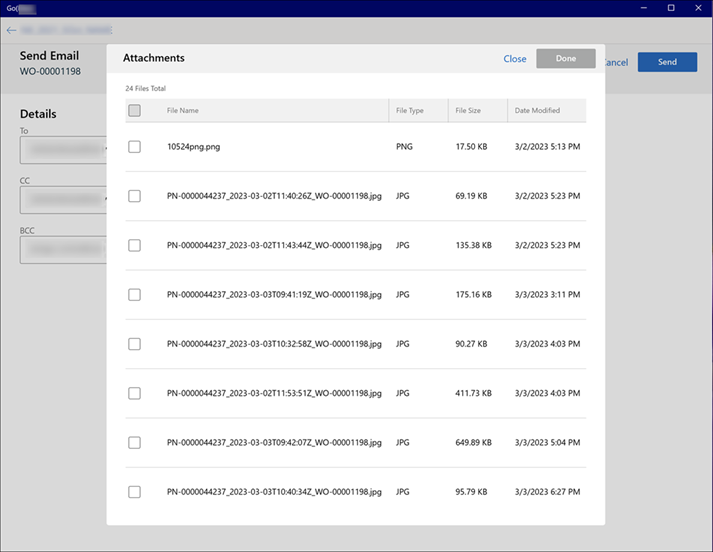
• The images, videos, and documents from the Work Order record are listed in the Attachments screen. • It is recommended to stay connected to the internet to get all the attachments from the record. |
5. Select the attachments you want to send to the customers and tap Done in the top-right corner of the screen.
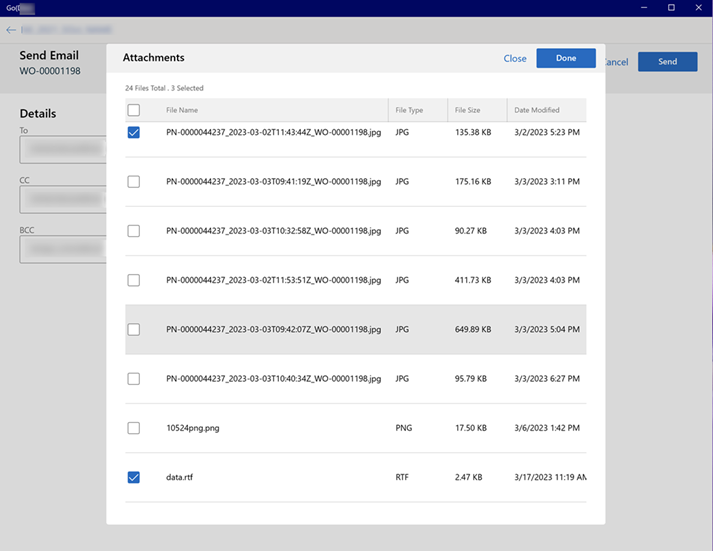
You can tap Select All to send all the attachments in the email. |
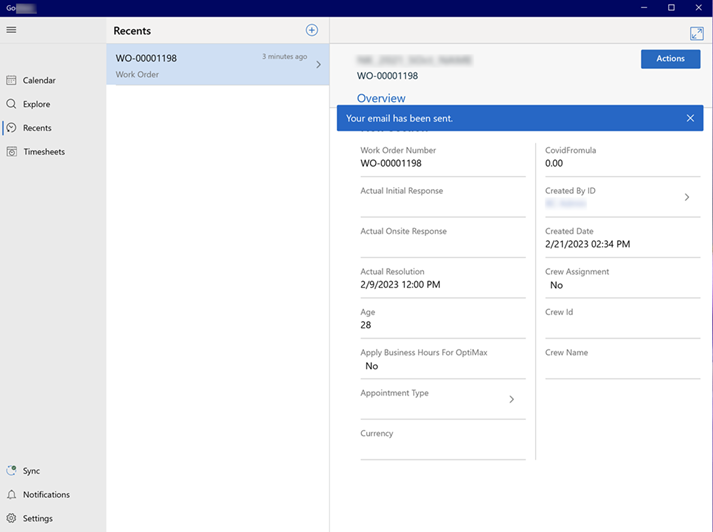
6. Tap Send. A confirmation screen is displayed once the email is sent successfully if you are connected to the internet.
Note: The following warning message is displayed if you tap Send without any attachments.  You can tap Send to send email without attachments. You can tap Cancel to navigate back to the email screen to add the attachments. |
7. Tap Done. You are redirected to the Work Order record screen.