Adding Responses with All Sections Visible
Android and iOS
To add Checklist Response:
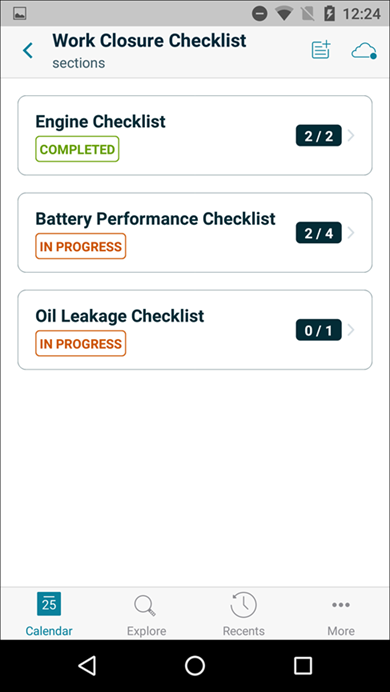
1. Tap Checklists under the Actions menu to navigate to the Checklists page. The Checklist page lists all the checklist processes whose entry criteria are satisfied for a given record.
2. Tap any checklist process. All the sections in that checklist process are displayed.
3. Tap each checklist section. All the questions under that section are displayed on one page and are scrollable.
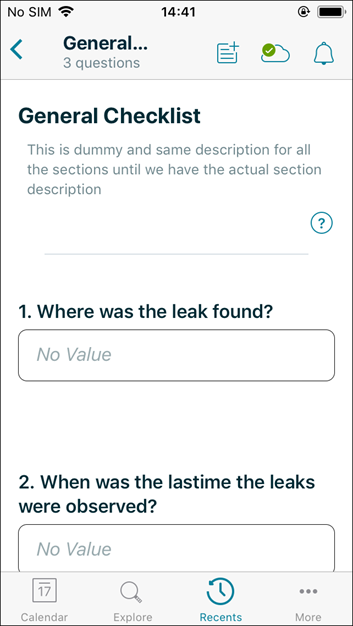
4. Respond to each question one by one. Tap Save to save the current section, or tap Next to go to the next section. Changes made are not saved automatically when you move from one section to another.
5. Repeat step 4 until you are finished answering all the questions in all the sections.
6. Tap Submit to submit the checklist responses. Your checklist process is now in the Completed state.
|
|
Smart Sync is triggered if the Sync on Submit option in the Checklist Designer is configured to run the Smart Sync.
|
Windows
To add a checklist:
1. Open the Work Order record in View SFM Process.
2. Click the SFM Transaction for Checklists from the Actions menu. The checklist processes with satisfied entry criteria are listed on the left pane.
3. Tap any checklist process. In Progress and Completed tabs are displayed in the right pane. By default, the In Progress tab is displayed with the incomplete checklist. If there is no In Progress checklist, + Start New Checklist is displayed under the In Progress tab.
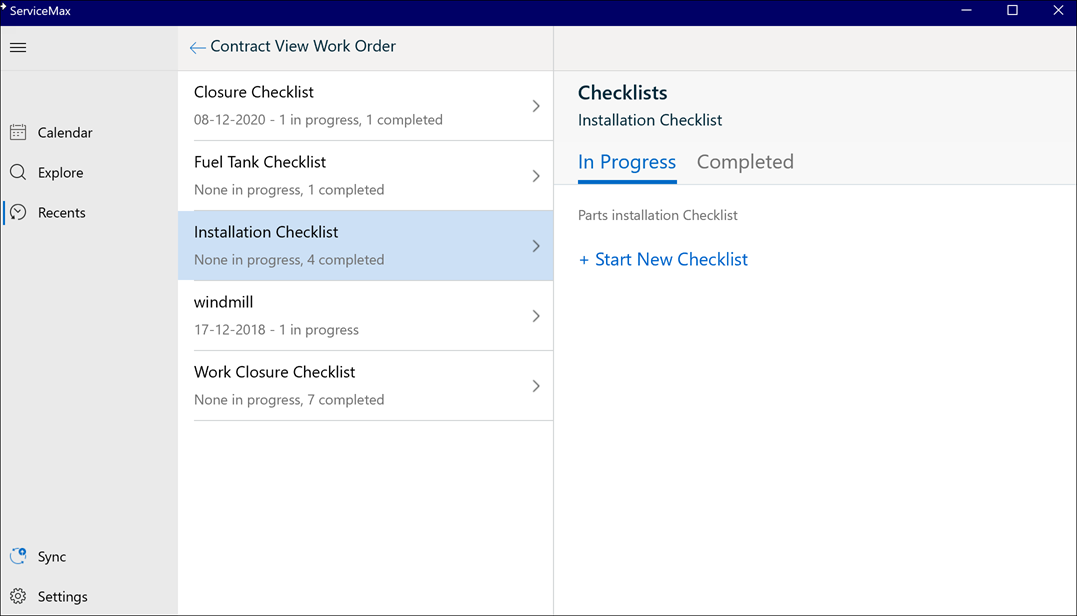
4. Click + Start New Checklist under the In Progress tab to add a checklist. The checklist sections for the respective process are displayed on the left pane. By default, the questions of the first section are displayed on the right pane.
|
|
When a checklist is in In Progress state, you cannot create a new instance of the same checklist until the In Progress checklist is submitted.
|
5. Click the checklist section to view the questions under the section on the right pane.
|
|
The questions are scrollable.
|
6. Click the Expand icon from the top right corner to launch the question section in full-screen mode.
7. Click the checklist title from the top of the screen to edit or rename the title. The title and the timestamp are anchored at the top of the checklist screen.
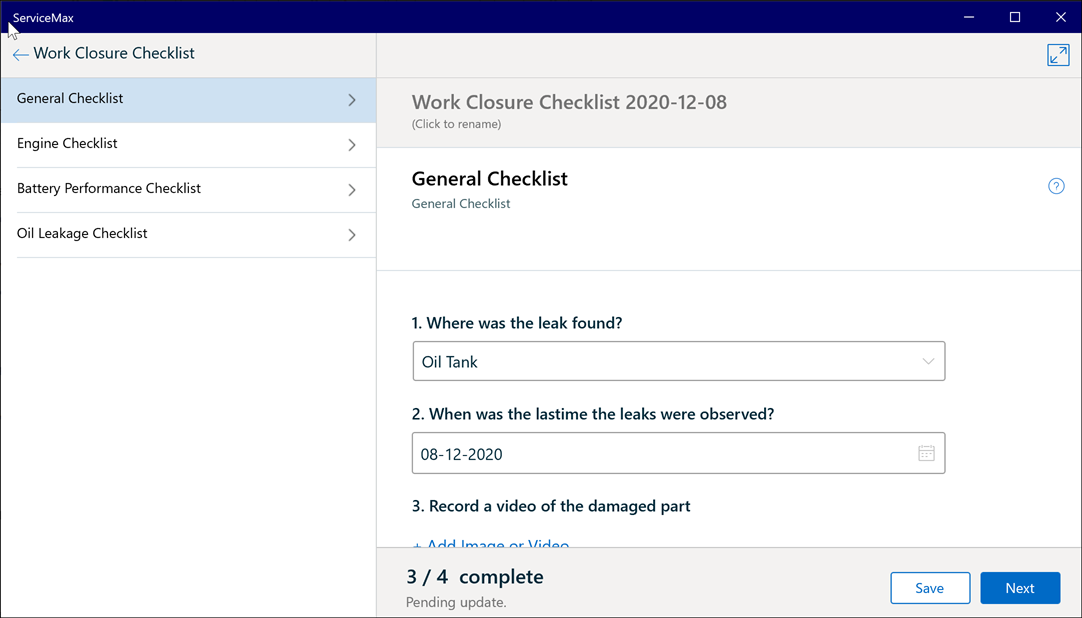
8. Enter the values for each question one by one. The number of questions answered across the total number of questions for that section is displayed in the bottom left corner of the screen. The Pending Update text denotes unsaved data.
9. Click Save to save the current section
10. Click Next to go to the next section. Updates to the questions are saved automatically when you move from one section to another.
|
|
You cannot save the section if the required fields are empty. For more information about required fields, default answers, and exit and entry criteria, see Additional Features of Checklists.
|
11. Repeat step 4 until you answer all the questions in all the sections.
12. Tap Submit to submit the checklist.
|
|
Smart Sync is triggered if the Sync on Submit option in the Checklist Designer is configured to run the Smart Sync.
|