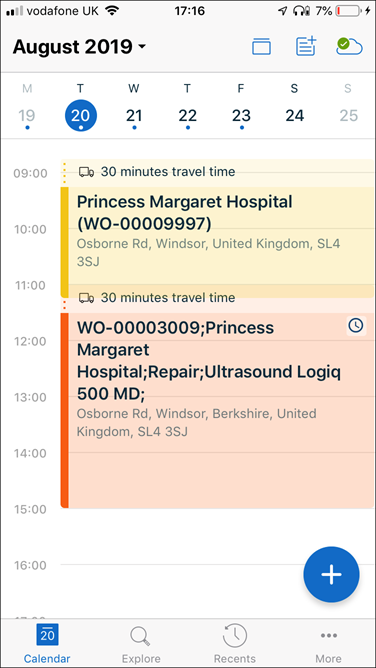
Configuring Appointment Colour by Work Order Status
|
|
It is recommended to use the ServiceMax Mobile Console for configuring appointment color.
|
Administrators can configure the appointment color according to Work Order Status depending on their business needs. To achieve this, administrators have to create a custom setting and activate it. A maximum of five custom settings can be configured for each Work Order Status.
For more information related to other custom settings used in ServiceMax Go app, see Custom Settings in ServiceMax Go.
To create a custom setting
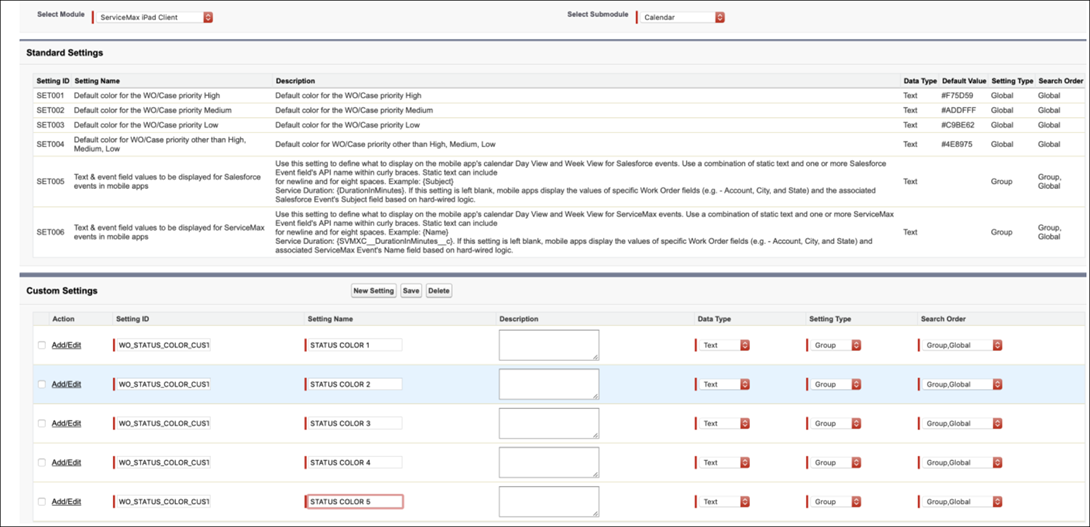
1. Go to ServiceMax Setup > App Administration > Settings.
2. Select Module: ServiceMax iPad Client; Submodule: Calendar.
3. On the Custom Settings section, click New Setting. Enter the values for the fields as described below:
◦ Setting Id: WO_STATUS_COLOR_CUSTOMx (where x is a number from 1 to 5)
◦ Setting Name: Enter a name for this setting
◦ Data Type: Text
◦ Setting Type: Group
◦ Search Order: Group, Global
|
|
If your setting type is Group use Group, Global. If your setting is Global use Global.
|
◦ Values: Enter the Work Order Status picklist value followed by pipe delimiter and a hex color code. For example, Open|#fbe555.
4. Click Save.
5. Similarly, add custom settings for other Work Order statuses. A maximum of five custom settings can be configured for each Work Order Status.
To activate the custom settings:
1. Go to ServiceMax Setup > App Administration > Configuration Profiles.
2. Under Group-wide Configuration Settings, select the relevant profile and click Edit.
3. Select Module: ServiceMax iPad Client; Submodule: Calendar.
4. Click Edit for the WO_STATUS_COLOR_CUSTOMx (where x is a number from 1 to 5) custom setting and enter the Work Order Status picklist value followed by pipe delimiter and a hex color code. For example, Open|#fbe555.
5. Click Save. Click Close.
6. Click Quick Save on the Edit Configuration Profile page.
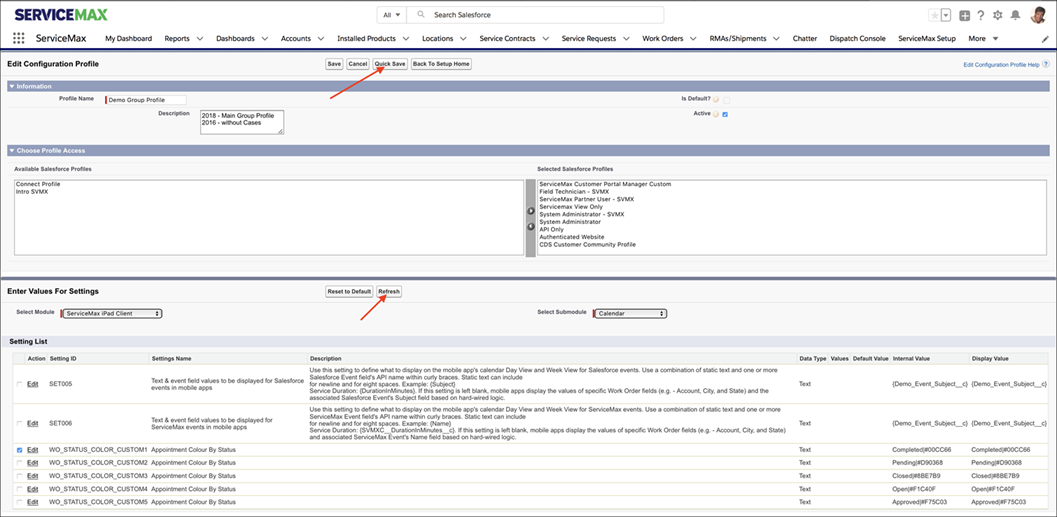
7. Click Refresh on the Enter Values for Settings section.
8. Click Save on the Edit Configuration Profile page when you are done adding values for all (max 5) custom settings.