Adding Objects to the Scan Section
You can add objects to the scan section so that technicians can get the required output from the scan result.
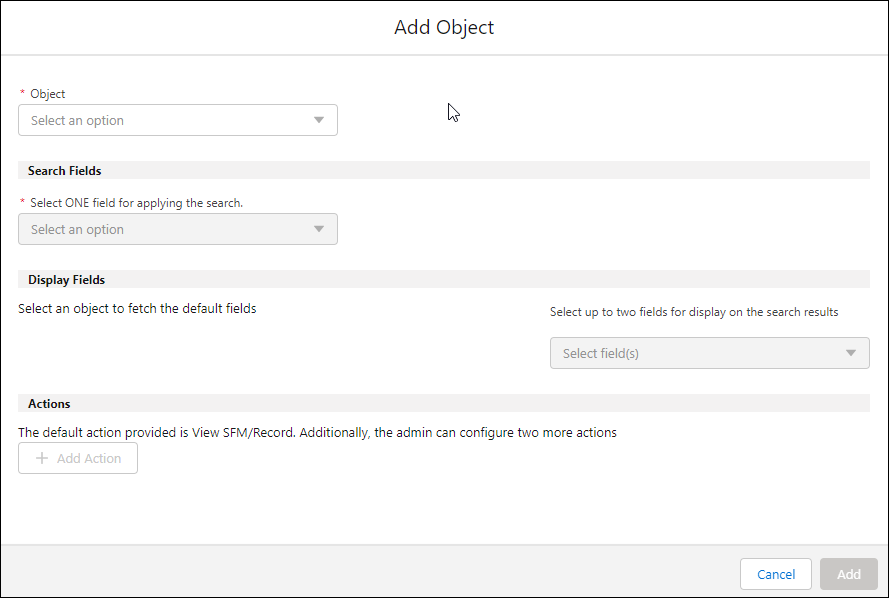
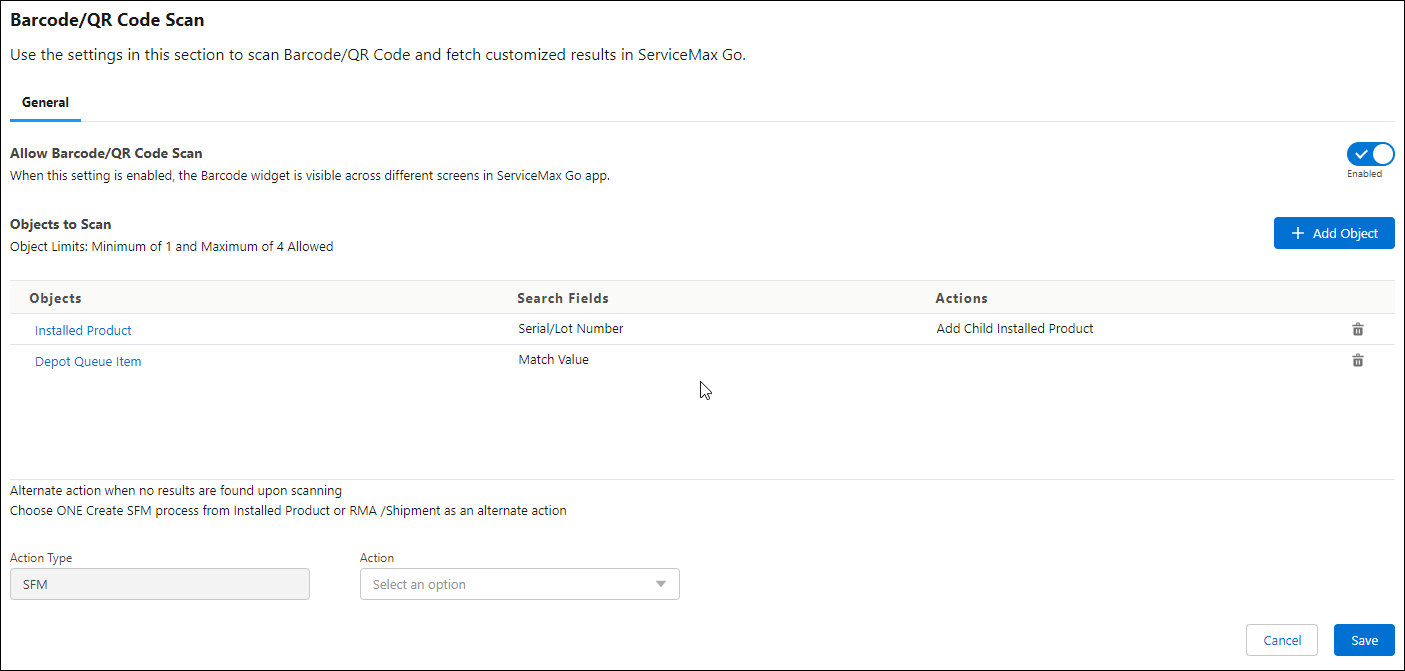
1. On the Barcode/QR Code Scan screen, click Add Object.

2. Select an object from the following list:
◦ Installed Product
◦ Product
◦ RMA/Shipment
◦ Depot Queue Item
The Search Fields, Display Fields, and the Actions sections are enabled with the available configurations. |
3. Select a field for the selected object to apply it for the search in the Search Fields section.
4. Select up to two fields on the selected object to display on the scan result screen the Display Fields section. There are two default fields to display the result.
You can click the remove button to delete them from the list. |
5. Create up to two SFM actions available for the selected object to enable technicians perform a specific task from the scan result.
The View SFM action is the default option for the scan result. |
6. Click Add.
The object is added to the barcode configuration in the Objects to Scan section and a confirmation message is displayed.

• You can click the object name to edit the object configuration. • You can click the delete icon on the object row to remove it from the configuration. |