Mapping Editor
You can use the Mapping Editor to configure field and value mappings for an object. The Mapping Editor maps a value to a field. You can configure mapping for any datatype fields, except a few.
|
|
Auto Number, Formula (Text), and Roll-up Summary data types are not supported in SFM Mapping.
|
For mapping formula fields, consider the following steps:
• Map Formula fields to respective Datatype fields on Target Object. For example, Formula (Number) to Number.
• Map all Formula fields to text Datatype fields on Target Object. For example, Formula (Number) to Text.
• Map formula to Formula fields. For example, Formula (Number) to Number, Formula (Picklist) to Formula (Picklist).
|
|
You can view and save the mapping successfully and it does not clear values or display an error on loading configurations.
|
Types of Mapping
The types of mapping in the Mapping Editor are as follows:
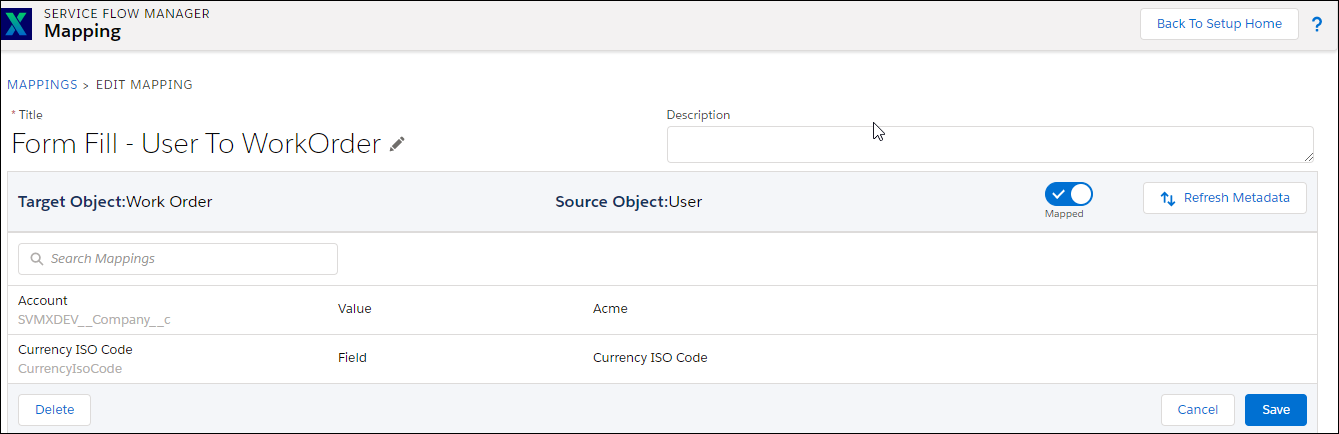
• Field Mapping: When a record is created from a different record, certain fields are allowed to be mapped from the Source Object to the Target Object. This action is called Field Mapping.
◦ Field Mapping is allowed to be used in one or more transactions.
◦ In this type of mapping both Source and Target, objects are present. The Target Object field is mapped to the compatible source object field (field, function, and value are the three options in the dropdown).
◦ At least one mapping is compulsory when the Target Object field is mapped with the Source Object field. Additionally, you are allowed to add two more mapping fields to the current row, excluding the options of fields selected earlier.
◦ The resulting target record has its fields populated with the values of the source record when a transaction configured with the field mapping is invoked.
◦ Multi-level field mapping is supported. For more information, see Multi-level Mapping.
• Value Mapping: This category mapping is applicable for new records. In this case, only value and function are present. Value mapping is only added to a child section.
Use Cases for Mapping Editor
The Mapping Editor maps fields from Source Object to Target Object. This mapping can be used in a transaction. The following are examples of mapping fields from the Source Object to the Target Object:
• Example 1: The Country field on the Case record is a Formula field. This maps to the Country picklist on the Work Order record. The Country field on the Work Order record can be populated from the Country field on the Case record.
• Example 2 :The target field mapped from the source field of the type formula is populated only when the record is saved. For example, a Picklist field (Target) is mapped from the Text field (Source).
Launching Mapping Editor
To launch the Mapping Editor:
1. Go to ServiceMax Setup > Service Flow Manager > SFM Mappings > Mapping List View > Mapping Editor. The Mapping Editor page is displayed.
2. Choose either field mapping or value mapping. The following table lists the different fields in the Mapping Editor.
|
Name
|
Description
|
|---|---|
|
Fields marked * are mandatory
|
|
|
Title*
|
The length of the title is a minimum of eight characters, and the name is unique. This is an editable field.
|
|
Description*
|
The Description in the Mapping Editor is a long text area field where a maximum of 32,678 odd characters is allowed. This is an editable field.
|
|
Source Object
|
This is an object from where an SFM delivery is launched. Source object fields are mapped to Target object fields.
For example, in Field Mapping, while creating a Work Order from Case, the Target Object is Work Order and the Case is the Source Object. The field values of the Case are assigned to the fields of the Work Order.
|
|
Target Object
|
This is an object created or updated from an SFM delivery submission.
|
|
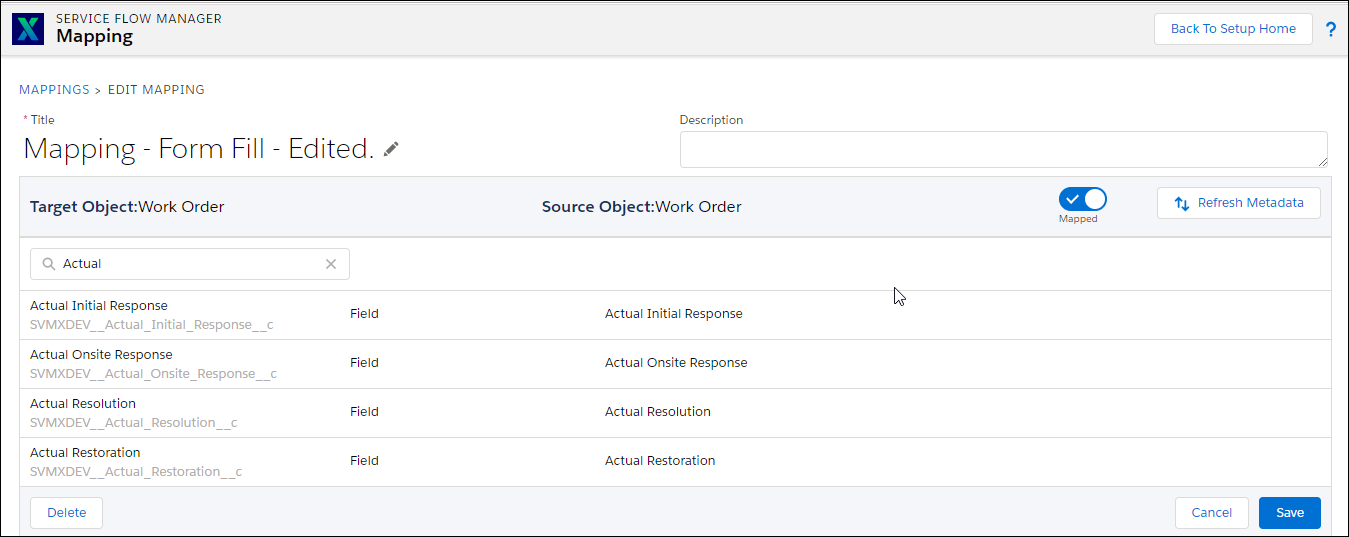
Unmapped Rows
|
The target object fields are not mapped to a field, value, or literal in this option. In Unmapped Rows, you can click on Edit and start mapping
|
|
Mapped Rows
|
Target object fields mapped to a field, value, or literal is known as Mapped Rows. In the Mapped Rows, you can click Clear All and edit the mapping options.
Note: In an edit mode you cannot proceed with the editing until you map the value for the respective fields.
|
|
Delete*
|
This option is applicable only for existing Mappings. If you try to delete any Mapping, a dialog box pops up. This displays the places where the mapping is referenced, and you receive a message with a confirmation to delete.
|
|
Cancel*
|
This option removes the current mapping and allows you to get back to List View.
|
|
Save*
|
This option saves the mapping. If you make any changes to the Mapping and save it, a pop-up box shows up with two options: Save As New and Save. The option Save As New copies the Mapping for editing without affecting the original Mapping, whereas, the option Save saves the Mapping and impacts all the references.
• The Save As New button enables you to save a clone of the existing mapping, and it opens as a new editor with the existing mapped rows.
• The Save button enables you to save the current mapping.
|
|
Refresh Metadata
|
This tracks and identifies if the object and all its fields are valid. This tracking captures any updated or deleted information in SalesForce.
|
|
Toggle
|
This option displays either All Fields or fields already mapped. You can view this by clicking on the toggle. This is set To All when you launch a New Mapping.
|
|
Search
|
This option is used to filter a field. A minimum of three characters is required for the search.
|
3. Click Save to save the mapping.
Screens for the fields in the Mapping Editor
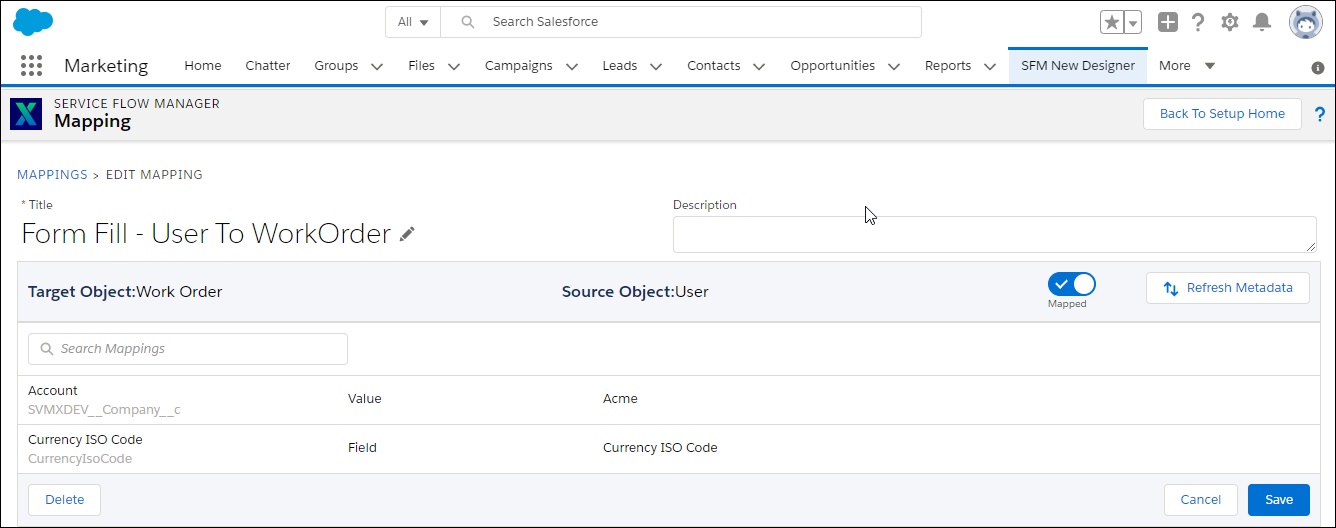
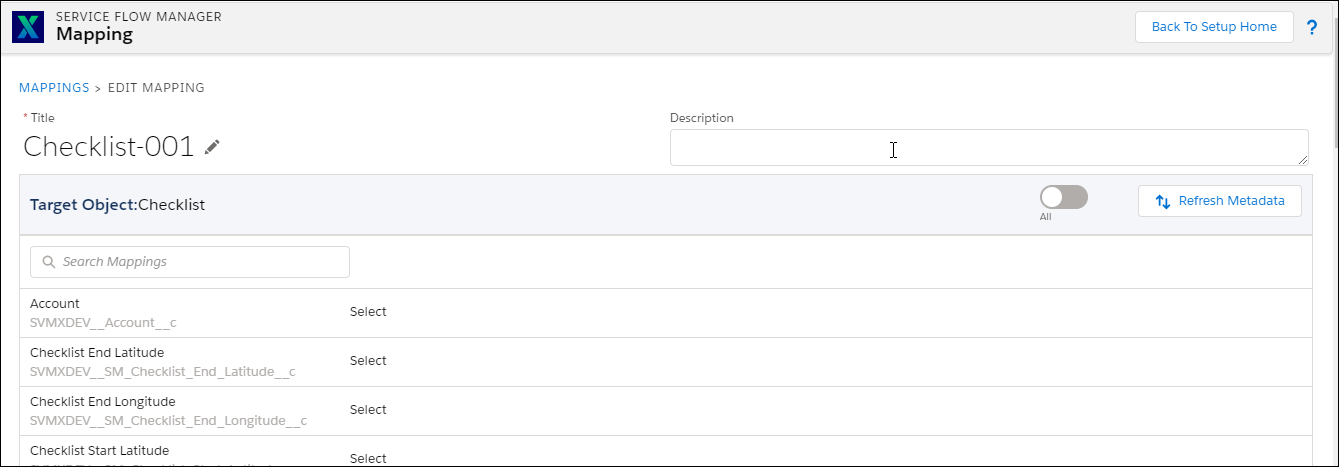
The following screen displays the breadcrumbs in the Mapping Editor:
The following screen displays the Title field in the Mapping Editor:

The following screen displays the Description field in the Mapping Editor:
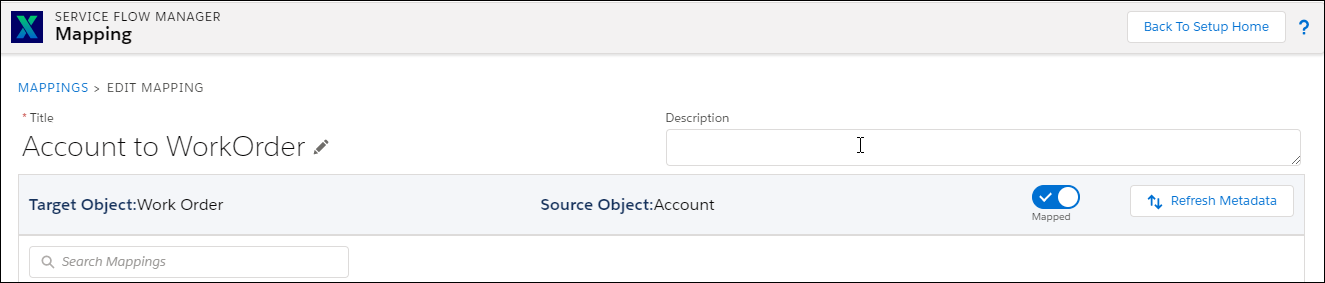
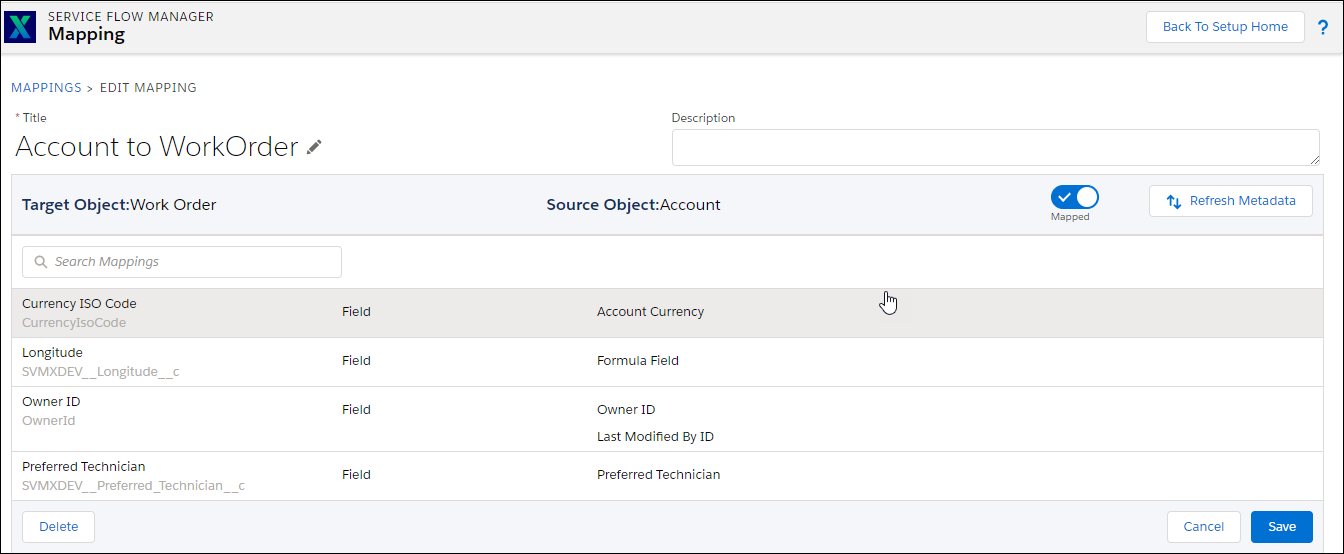
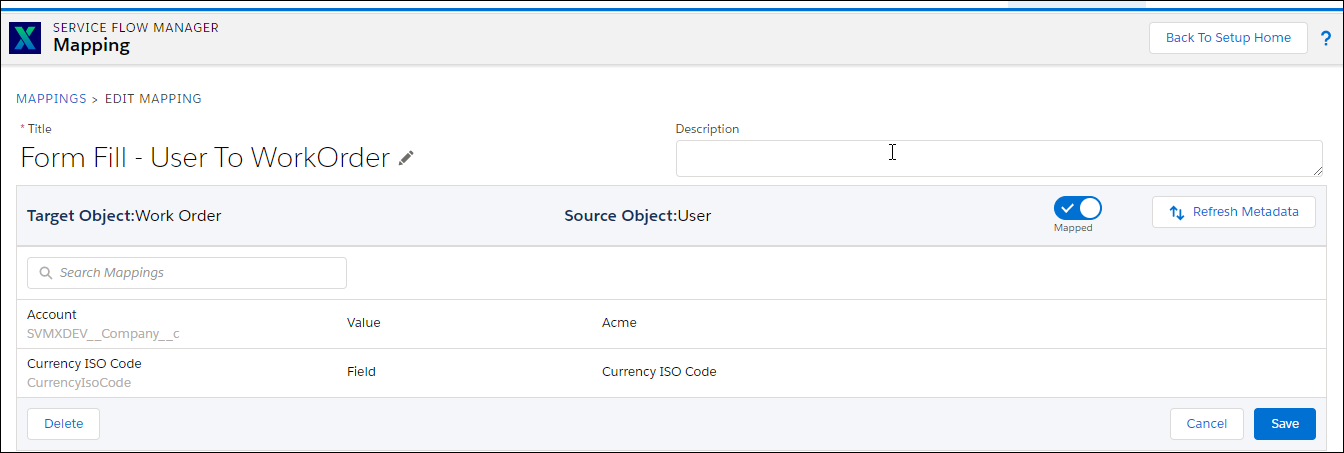
The following screen displays the Object field in the Mapping Editor:
The following screen displays the Unmapped Rows in the Mapping Editor:
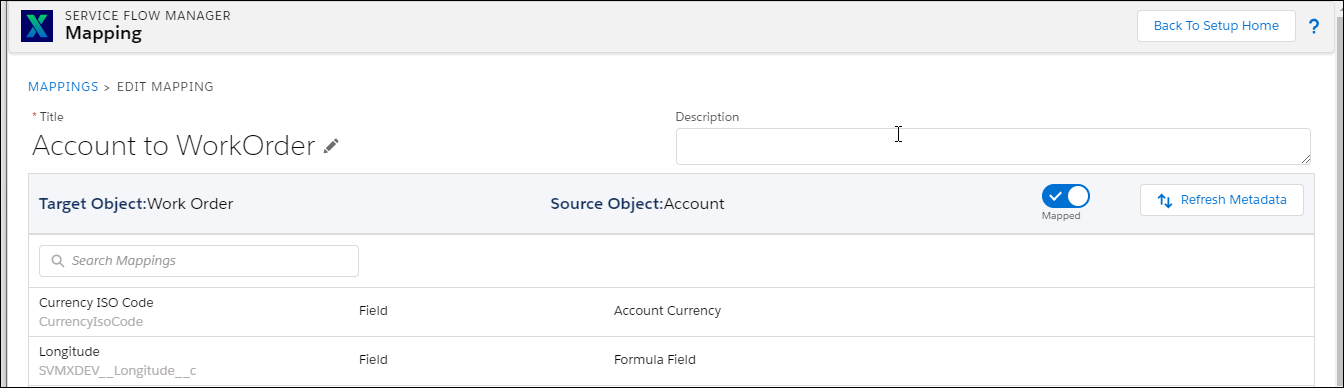
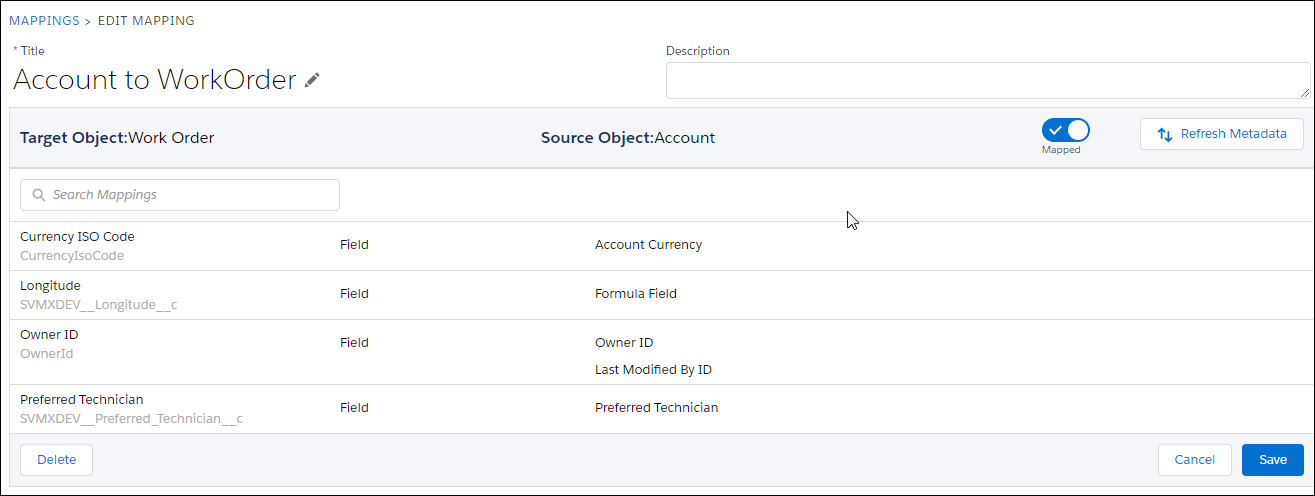
The following screen displays the Mapped Rows field in the Mapping Editor:
The following screen displays the user confirmation pop-up box to delete a mapping in the Mapping Editor:
The following screen displays the pop-up box asking for confirmation to cancel a change in the Mapping Editor:

The following screen displays the Save button in the Mapping Editor:

The following screen displays the Refresh Metadata button on the right edge of the screenshot in the Mapping Editor:
The following screen displays the Toggle button on the right edge of the screenshot in the Mapping Editor:
The following screen displays the Search bar below the Target Object Name of the screenshot in the Mapping Editor:
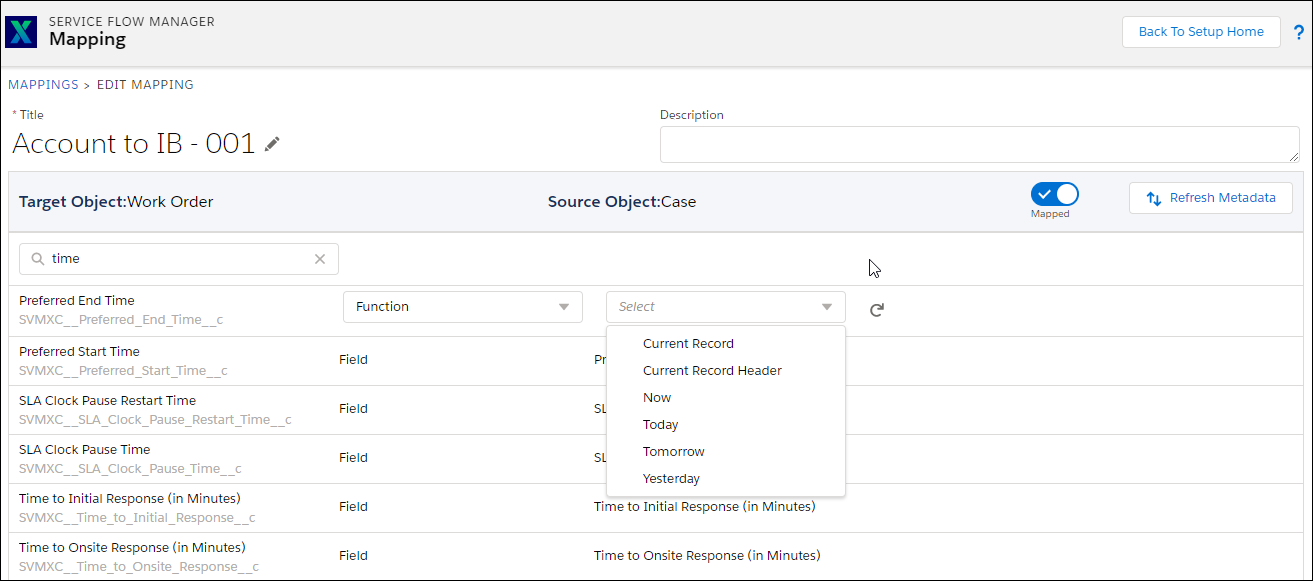
SFM and Date Literals in Mapping Editor
SFM Literals are special keywords supported in the SFM. The literals are also known as Field Attributes, Functions, or Constants. The keywords are supported in various contexts such as expressions, maps, source/target object updates, lookup filters, data validation rules, and custom actions.
Some of the literals are presented as picklist values, enabling the admin to select the required value in the SFM Designer. Examples are the Date and Datetime literals Now, Today, Tomorrow, and Yesterday, and the Location lookup function User Trunk in the Advanced Lookup Filter.
In the Mapping Editor, the literal syntax is auto-populated and you need to provide the Field API name.
The following table lists the SFM literals supported in the Mapping Editor:
|
Name of the Literal
|
Description
|
|---|---|
|
User Trunk
|
The SVMX.USERTRUNK is called User Trunk. This option is a function literal and you can enable it for the fields that refer to a Location object. It applies to Location lookup fields. It represents the Inventory Location of the technician associated with the logged-in Salesforce User. An example of its usage in an advanced lookup filter would be 'Location Equals User Trunk'.
|
|
Login User
|
The current user has been replaced as Login User. This literal refers to the User object and is enabled for the fields. Example: User=value.
|
|
Current Record
|
This record applies as a prefix to any type of field. It represents the record that is currently in the context. The suffix is followed by the API name of any field in the current object.
|
|
Current Record Header
|
This refers to the ‘HEADER’ of the ‘CURRENT’ (i.e. child) ‘RECORD’. ‘HEADER’ refers to the ‘Header’ object in SFM that is not always a ‘Master’ object in a ‘Master/Detail’ relationship, as the example later in this section illustrates.
It applies as a prefix, with the suffix being ‘.’ followed by the API Name of a field in the ‘HEADER’ object. An example is SVMX.CURRENTRECORDHEADER. SVMXC__Service_Order__c.
|
|
NULL
|
Configure this literal to clear value in the existing field. This applies to all data types except the Checkbox in the Field Mapping screen. This literal comes under the Function category. For example, You want to clear the default user assignment on SFM load to fill in the correct details, clear the error message on successful SFM save, and clear dispatch process details on Work Order for reprocessing.
|
The following table lists the Date and Datetime literals supported in the Mapping Editor:
|
Name of the Literal
|
Description
|
|---|---|
|
Now
|
It applies to Datetime fields. It represents the current time.
|
|
Today
|
It applies to the Date and Datetime fields. It represents the current day for Date fields. It represents 12:00 AM local time today for Datetime fields.
|
|
Tomorrow
|
It applies to the Date and Datetime fields. It represents the next day for Date fields. It represents 12:00 AM local time tomorrow for Datetime fields.
|
|
Yesterday
|
It applies to the Date and Datetime fields. It represents the previous day for Date fields. It represents 12:00 AM local time yesterday for Datetime fields.
|
|
|
In SFM transaction NULL literal is supported in the following configuration fields: Mapping Editor, Formulas, and Source Object Update.
|
The following screen displays the literals that are supported in the Mapping Editor:
Mapping Salesforce Queues
You can configure Queues in the SFM mapping. The mapping can be applied to the fields that have a lookup to the user records. For example, Owner Id. You can configure both field and value mappings.
Prerequisite
Ensure the following steps are in place before configuring the Queues in the SFM mappings:
1. Create the Queues in the Salesforce org.
2. Edit the Queues and grant permissions to the required objects by moving them to the Supported Object List.
To configure Queues in SFM mapping
1. Create or Edit an SFM mapping.
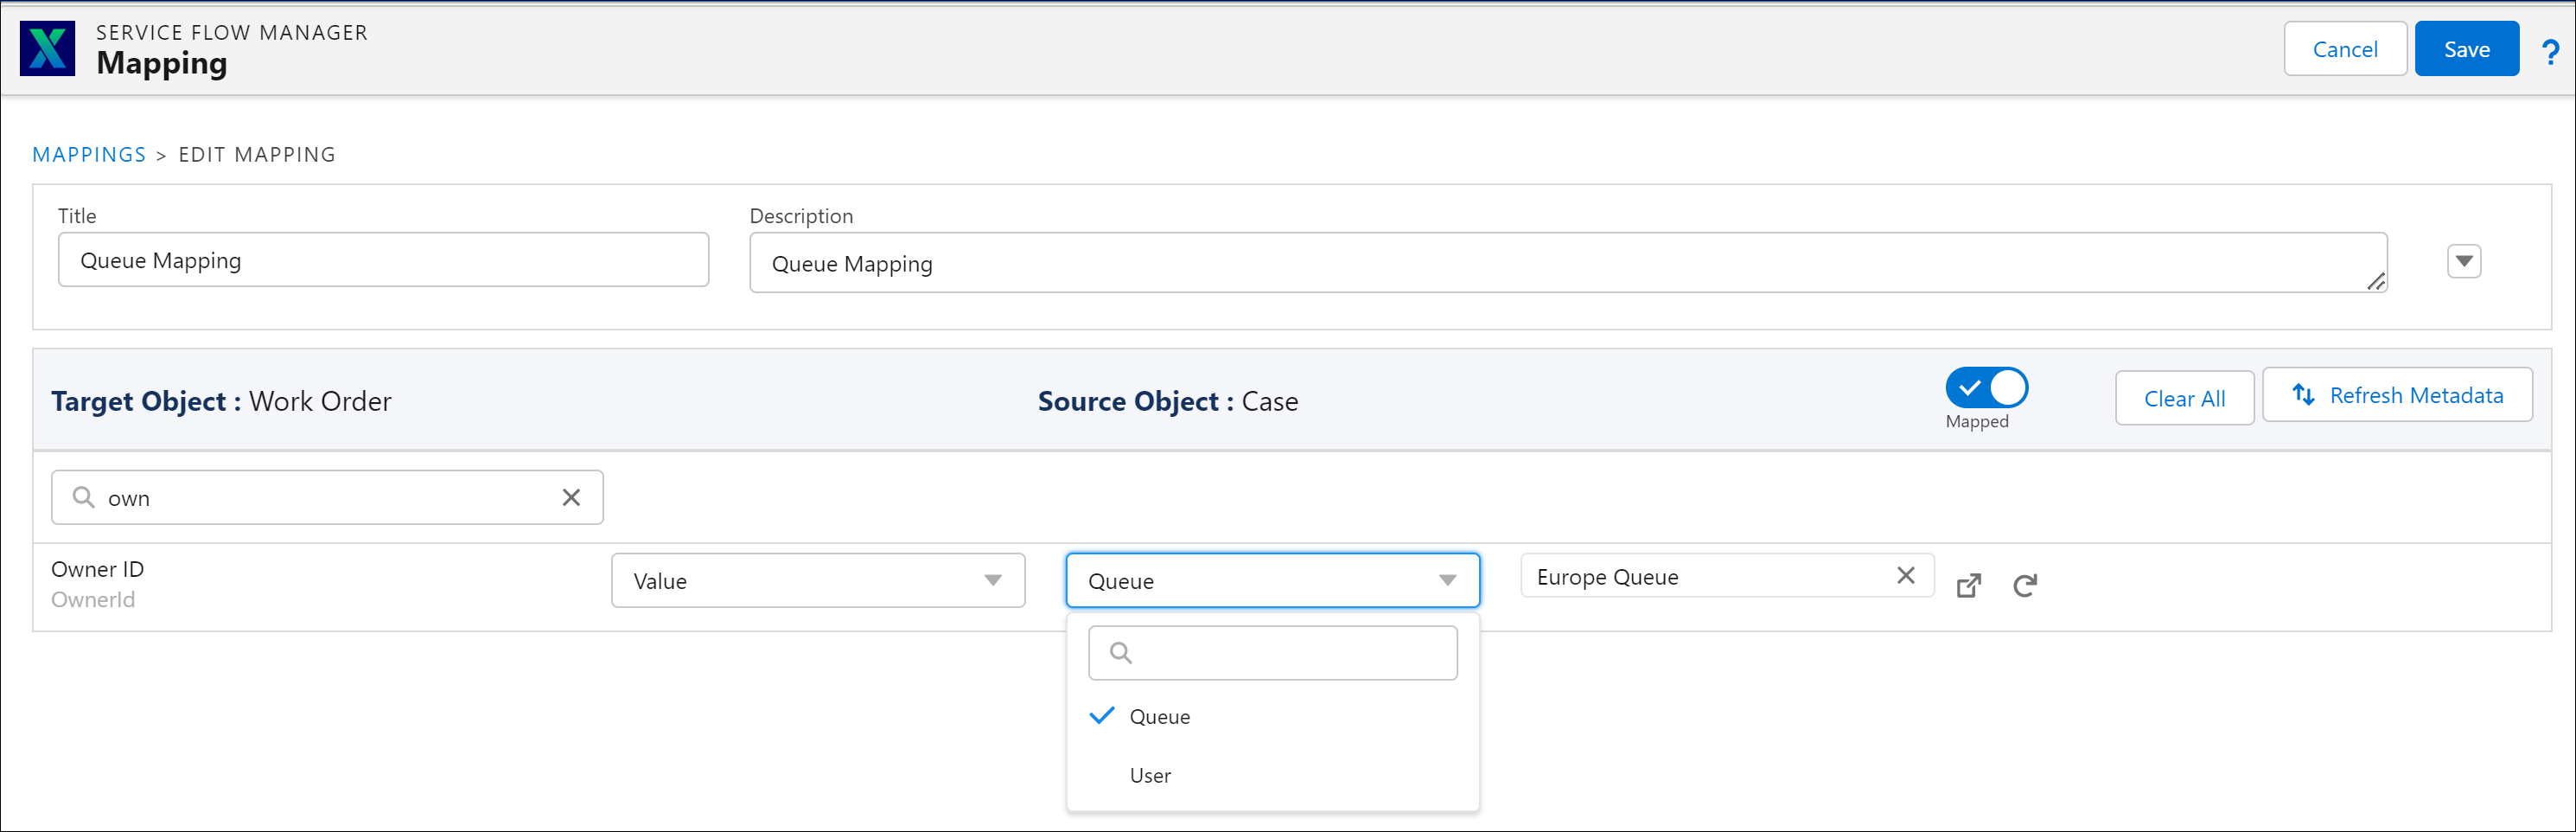
2. Click a field that has a lookup to the user record.
3. Select Value from the drop-down list and then select Queue from the adjacent drop-down list.
4. Click the magnifying glass icon to display the list of Queues configured in the org.
5. Select a Queue from the list of Queues.
6. Click Save to save the mapping.
|
|
• When you configure a Queue in the SFM Mapping for an object and later remove the object from the list of the supported objects for that Queue, the mapping still shows the Queue. No error is displayed on saving the SFM Mapping unless that specific field is not edited. This is known behavior on the SFM Mapping editor.
• On SFM load, the Queue name will be displayed for the Owner Id field. If the user tries to set a new value, then it will list only user values. Queues will not be available for selection.
|