Configuring Scheduled SFM Process
To configure a scheduled SFM process:
1. Go to ServiceMax Setup > Service Flow Manager> Scheduled SFM. The Scheduled SFM List View is displayed.
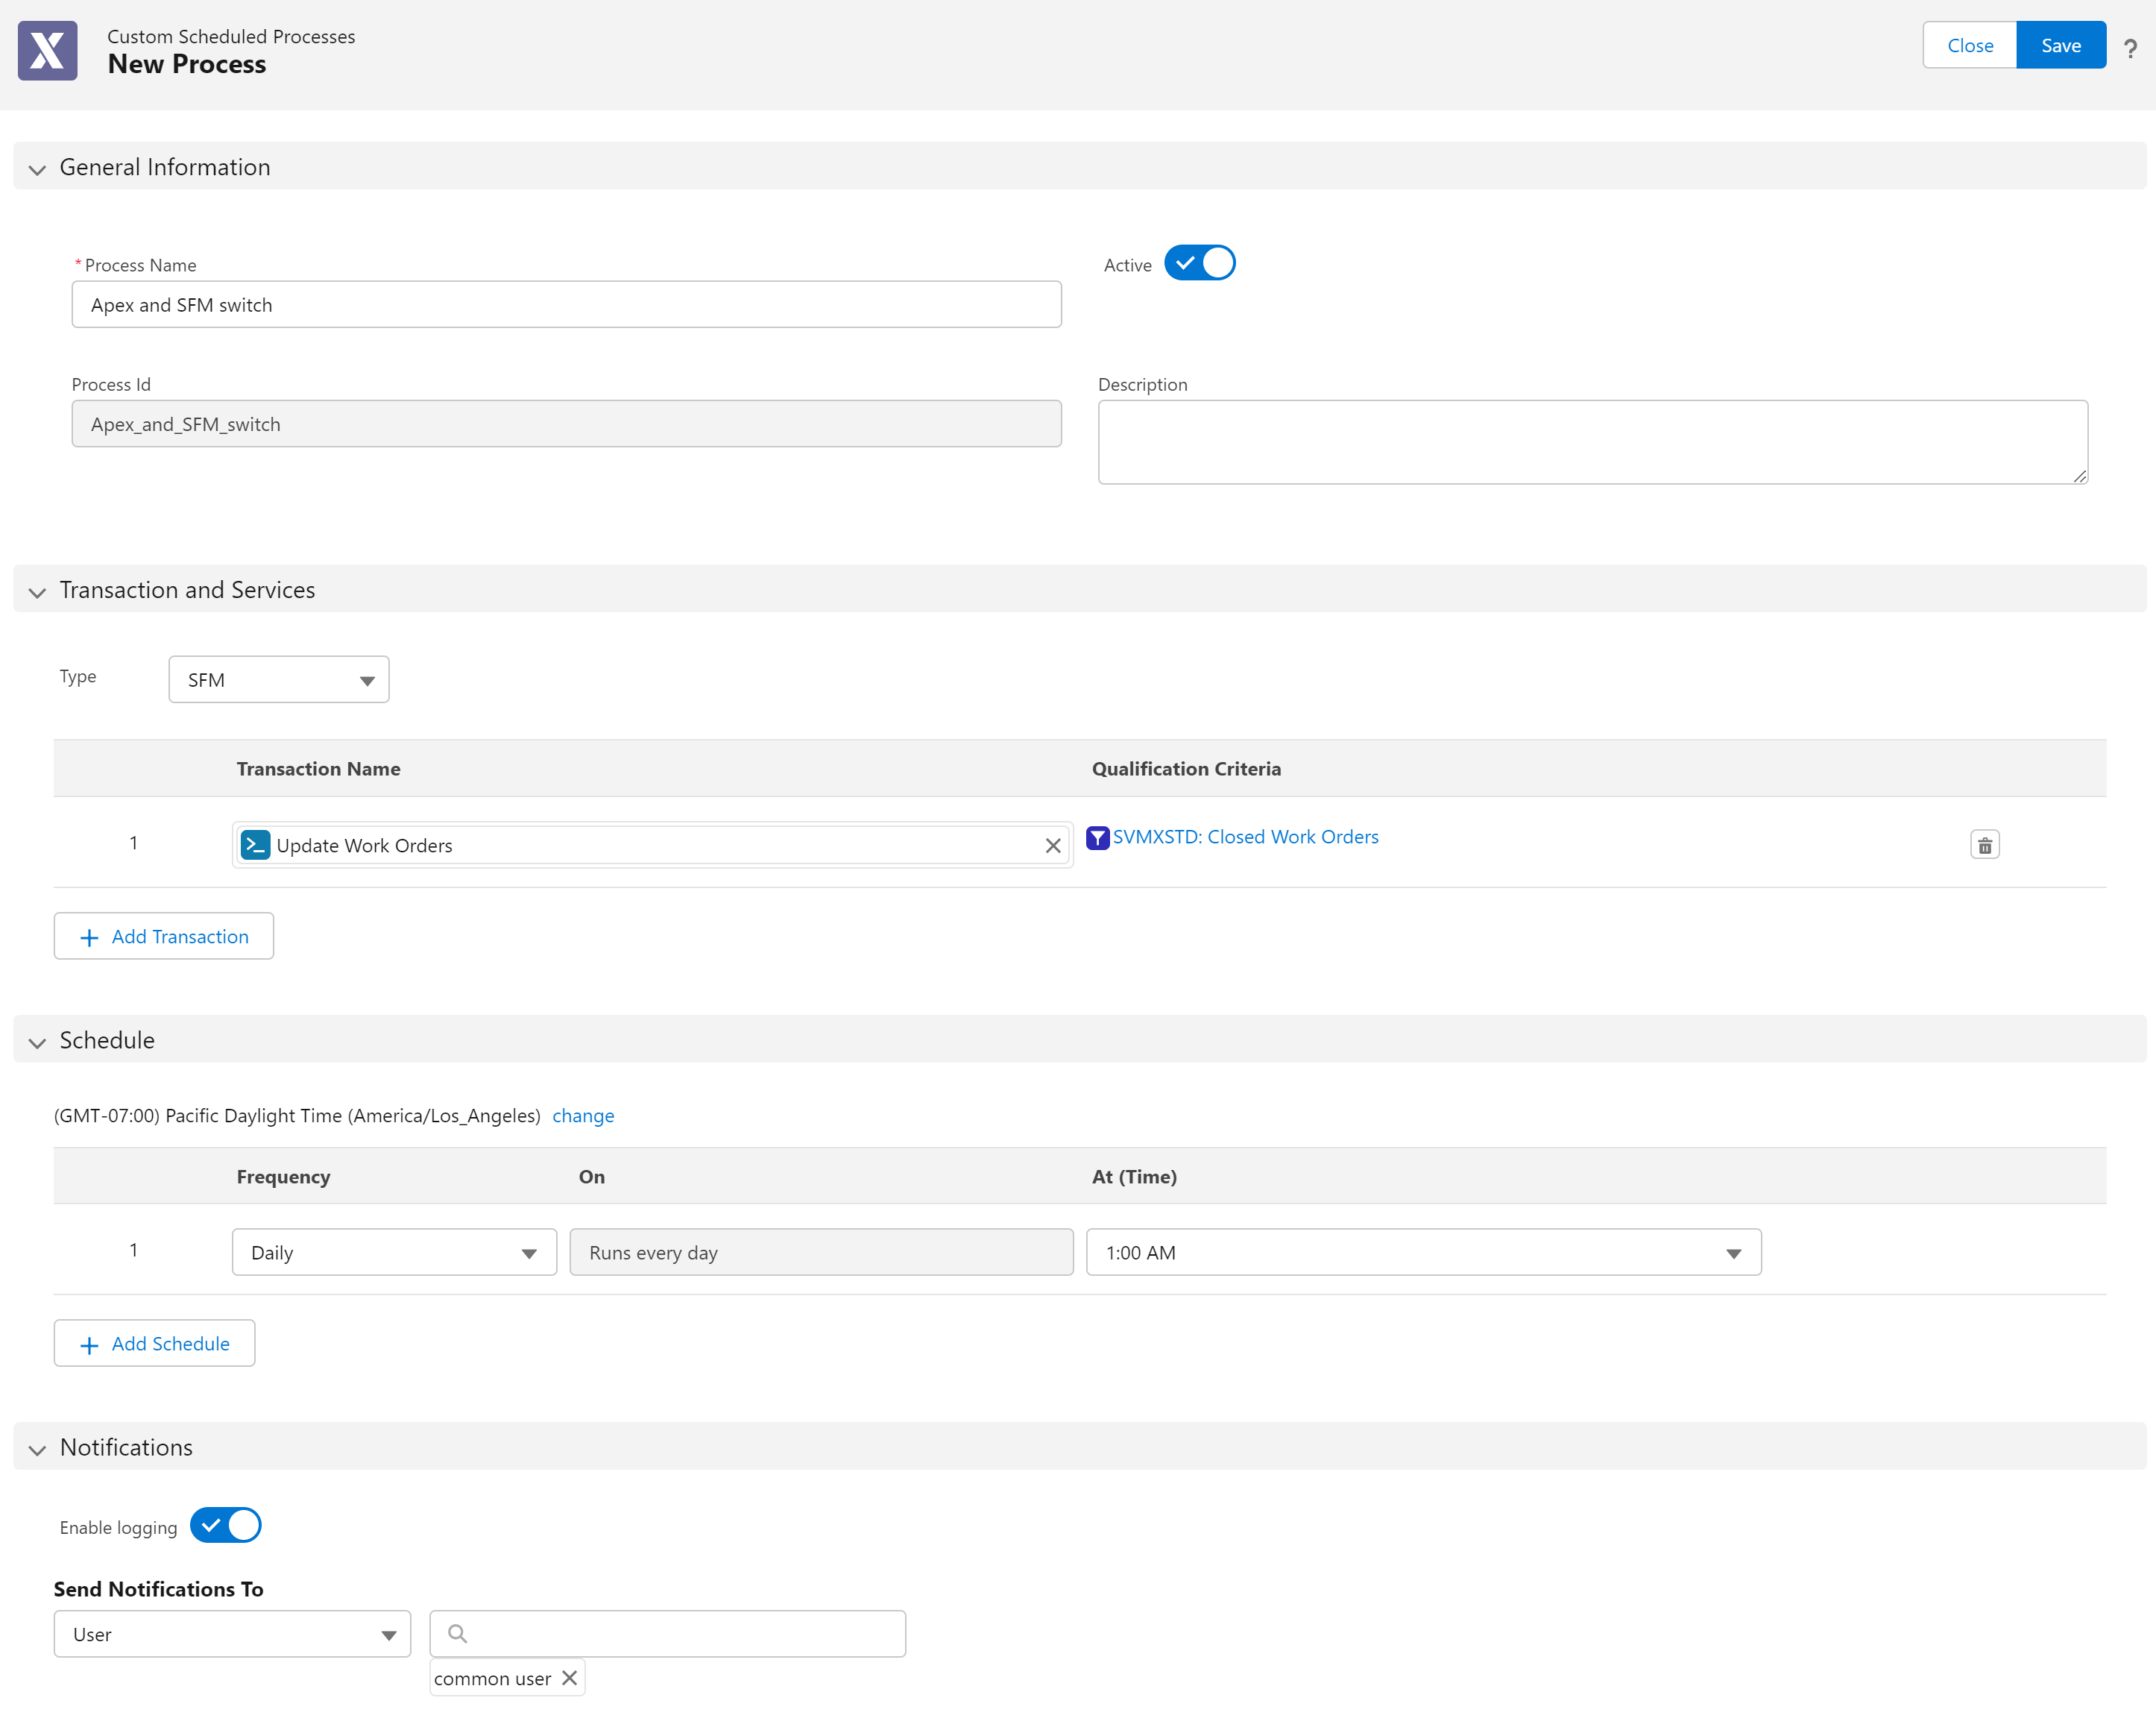
2. Click New Process at the top of the Scheduled SFM List View page. The Custom Scheduled Process screen is displayed.

3. Enter the details for the fields as described in the following table:
Fields | Description | ||
|---|---|---|---|
Fields marked with * are mandatory | |||
General Information | |||
*Process Name | Name of the Scheduled SFM Process. | ||
Active | Enable the Active toggle button to execute the Scheduled SFM Process. Inactive Scheduled SFM Processes cannot be executed. | ||
Process Id | Unique ID of the Scheduled SFM Process. | ||
Description | Description of the Scheduled SFM Process. | ||
Transaction and Services | |||
Type | Select the type of process you want to schedule. Select SFM for Transactions and Apex for Services. Any one type can be selected in each configuration. | ||
Transaction Name | Select the SFM from the lookup search list. The respective Qualification Criteria defined for the selected transaction are auto-populated. | ||
Qualification Criteria | The Qualification Criteria defined for the selected transaction are auto-populated. Click the name to view the expression details in the expression editor and update the expression. | ||
Object Name | Select an object from the lookup search list. Click Add Object to add additional configurations. | ||
Class Name | Create a custom Apex class and enter that custom class name in this field. This option is available for the Apex type process. | ||
Batch Size | Specify the number of batches required to be run to process the qualified records. This option is available for the Apex type process. | ||
Schedule | |||
Time zone change | Click Change to select another time zone from the drop-down list. By default, the user time zone as per the Salesforce org settings is displayed. | ||
Frequency | Select a frequency for the Scheduled SFM to be executed; Daily, Weekly, or Monthly. You can select multiple dates for Weekly or Monthly frequency. | ||
On | Select the date for the Scheduled SFM to be executed. | ||
At (Time) | Select the time at which the Scheduled SFM is to be executed. | ||
Notifications | |||
Enable logging | Enable the Enable logging toggle to capture the logs when the Scheduled SFMs are executed. | ||
Send Notifications To User | Select the list of users from the drop-down list who will receive a success or failure notification status of the Scheduled SFM execution. The users can be part of any of these categories: User, Partner User, or Customer Portal User. You can select multiple users to receive a notification.
| ||
4. Click Save
5. Click Close.