Installing Creo+ on an Azure Virtual Desktop
You can install and run Creo+ from an Azure Virtual Desktop.
Prerequisites to Installing Creo+ on an Azure Virtual Desktop
Ensure the following conditions are met before installing Creo+ on an AVD.
• Azure Virtual Desktop(AVD) instances are created and managed by your organization.
• Administrators have assigned an AVD to users with SSO configuration enabled—Users can sign into the AVD with their company credentials.
• Users have installed the Windows App and use it to connect to the Azure Virtual Desktop. This is the recommended and secure way to connect to AVD.
• An Administrator has sent the user an invitation to the Creo+ Portal—https://creo.portal.ptc.com/creoplus/.
• An Administrator has added users to an organization, assigned them valid License to Run licenses, and added users to relevant profiles.
Installing Creo+ on an Azure Virtual Desktop
Carry out the following steps to install Creo+ on an AVD.
1. From your computer, open the Windows app.
2. Select the assigned AVD and authenticate using single-sign on. After authentication, you are logged into the Azure Virtual Desktop environment
4. From the Home page of the Creo+ Portal, click Download on the Download PTC Control Center box to download the install file ptccontrolcenter.msi.
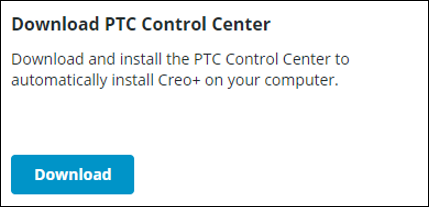
The install file ptccontrolcenter.msi is downloaded to the Downloads folder on the AVD.
5. Double-click ptccontrolcenter.msi to start the installation of the PTC Control Center on the AVD.
6. Log in to connect to the Creo+ portal, to authenticate your login details.
8. After you successfully install the PTC Control Center, it automatically downloads and installs Creo+ on the AVD and provides you access to all the licenses that are assigned to you.