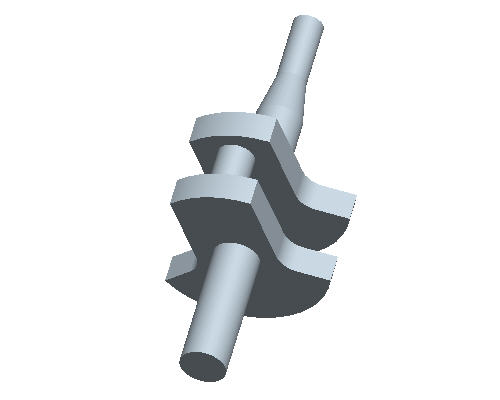
Task 5. Trace an existing sketch to cut-away geometry from the lobe
-
Click the Sketch Tool
 icon on the right toolbar to create a sketch.
 -
Click the Datum Planes
 icon to display datum planes.
 -
In the Sketch dialog, select the FRONT plane as the Sketch Plane. Click on the Sketch button to close the dialog.
-
Click the Datum Planes
icon to hide the datum planes. -
Select the No Hidden View
 icon on the main toolbar.
 -
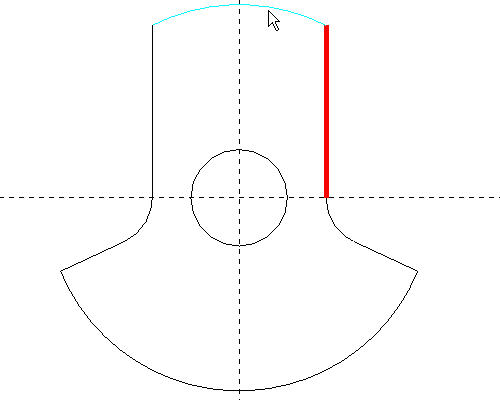
Select the Use Edge
 icon from the sketch toolbar.
 -
In the Type dialog, select the Chain option. Select the edge highlighted in red in the following diagram, followed by the light-blue edge with the cursor.
-
Click Accept, and then select Close from the Type dialog.

The Entity from Edge tool snaps to existing geometry without the need for dimensions. The sketch will update when the existing geometry changes.
-
Click the Circle
 tool, and sketch a circle as shown in the following illustration. Edit the dimensions as shown.
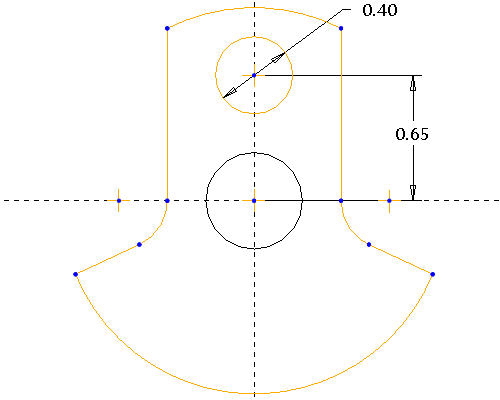
-
Click the Complete Sketch
 icon from the right side toolbar.
 -
Press CTRL+D to orient the model in the default orientation.
-
Click the Extrude
 icon with the sketch selected.
 -
Select Both Sides
 from the dashboard as the depth direction, and enter .50 as the depth.
 -
Select the Remove Material
 icon.
icon. -
Select the Complete Feature
 button in the dashboard to complete the cut.
 -
Select the Shading
 icon on the main toolbar.