Creating Bindings in a Mashup
There are multiple ways to create bindings between items in Mashup Builder.
Drag-and-Drop
You can create bindings between items properties in your mashup by dragging a bindable property onto a valid target on a panel. Your pointer changes to a plus sign. To create the binding, release the right mouse button.
You can also create bindings by dragging a property on the canvas from one widget to another.
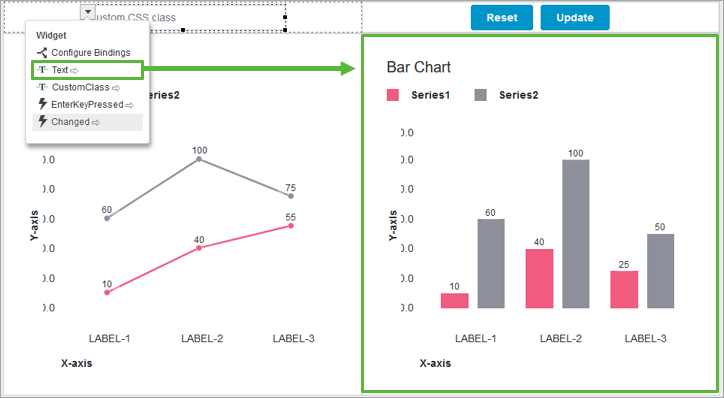
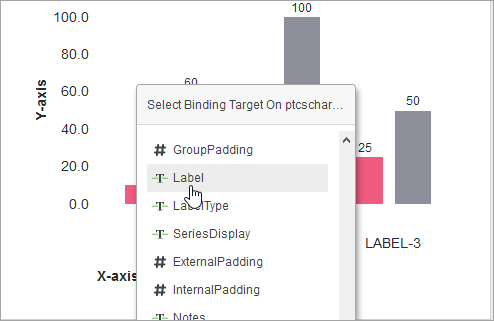
When you drop a property to a widget on the canvas, a list of properties appears. These are the target properties that you can bind the current source to. Select a property to use as a target for the binding.
Using the Shortcut Menu
To quickly create a binding between a data service property and a valid target, right-click a data property on the Data, User, and Session panels. The shortcut menu appears. You can bind a data property from a service to a parameter within another service.
1. Open the Data, User, or Session panel.
2. Right-click a data property, then click Select source. The property is now selected. A message appears containing:
◦ The data entity name
◦ The service name
◦ The data property name
The list of available properties on the Data panel is filtered, and only valid targets are displayed. |
3. To bind the source property to a target, right-click a valid target, then click Bind to target. A binding is created.
Use the Bindings and Service Configuration Dialog Boxes
You can use the bindings configuration dialog boxes to create and manage bindings. You can configure bindings for the following entities:
• Widgets, containers, and the mashup iteself—Select an item on the canvas or on the Explorer panel, then on the Properties panel, click  .
.
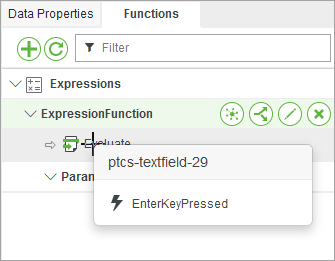
.• Functions—On the Functions panel, next to a function name, click .
.• Services—Select a service on the Data panel, then on the Data Properties panel click .
.For more information, see Configuring Bindings in a Mashup and Configuring Data Services.