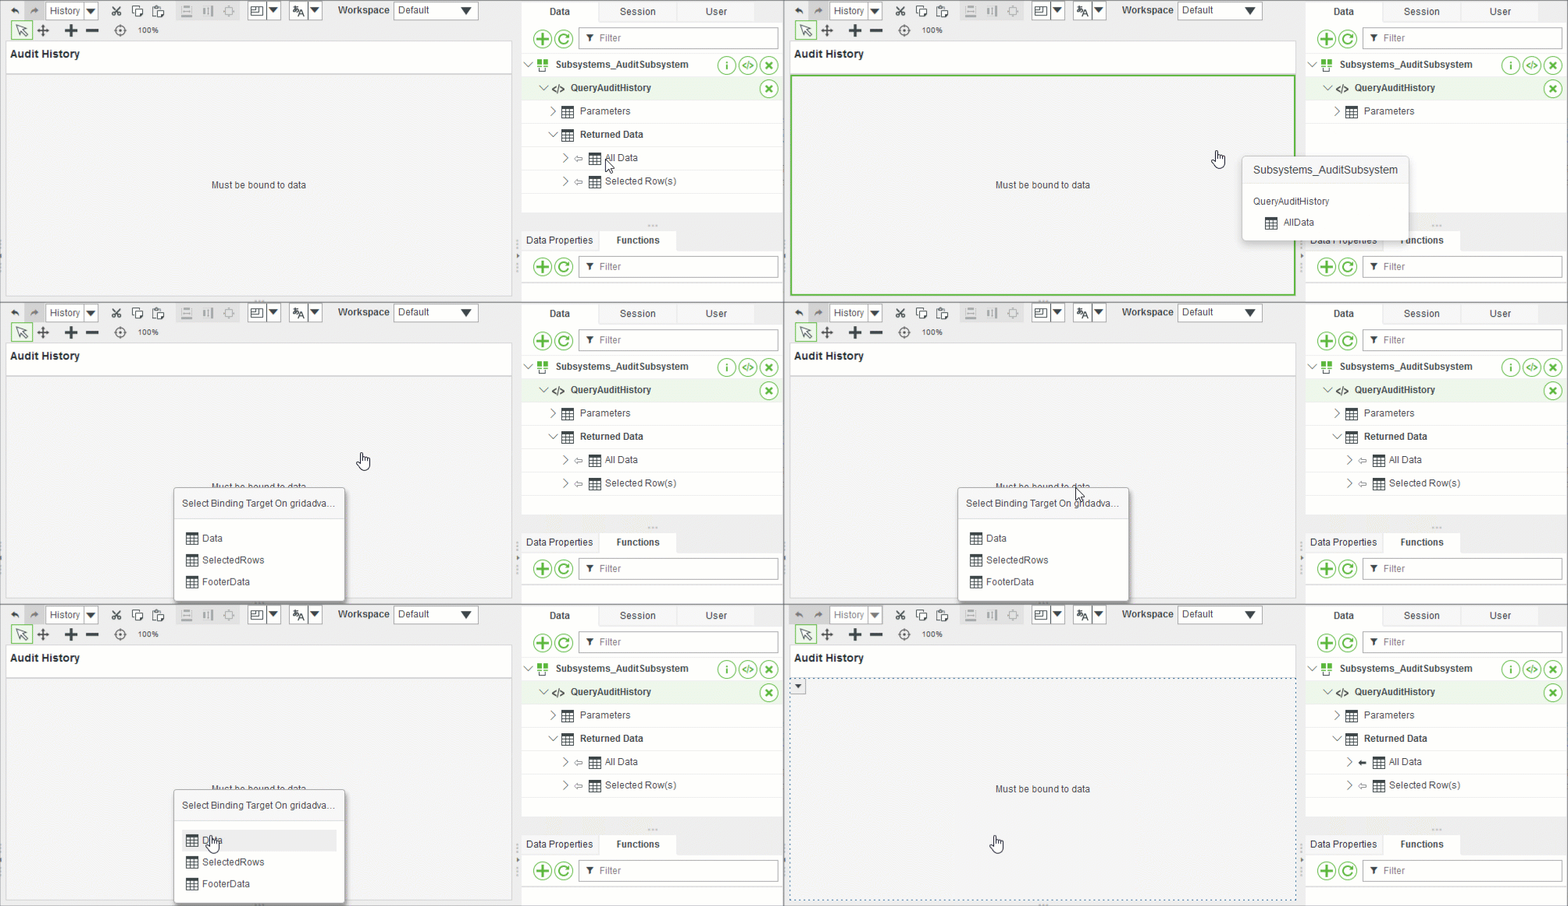
Binding a Data Service to a Widget
Data returned by a service appears on the Data panel, under the service name, under Returned Data. If the arrow icon points away from a data property, you can bind it to a target.

• To bind a data service to a widget, select the All Data property of that service, then drag it to the widget on your mashup.
• To bind a service to a widget that only displays one type of data, such as a text box or check box, select the Selected Row(s) property of that service. Then select one data column and drag the column onto the widget.
On the canvas, widgets you can bind data to are highlighted in a green border. After you bind the data property, on the Data panel, the arrow icon alongside that data property is filled in. You can view the binding on the Bindings panel.
Some widgets only display one type of data, such as a text area or check box. In these cases, you can select an individual column from a data service and drag that specific column onto the widget to bind the data. Once the data is bound to the widget, you can continue to configure the widget.
For more information about widget configuration, refer to the widget section of the Mashup Builder help.
To execute the data service at run time, bind a trigger event to the data service. The most common trigger event is the Loaded mashup event, which executes a data service when the mashup is loaded at run time. To automatically create a binding between the Loaded mashup event and the service, when you add a data property to a mashup, select the Execute on Load property.
You can also trigger data services based on other types of events, such as data selection, a button click, or another completed service. For example, you can bind the following events to execute data services in mashups:
• The Clicked event of a Button widget.
• The True or False events of a Validator function.
• The DataServiceInvokeComplete event of a data service.