Upload File
Use the Upload File action to upload the specified file. For more information, refer to Dropbox developer documentation.
Complete the following steps to use the Upload File action in your workflow:
1. Drag the Upload File action under Dropbox to the canvas, place the pointer on the action, and then click  or double-click the action. The Upload File window opens.
or double-click the action. The Upload File window opens.2. Edit the Label, if needed. By default, the label name is the same as the action name.
3. To add a Dropbox connector type, refer to Supported Dropbox Connector Types.
If you previously added a connector type, select the appropriate Connector Type, and under Connector Name, select the connector.
4. Click TEST to validate the connector.
5. Click MAP CONNECTOR to execute the action using a connector that is different from the one that you are using to populate the input fields. In the Runtime Connector field, provide a valid Dropbox connector name. For more information about MAP CONNECTOR, see Using Map Connector.
6. In the Source File Path field, map the output of a previous action to provide the path of the file.
7. In the Destination File Path field, select or specify the path where you want to upload the file.
8. In the Write Mode field, select one of the following modes to specify an action if the file already exists:
◦ Add—Does not overwrite an existing file if there is a conflict. The auto rename strategy is to append a number to the file name. For example, "document.txt" may become "document (1).txt".
◦ Overwrite—Always overwrite the existing file.
9. In the Auto Rename field, select true to automatically rename the file or folder that has a similar name to avoid conflicts. The default value is false.
10. Click Done.
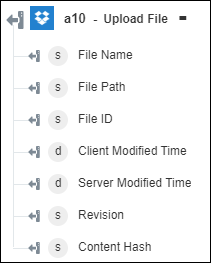
Output schema