Excluding Salesforce and ServiceMax Events From Real-Time Sync
Salesforce ServiceMax Event records that are assigned to users who are not technicians or that have an empty Technician field value are not applicable to Service Board. Create, update, and delete events for these records should not be synced to Service Board, because they do not appear on the Scheduler Calendar. You can implement real-time sync filters in Flows to exclude these records from real-time sync.
In Salesforce, there is no direct relationship between the ServiceMax Event and Technician objects, so for Salesforce Event records assigned to non-technician users, criteria cannot be applied and filtering must be implemented in reverse order by using queries.
For ServiceMax Event records with an empty Technician field value, you can configure the Flow for the ServiceMax Event object.
To exclude ServiceMax Event records from real-time sync:
1. On the Salesforce Setup page, in the left pane, click > > , and then in the list view, click Notify Service Board for ServiceMax Event.
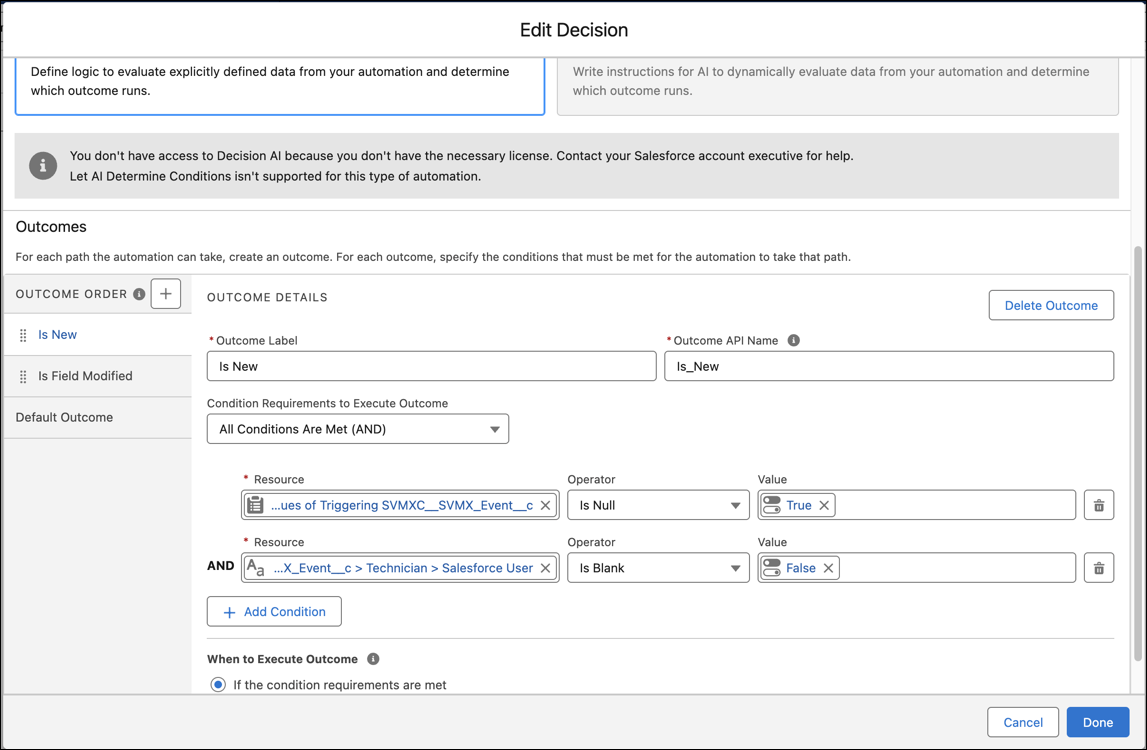
2. In the right pane, double-click the Decision element, and then in the Edit Decision dialog box, in the left pane, under Outcome Order, click Is New.
3. In the right pane, under Outcome Details, click Add Condition, and then select the following filtering criteria:
◦ Resource: {!$Record.SVMXC__Technician__r.SVMXC__Salesforce_User__c}
◦ Operator: Is Blank
◦ Value: False
4. In the left pane, click IsFieldModified, and then in the right pane, under Outcome Details, in the Condition Requirements to Execute Outcome list, click Custom Condition Logic is Met.
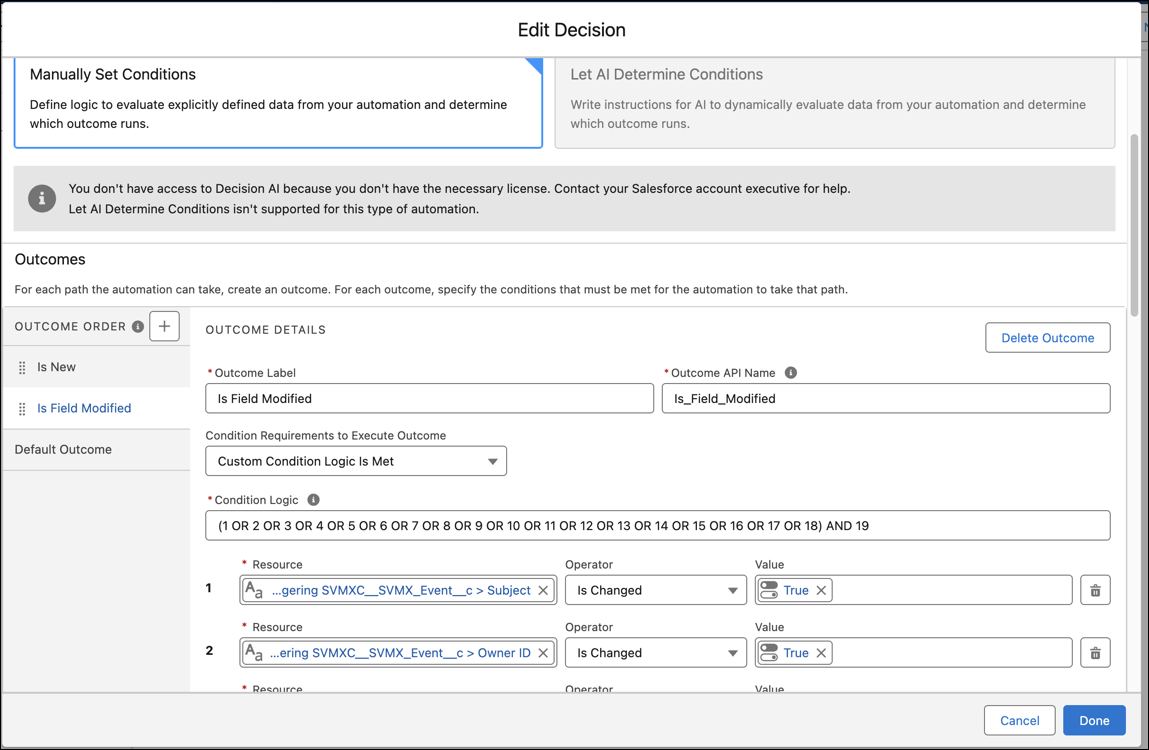
5. Click Add Condition, and then select the following filtering criteria:
◦ Resource: {!$Record.SVMXC__Technician__r.SVMXC__Salesforce_User__c}
◦ Operator: Is Blank
◦ Value: False
6. In the Condition Logic field, enter the following field value, and then in the bottom right corner, click Done.
(1 OR 2 OR 3 OR 4 OR 5 OR 6 OR 7 OR 8 OR 9 OR 10 OR 11 OR 12 OR 13 OR 14 OR 15 OR 16 OR 17 OR 18 ) AND 19
7. In Flow Builder in the top right corner, click Save As to create a new Flow with your newly defined custom filter, and then in the Flows list view, deactivate the Flow for which you configured a custom replacement and activate your newly created Flow.