Migrating Configuration Items
To migrate configuration items:
1. Launch the ServiceMax Migration Tool from https://migrate.servicemax.com.
◦ If the Migration Tool does not respond due to scheduled maintenance, a notification message is displayed. You can use the tool after the downtime period is over.
◦ An alert is displayed 72 hours in advance about the scheduled maintenance downtime. You can plan your migration tasks accordingly.
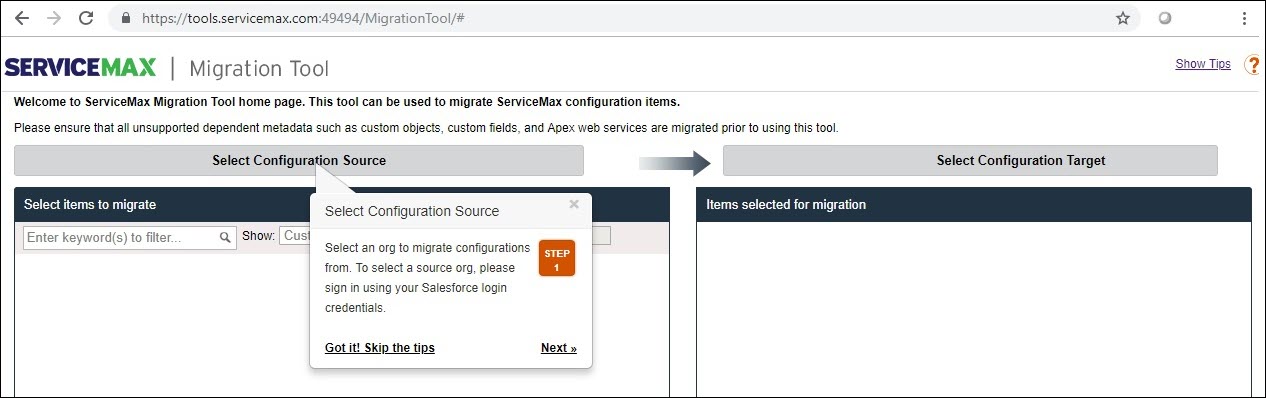
2. Click Select Configuration Source. The Configuration Source screen is displayed with two options as shown in the following screen:
◦ Source org – Select this option to migrate data from an org. Choose the required connection and log in to source org to select data items for migration.
◦ Import From file – Select this option to import the configurations defined in JSON files in zip format to a target org.
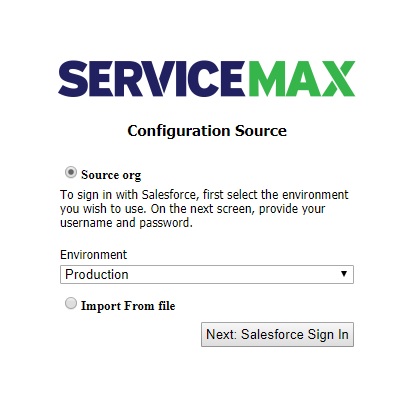
3. Log into the selected Configuration Source.
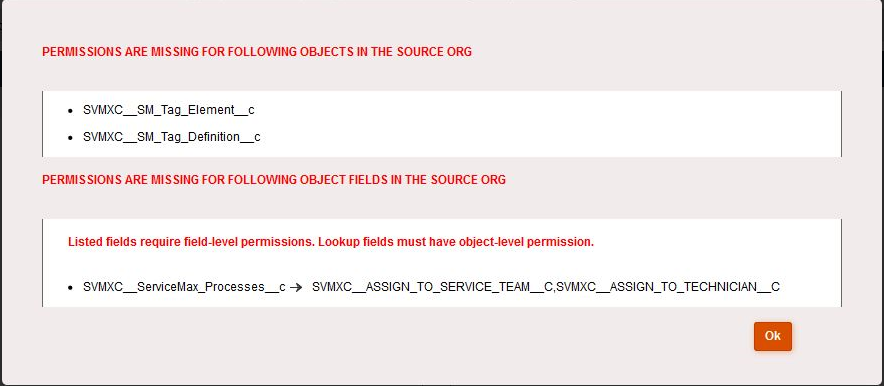
If you have selected Source org, provide the login credentials of the required Salesforce Org. When you provide the login credentials, user permissions are validated as shown in the following screen.
|
|
• Lookup fields must have object-level permission.
• If error messages are displayed informing you of missing permissions upon user permission validation, provide the necessary object and field-level permissions in the org.
|
4. If you have chosen Import from File, select the required file by navigating to the appropriate folder. On successful login/load, the following screen is displayed.
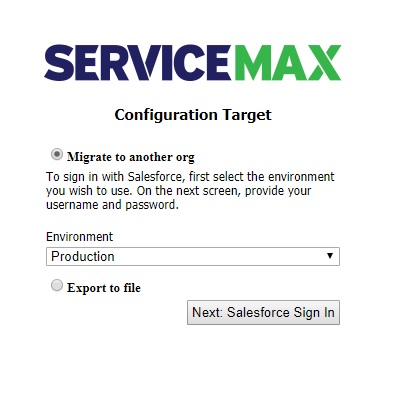
5. Click Select Configuration Target. The Configuration Target screen appears, with two options – Migrate to another org and Export to file as shown in the following screen.
◦ Migrate to another org: Select this option to migrate data to an Org. Choose the required connection and log in to the target org.
◦ Export to file: Select this option to export the selected configuration definitions to a zipped bundle of files in JSON format.
|
|
You must have the necessary CRUD (Create, Read, Update, and Delete) permissions for all ServiceMax objects and fields to migrate data into the target org. If you do not have CRUD permissions on some fields or objects, the system lists the objects and fields. You can retry after obtaining the required permissions.
|
6. Log in to the selected Configuration Target.
a. If you have selected Migrate to another org, enter the login credentials of the required Salesforce Org.
b. If you have chosen Export to file, click Next. On successful login, the following screen is displayed.

If you need to log in to a different source or target org, you can click the Logout icon next to the source org or target org as needed and log in again. If you need to log in to different sources and target orgs, you can click the Logout icon at the top right of the migration tool screen and log in again.
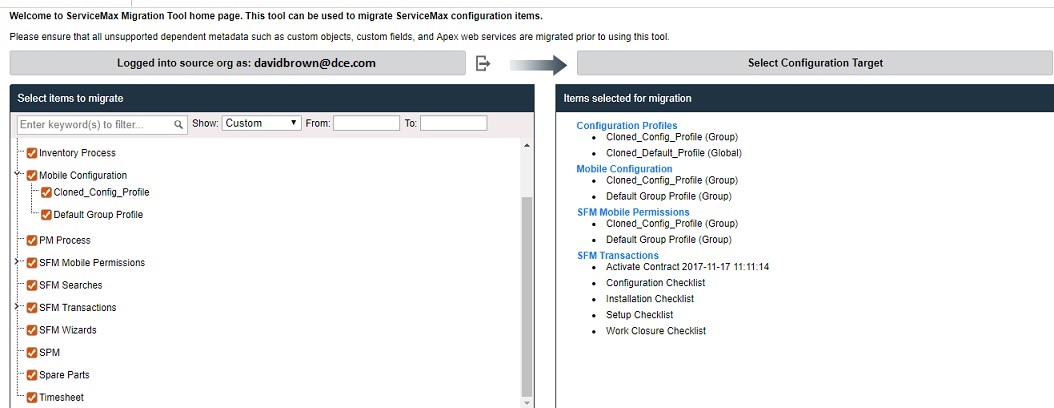
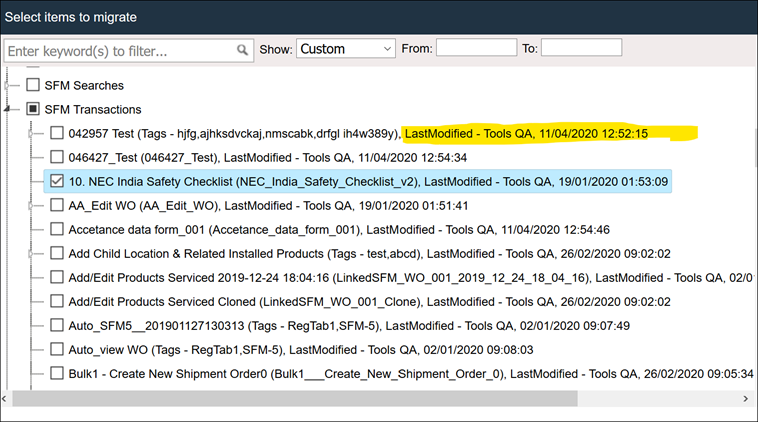
7. Identify the configuration items to be migrated and select them.
a. Expand the configuration tree to see the list of custom items of each supported type available for migration.
b. Use the inline filter to search for the required items. For example, use the Enter Keywords to Filter to search for items.
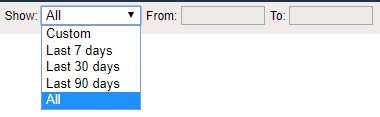
c. Enter a date range to retrieve all the created or modified custom configuration items in the source org by choosing one of the following options:
|
Fields
|
Description
|
|---|---|
|
Custom
|
This is the default option selected in the Show drop-down list. Choose the From and To date using the date picker to retrieve all the created/modified custom configuration items from the source org.
|
|
Last 7 days
|
Select this option from the Show drop-down list to retrieve all the created/modified configuration items in the last 7 days. The From and To date gets auto-populated with start and end date for the last 7 days, that is, From date will be set to Today – 7 days, and the To date will be set to Today.
|
|
Last 30 days
|
Select this option from the Show drop-down list to retrieve all the created/modified configuration items in the last 30 days. The From and To date gets auto-populated with start and end date for the last 30 days, that is, From date will be set to Today – 30 days and To date will be set to Today
|
|
Last 90 days
|
Select this option from the Show drop-down list to retrieve all the created/modified configuration items in the last 90 days. The From and To date gets auto-populated with start and end date for the last 90 days, that is, From date will be set to Today – 90 days and the To date will be set to Today.
|
|
All
|
Select this option from Show drop-down list to retrieve all the created/modified configuration items qualifying for migration from source org. The From and To date are disabled.
|
The following screen displays the Date Options.
|
|
If the configuration data for the given range is not present, the following message is displayed:
No data found for the specified date range. Please modify the date range and search again.
|
8. To select all the items of a type (for example, Configuration Profiles), select the checkbox against that type. Each item of that type is auto-selected as shown in the following screen.
|
|
If you have selected only some of a particular type, the checkbox next to that type is displayed in grey.
|
9. Check the target org area to confirm if you have selected all the required items. As you select each item in the source org box, the same is auto-populated with the name of items to be migrated as shown in the following screen.
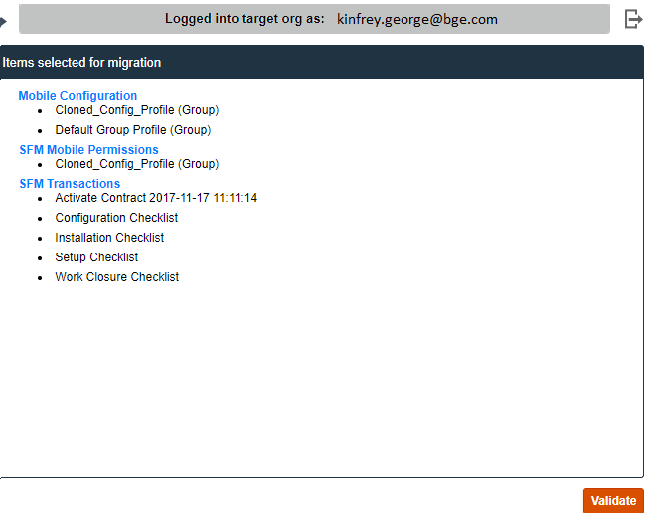
10. Click Validate. The following screen displays the Validation Results.
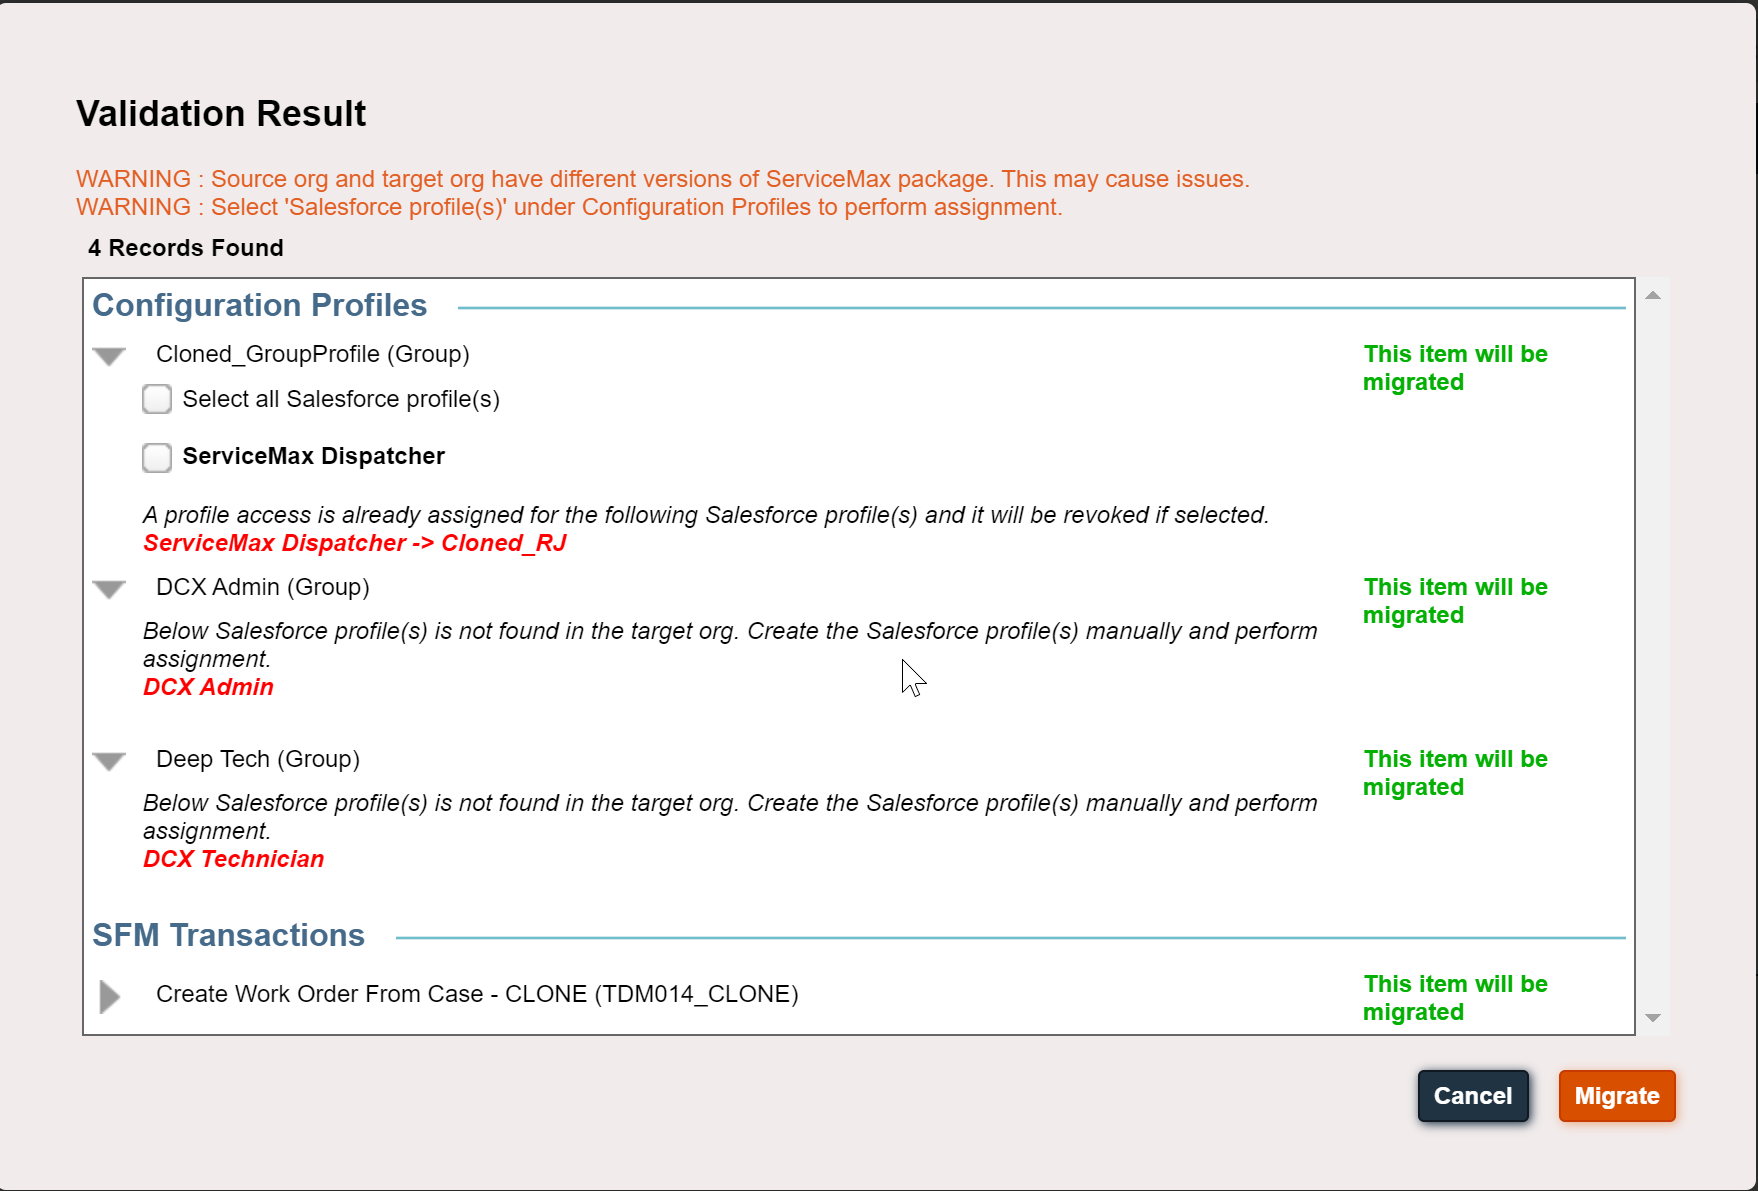
The Migration Tool runs a check to verify if all the items selected for migrations are available in the source org.
|
|
If any of the items selected are found missing, warning messages are displayed under those particular items. You can either ignore those messages or investigate why the items are not found and restart the migration. For more information, see Review Validation Results.
|
11. Click Migrate to migrate the required configuration items to the target org.