Day View
Android and iOS
The Day View displays the events scheduled for the logged-in technician for the current day.
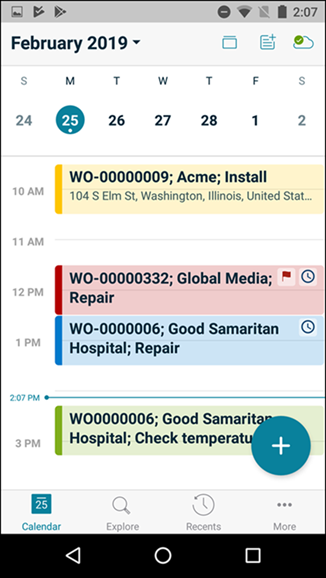
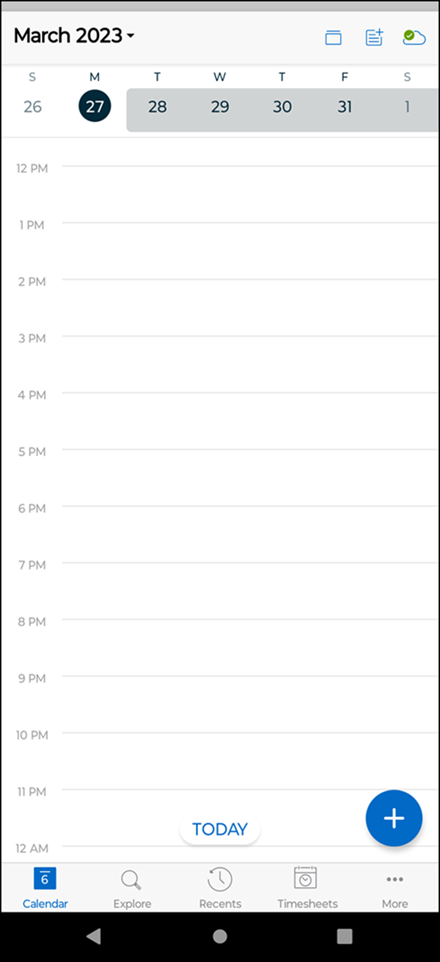
Tap each appointment to display the details on a new screen. The following screenshot illustrates the Day View screen.

To use the Day view:
1. Tap Add to create a user appointment.
The New Event button is available based on the configuration. If it is configured to be hidden for the group profile from module ServiceMax iPad Client and sub-module Calendar, then this button is not displayed. For more information on the configuration, refer to Configure Create Button. |
2. Tap Today to go to the appointments for the current date.
3. Swipe left or right anywhere on the Calendar screen to view appointments for the next or previous days.
Calendar Indicators
View the following indicators on the Day View screen:
• Work order appointments are color-coded based on the priority of a work order, or as defined by your administrator on the Mobile Console.
• Overlapping/Concurrent appointments are displayed next to each other.
• If your device is set to 12-hour format, then the time indicators are displayed in AM/PM format and are scrollable.
• If your device is set to 24-hour format, then the time indicators do not use AM and PM format.
• The time indicators are displayed starting from 12:00 AM (previous day midnight) to 12:00 AM (current day midnight).
• The red flag icon indicates a high-priority work order.
• Calendar events display the travel time allocated before and after the event when the relevant field values exist on the event. This is applicable for both Work Order and non Work Order events.
• Text for the travel time is displayed when the travel time duration is adequate for the travel time block to accommodate the text. Events display up to two lines of text for the subject, after which the description is displayed when the event duration is adequate for the event block on the calendar to accommodate them.
• The days that are outside the sync event window are highlighted in grey if configured by your administrator. The events in the extended event window are displayed with dots.

• In the extended event window, all the records related to the event are downloaded if you are connected to the internet. If you are not connected to the internet, the view SFM screen for the specific record is displayed.
Windows
The Day View displays the events scheduled for the logged-in technician for the current day.

Perform the following actions on the Day View screen:
1. Click New Event to create a user event.
The New Event button is available based on the configuration. If it is configured to be hidden for the group profile from module ServiceMax iPad Client and sub-module Calendar, then this button is not displayed. For more information on the configuration, refer to Configure Create Button. |
2. Click Today to go to the appointments for the current date.
3. Click the date picker to choose a date and view events for that day. For information about the date picker, see DateTime Field.
4. Click an event to view the event details in a split view.
5. Click the Work Order number from the event details section to view the Work Order record details on a new screen.
Calendar Indicators
View the following indicators on the Day View screen:
• The time indicators on the day view are displayed from 12:00 AM midnight of the previous day to 12:00 AM midnight of the current day.
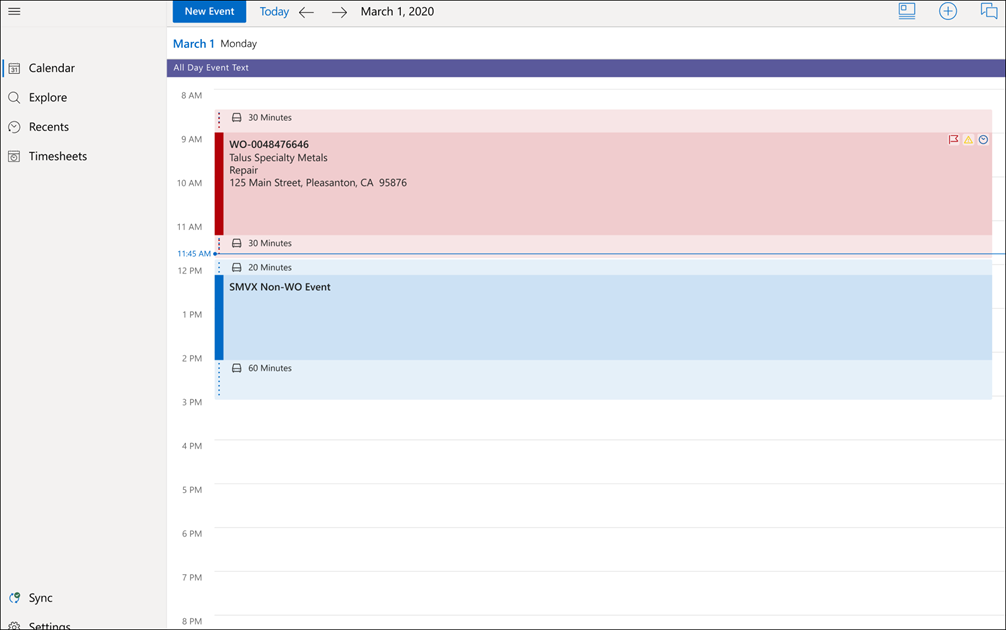
• The horizontal blue line across the calendar indicates the current-time indicator.
• If your device is set to 12-hour format, the time indicators are displayed in AM and PM format. If your device is set to 24-hour format, the time indicators are displayed without the AM and PM format as 00.00 to 24.00 hours.
• If the allocated travel time is defined by the dispatcher to the work location for the appointment or for a non-work order event, then the same is displayed on the calendar with a travel time block with a van icon and the travel time in minutes.
• Work Order events are color-coded.
• Overlapping or concurrent events are displayed next to each other.
• The red flag icon on the event indicates high-priority work orders.
• The clock icon on the event indicates the SLA clock.
• The exclamation mark on the event indicates a sync conflict.
• The days that are outside the sync event window are highlighted in grey if configured by your administrator. The events in the extended event window are displayed with dots.

• In the extended event window, all the records related to the event are downloaded if you are connected to the internet. If you are not connected to the internet, the view SFM screen for the specific record is displayed.